Health Update

Happy New Year to all my lovely readers!

I know I haven’t updated my blog very much in the last year or so, but I know there are many of you still visiting my blog and making my recipes, so I thought I should update you about why I’ve been so quiet…

Over the last few years I’ve been really struggling with my health – particularly, feeling excessively tired and suddenly falling asleep during the day. Initially, I thought I was just working too hard and tried to struggle on, letting a bunch of things fall to the wayside – including this blog.

In 2019, my symptoms began to get worse. I started feeling weak when I experienced strong emotions, like joy, fear or surprise. It wasn’t until my emotions starting making me collapse that I realised something was really wrong. Shortly before Christmas 2020, I was diagnosed with Type 1 Narcolepsy (with Cataplexy).

Narcolepsy is a long term condition which makes the immune system attack the brain’s sleep regulator. This means I suffer from excessive daytime sleepiness, sleep attacks (suddenly falling asleep, often at inappropriate times), cataplexy (sudden loss of muscle control caused by experiencing strong emotions such as joy, fear or surprise) and a range of sleep related problems included fragmented sleep, vivid dreams, sleep paralysis and sleep related hallucinations. Narcolepsy is not curable, and although it’s a spectrum disease (this means that the severity of symptoms vary from person to person) many find the condition debilitating and isolating.

I will be very surprised if you know anything about Narcolepsy, or know anyone who suffers from it. It is a rare condition, affecting 1 person in 2,500 – this means about 30,000 people in the UK suffer from Narcolepsy. I tried to find some high profile people who suffer from Narcolepsy and really struggled. The only celebrity I could find with Narcolepsy is Jinx Monsoon (winner of Ru Paul’s Drag Race Season 5) – this really does put into perspective how rare Narcolepsy is.

Even if you have heard of Narcolepsy, the likelihood is you don’t know much about it, or, what you do know is likely incredibly inaccurate – this is not helped by unhelpful, inaccurate and sometime offensive portrayals of Narcoleptics in the media, film and TV. Until I was diagnosed, I had only heard of Narcolepsy through the film Moulin Rouge – some of you may recall the oh so “hilarious” Narcoleptic Argentinian who would go as stiff as a board for comic effect.

For me, the condition is incredibly debilitating. Excessive sleepiness makes life difficult every day as I constantly feel drowsy and I am always fighting the urge to sleep. I have sleep attacks that can last hours at a time, which means I’m not that productive and fall asleep half way through doing things. The drowsiness makes even simple tasks incredibly difficult. At the moment, I am not allowed to drive in case I fall asleep at the wheel, have a bath unsupervised in case I fall asleep and drown, or even cook unattended in case I burn myself – that last one doesn’t bode so well when you write a food blog!

Cataplexy is also a problem as it is easily triggered by so many things – a funny joke, animals I find cute, or a song I like – and it is completely out of my control. It’s not unusual for me to have mild cataplexy throughout the day, which leads to partial loss of muscle control or blurred eyesight, but I also suffer from major attacks which can result in up to 7 or 8 collapses in a single day.

Narcolepsy has stopped me from doing so many things and I have become incredibly cautious about going out by myself in case something happens. I have fallen asleep many times in unusual places, like the pub or the theatre, and I’m sure many people thought I was being rude, or, perhaps even drunk. I have also received abuse for sitting in the disabled seats on the tube, or for falling asleep and not giving my seat to someone else who they consider needs it more than I do because I don’t “look” disabled.

All this being said, I still consider myself to be very fortunate in many many ways. I am so lucky to have wonderful friends and family who have been really understanding and supportive. I also cannot even begin to explain how wonderful Paul (my partner) has been, and continues to be every day, especially as my condition has a big impact on him too.

So, where does this leave me and my blog?

Well, Narcolepsy is a very strange condition and can be quite difficult to treat. The treatment available is a mixture of medication and lifestyle adjustments and I am still learning what works for me, but so far I’ve noticed that reducing sugar and carbohydrates helps me to feel a little less sleepy.

My blog was initially a gluten free blog, but I have decided to open it up to include other intolerances and dietary requirements now that my own needs have changed. You’ll still find the same passion for good gluten free food, but you’ll also find more dairy free, egg free, refined sugar free and low carb recipes as well.

At the moment, I have decided to focus on working through my back catalogue of recipes and updating them to provide dairy free, egg free and refined sugar free options where possible. I am hoping to get back in the kitchen and developing new recipes once I start my medication and it becomes a bit easier to cook and bake by myself.

Many people with Narcolepsy don’t want to discuss or even admit to their condition because they are worried about how they will be perceived, or that their disability will become their identity. This hasn’t been easy to share, but I wanted to be honest about my absence and help, in a small way, to help raise some awareness of Narcolepsy.

You can find out more information about Narcolepsy through the charity Narcolepsy UK.

For blog updates follow me on Facebook or Instagram!

Gluten Free S’mores Cake Recipe (Vegan)

I am often asked by friends to make birthday cakes suitable for vegans, and this chocolate sponge recipe is the one I go to nearly every time because it never fails to please. Those who aren’t vegan can never believe that this cake doesn’t contain eggs, and vegans are always pleasantly surprised that it has the texture of “normal” cake – never mind that it’s also gluten free!

573CCF5E-91B7-45AD-AF7B-E607D3DC9FEA

After coming across vegan marshmallows at my local supermarket, I really wanted to come up with a fun way to use them in a bake – so I decided to combine them with my favourite vegan sponge recipe and make a Vegan S’mores Cake.

Freedom Mallows are really similar to “real” marshmallows in both taste and texture. When I toasted them they lost their shape a little, but they are so close to the real thing I hardly think that matters. I found them in Sainsbury’s, but they can also be found in Holland and Barratt or online.

B36AAE12-E545-45FD-A24B-97970EC817E3

If you’re looking for a cake that is suitable for a party with guests who have multiple allergies, intolerances or requirements then this is the recipe for you – no need to prepare more than dessert with this easy crowd pleaser.

Gluten Free and Vegan S’mores Cake

Ingredients

For the sponge:

300g gluten free self-raising flour 

50g cocoa powder

200g caster sugar  

2 tsp baking powder

375ml sweetened soya milk 

150ml sunflower oil

For the frosting:

75g cocoa powder

75g golden syrup

50g dairy free butter

To decorate:

150g vegan marshmallows (I used Freedom Mallows)

Method

1) Preheat the oven to 180 C/160 C fan/gas mark 4.

2) Grease and line three 7 inch sandwich tins with greaseproof paper.

3) In a large bowl, mix together the cocoa powder, gluten free flour, caster sugar and baking powder until combined.

4) Whisk together the oil and soya milk in a separate bowl, then add this to the dry ingredients. Whisk until the ingredients are just combined and quickly pour the batter into the prepared tins.

5) Tap the tins gentle on the work surface to get rid of any air bubbles and bake for 15 minutes or until the cake is firm to touch and cooked right through.

6) Leave the cakes to cool slightly in their tins, before turning them out onto a wire rack to cool.

7) To make the frosting, melt together the butter and golden syrup in a small pan over a medium heat. Sift in the cocoa powder and stir until combined. Remove the pan from the heat and leave to cool – the mixture will become less runny and spreadable as it cools down.

8) To Assemble the cake, place one of the sponges on a serving plate then spread a third of the frosting over the top. Repeat with the remaining sponges until you have all three sponges stacked on top of each other – there should be a layer on frosting on top.

9) Spread the marshmallows out across baking tray lined with greaseproof paper. Grill the marshmallows for 30 – 60 seconds or until golden brown – keep an eye on them so they don’t burn.

10) Leave the marshmallows to cool slightly, then pile them on top of the cake.

D8C4AC22-F515-413E-843D-C23D7E2520BB

I love seeing your take on my recipes, so remember to share a snap of your S’mores cakes over on Facebook, Twitter or Instagram using the hashtag #titchytonbakes.

Mojito Recipe

Could there be a more perfect summer cocktail than the Mojito? Easy to make and super refreshing – I’ll definitely be making my fair share of these over the the bank holiday weekend.

C4E5C9CB-9F0C-44C9-A6F9-FFF34E8369B8

I am sure many Mixologists would baulk at the thought of 7up in a Mojito – but l when you don’t have all the ingredients to hand, sometimes you’ve got to improvise! And so, I have named my version of this drink the “mo-chea-to” because it’s not a traditional mojito, but it definitely tastes as good.


Mojito Recipe

Makes 1 Cocktail

Ingredients

Half a lime, cut into four pieces

8 fresh mint leaves, plus extra for garnish 

35ml White Rum 

A dash of 7 Up Free (or Sprite)

A few handfuls of crushed ice

Method: 

1) Place the lime and the mint leaves into glass or a kilner jar. Gently muddle the ingredients until the lime start to release  its juice.

2) Add a few handful of ice, followed by the rum. Top up with 7up and garnish each glass with a sprig of mint and a paper straw.

11FF1E66-65CF-4C97-AD8A-5414365C051D

No Churn Nutella Ice Cream

Get ready for the heatwave and cool down with my No Churn Nutella Ice Cream!

889255B3-A424-46E5-A527-0DA4E7CF428E

This recipe is inspired by my trip to Torino where I ate some the best Gelato EVER. My favourite flavour was probably cioccolato e nocciole (chocolate and hazelnut) as the ice cream was made with hazelnuts grown in the Piedmont region (which is famous for its hazelnuts).

E78532A1-0BC0-45CA-ABE8-69AFF189BDA6

My recipe is a no-churn recipe which is a super quick and easy way of making homemade ice cream without an ice cream maker – this recipe also only needs 5 ingredients.

The secret to making excellent homemade ice cream is adding a little liquid glucose – this magic ingredient stops the ice cream from freezing too solidly, which means it can be scooped as soon as you take it out of the freezer.


No Churn Nutella Ice Cream – GF/EF

Ingredients: 

100g Nutella 

1 x 397g tin condensed milk 

300 ml double cream 

2 tsp liquid glucose 

A few handfuls of Chopped hazelnuts 

Method:

1) In a large bowl, mix together the Nutella and condensed milk.

2) Pour in the cream and add the liquid glucose, then whisk the ingredients using an electric whisk until it begins to thicken.

3) Transfer the mixture to a freezer safe container and freeze for a least 6 hours.

4) Once the ice cream has frozen scatter across the hazelnuts, then serve!

8FDAE051-FDDC-46D1-916A-CA93BB542D75

I love seeing your take on my recipes, so remember to share a snap of your Nutella Ice Cream over on Facebook, Twitter or Instagram using the hashtag #titchytonbakes

Gluten Free Easter: Mini Egg Brownies

What could be more perfect for Easter than Brownies? Especially my Gluten Free Mini Egg Brownies, which are packed so full of chocolate they are guaranteed to satisfy even the fussiest of chocoholics.

BROWNIES2

I honestly don’t know what I’d do if Mini Eggs weren’t gluten free as they are my favourite Easter treat – they are also a great addition to brownies as they add a bit of crunch.

Be aware that Cadbury’s mini eggs contain Maltodextrin, which whilst being a gluten free ingredient can sometimes prove troublesome for Coeliacs. But the good news is, there are a couple of supermarket alternatives out there which don’t contain maltodextrin, including Micro Easter Eggs from Sainsbury’s and Chicky Choccy Eggs from M&S.

I have also been informed, that whilst Mini Eggs are definitely gluten free in the UK, in the US they may contain gluten due to potential cross-contamination risks during the manufacturing process.

BROWNIES

Gluten Free Brownies – GF/DF options

Ingredients

200g unsalted butter
200g Dark Chocolate (85% Cocoa solids)
80g gluten free self-raising flour
60g cocoa powder
250g light brown caster sugar
4 large eggs
2 x 90g packets of Cadbury Mini Eggs, chilled

Method

1) Preheat the oven to 180 C/160 C fan/gas mark 4, then grease and line a rectangular baking tray with baking parchment.

2) Heat the butter, chocolate and sugar together in a large saucepan over a low heat. Leave to cool slightly, then stir in the flour and cocoa powder.

3) Add the eggs one a time, beating the mixture vigorously in between each addition. Once the mixture has turned thick and glossy transfer it to the prepared tray, then scatter across the chilled mini eggs.

4) Bake for 25 to 30 minutes or until the brownies are firm to touch. Leave to cool completely before cutting into squares.

BROWNIES3

I love seeing your take on my recipes, so remember to share a snap of your Mini Egg Brownies over on Facebook, Twitter or Instagram using the hashtag #titchytonbakes.

Gluten Free Easter – Hot Cross Bun Muffins

Easter is fast approaching and although the weather has been unseasonably cold I have still been enjoying all the delightful treats the season has to offer.

One of my favourite Easter treats is a hot cross bun slathered in butter; and although I am quite keen on making a lot of my food from scratch I have little time and patience for attempting gluten free bread.

This is where my Hot Cross Bun Muffins come in…

125FE8CC-CA5A-449B-8C2E-5523F068F466

Some may consider it lazy, but making Hot Cross Buns in muffin form is the easiest way to get your Hot Cross Buns fix without the hassle of actually making bread.

As well as being gluten free, this recipe can easily be made dairy free by changing the milk for a dairy free alternative.

6E0CE377-9BA6-4860-941E-ACD484BEA31B
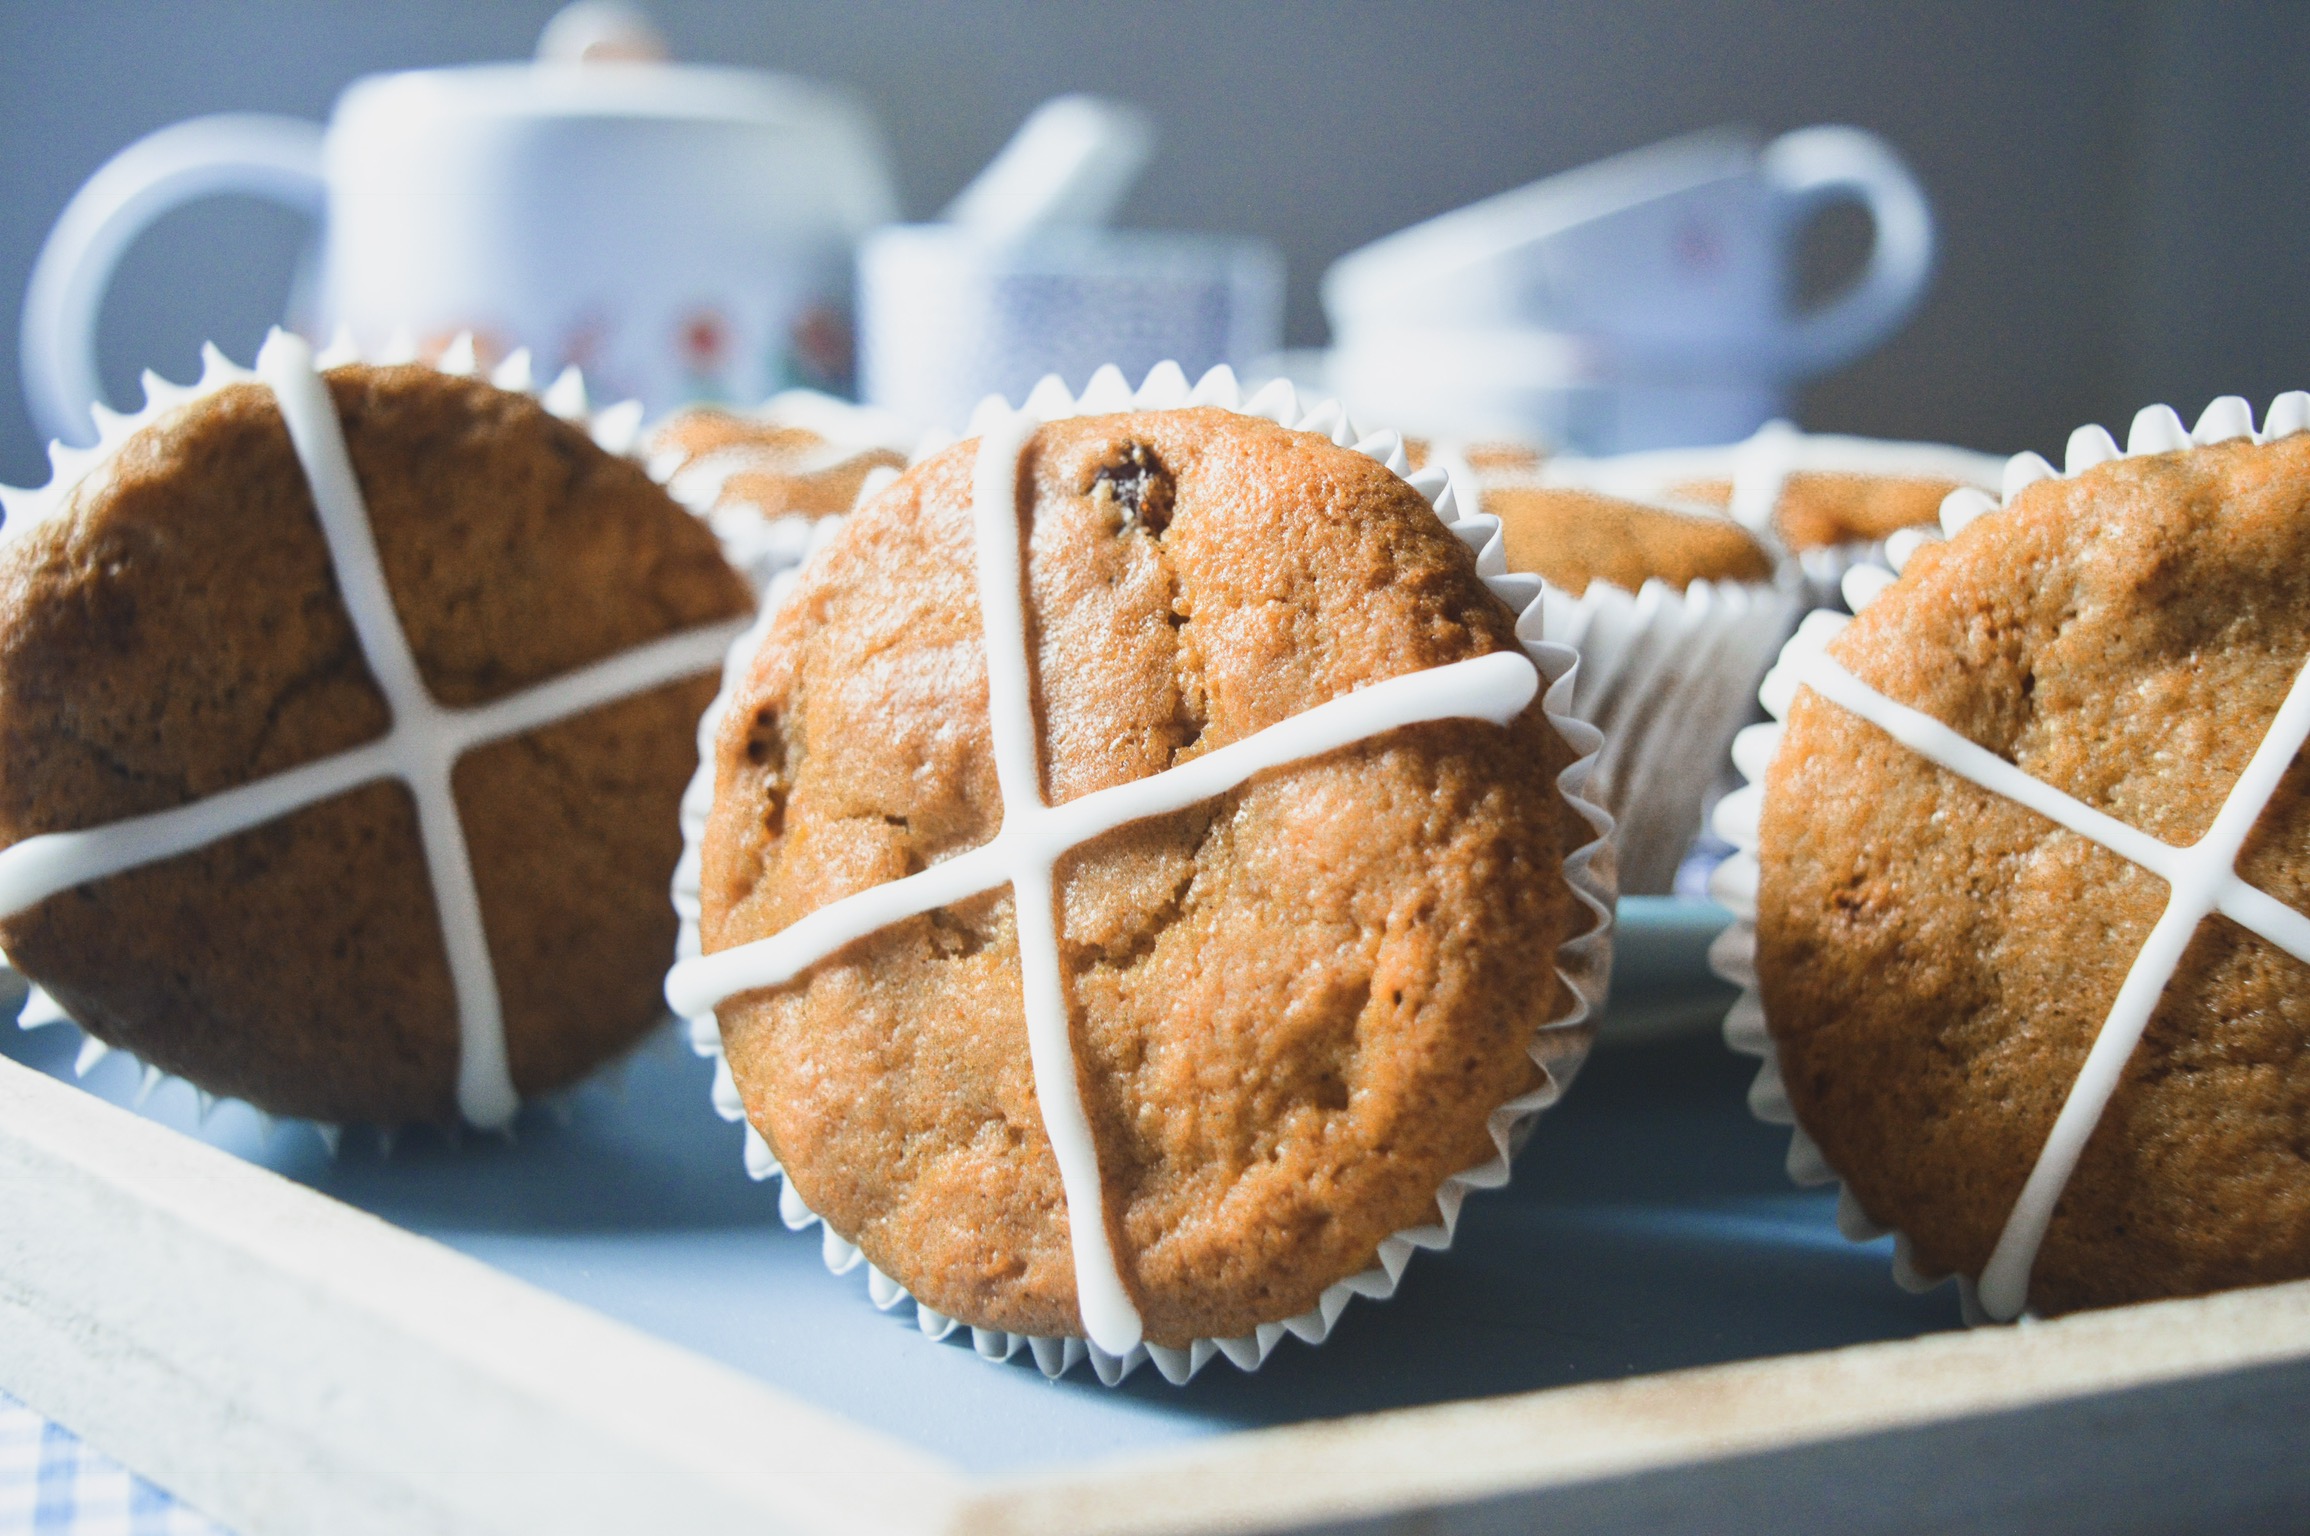
Hot Cross Bun Muffins – GF/DF options

Ingredients

For the muffins:

200g mixed dried fruit (I used sultanas/raisins/mixed peel)
300g gluten free self raising flour
Zest of an orange (save the juice for the icing)
1 tsp ground cinnamon
1 tsp mixed spice
1 tsp baking powder
1/2 tsp bicarbonate of soda
150g light brown sugar
2 large eggs
100 ml sunflower oil
200 ml milk (or dairy free alternative)

For the crosses:

100g icing sugar

1 – 2 tbsp of orange juice

Method:

1) Preheat the oven to 180 C/160 C fan/gas mark 4, then line a muffin tin with muffin cases.

2) In a large bowl, stir together the flour, baking powder, bicarbonate of soda, orange zest, cinnamon and mixed spice.

3) In a separate bowl, whisk together eggs, sugar, oil and milk until combined.

4) Gently mix together all the ingredients using a wooden spoon until you are left with a batter which is only just combined (don’t worry too much if there are any lumps), then stir through the dried fruit.

5) Spoon approximately 2 tablespoons of batter into each muffin case, then bake for 25 minutes, until golden brown.

6) Leave the muffins to cool completely on a wire rack, while you make icing.

7) To make the icing, mix the icing sugar with 1 – 2 tablespoons of orange juice or water, then mix until the ingredients form a pipeable paste.

8) Transfer the icing to a piping bag and pipe a cross onto each muffin.

Be sure to store the muffins in an air tight container and they will last for 4 to 5 days!

CDD15BDD-2C1C-42E3-A0A9-FA457CF08254

I love seeing your take on my recipes, so remember to share a snap of your Hot Cross Bun Muffins over on Facebook, Twitter or Instagram using the hashtag #titchytonbakes.

Gluten Free Rhubarb and Apple Crumble with Homemade Custard

The UK has been experiencing a bit of a cold snap over the last week and as temperatures have continued to plummet I have found myself drawn to warming comfort foods.

Although it is not quite peak-rhubarb season until about April, rhubarb is available as early as February and I recently spotted some beautiful pink rhubarb at my local fruit and veg stall which made my mouth water. I think people often don’t know what to do with rhubarb, but one of the simplest ways to cook it is in a crumble – and you can’t really go wrong with the classic combination of Rhubarb and Apple.

crumble 4

For most recipes, it is essential to sweeten rhubarb with a little sugar, but not so much that it begins to lose all its sharpness. If cooked properly, rhubarb should be that perfect balance between sweet and sour – be careful too, not to cook the rhubarb for too long as it can lose it shape become mush.

Crumble

I topped my crumble with gluten free oats, but if you struggle to tolerate gluten free oats, you could try buckwheat flakes, quinoa flakes or flaked almonds instead.

Gluten Free Rhubarb and Apple Crumble with Homemade Custard Ingredients – GF/DF options

For the filling:
400g pink rhubarb, cut into thumb size pieces
300g Bramley apples, peeled and sliced
100g caster sugar

For the crumble topping:
75g unsalted butter (or dairy free butter)
250g all-purpose gluten free flour (I used Schär All Purpose Baking Mix)
50g caster sugar
A handful of gluten free oats, buckwheat flakes, quinoa flakes or flaked almonds

Custard:
1 tsp cornflour
1 egg yolk
1 tsp vanilla extract
20g caster sugar
150ml double cream (or dairy free alternative)
100ml milk (or dairy free alternative)

Method

1) Preheat the oven 200 C/180 C fan/gas mark.

2) Place the rhubarb and caster sugar into a heavy bottomed pan. Heat the ingredients over a low to medium heat until the rhubarb starts to release its juices, but holds its shape.

2) Add the slices of apple to the pan and stir until the apple is coated with the rhubarb juice. Pour the fruit into the baking dish and set aside while you make the crumble topping.

3) To make the crumble topping, mix together the flour and sugar then rub in butter until you are left with a breadcrumb like texture.

4) Spoon the crumble mixture over the fruit filling, ensuring it is completely covered. Top with gluten-free oats (or one of the alternatives listed above), then bake in the preheated oven for 30 minutes until the topping is golden brown.

5) To make custard: place the cornflour, egg yolk, sugar, and vanilla extract into a heavy bottomed pan and give the ingredients a quick whisk. Add milk and cream then place the pan over a medium heat. Continuously whisk the mixture to help it thicken and to stop the custard burning – do not let it boil.

6) Once the custard has thickened remove the pan from the heat and serve.

crumble 2

I love seeing your take on my recipes, so remember to share a snap of your crumbles over on Facebook, Twitter or Instagram using the hashtag #titchytonbakes.

Gluten Free ‘Baci di Dama’ (Hazelnut and Chocolate Cookies)

If you’re looking for the perfect bake for Valentine’s Day, look no further than these mini Hazelnut and Chocolate Cookies which are very romantically named ‘Baci di Dama’ or ‘Lady’s Kisses’.

16675738-74A1-495A-97C3-4C8197A419C0

Baci di Dama originate from the Piedmont region of Italy and were made to celebrate the excellent Hazelnuts produced there. It is thought that the cookies are called ‘Lady’s Kisses’ as the two sandwiched cookies are said to resemble lips pursed together ready to receive a kiss or the two halves symbolise two lovers kissing.

C186BD84-623A-4992-A867-533C63D3B80C

Whichever explanation you decide to opt for, there’s no doubt that these miniature cookies are incredibly cute. They are also incredibly simple to make and require just five ingredients – great for a last minute gift idea if you’re stumped for what to get someone for Valentine’s Day!

0356EA2A-451C-4269-A6B7-6EF5DBE491D7


Baci di Dama (Lady’s Kisses) – GF/EF/DF options

Ingredients

100g blanched hazelnuts
100g gluten free flour (I used Schär All Purpose Baking mix
60g caster sugar
60g unsalted butter (or a dairy free alternative, like Stork Margarine)
50g good quality dark chocolate (or dairy free alternative)

Method

1) Place a dry frying pan over a medium heat, then lightly toast the hazelnuts until golden brown.

2) Blitz the hazelnuts in a food processor until they resemble fine breadcrumbs. Place the ground hazelnuts into a large bowl, then stir through the sugar and the flour.

3) Rub the butter into the hazelnut mixture and start to bring the mixture together to a form a dough – if the mixture is a little crumbly, add a few drops of water to help it come together.

4) Wrap the dough in cling film and chill it in the refrigerator for two hours to help it firm up.

5) Preheat the oven to 160 C/140 C fan/gas mark 3. Roll the chilled dough into small ball shapes which weigh approximately 5 grams each, then place the pieces of dough onto baking trays lined with baking parchment and chill the

6) Place the balls of cookie dough into the fridge to chill for 15 minutes. Bake the cookies for 15 minutes or until they are golden brown.

7) Transfer the cookies to a wire rack to cool completely while you melt the chocolate.

8) Melt the chocolate in a heatproof bowl over a pan of gently simmering water. Allow the chocolate to cool for a few minutes, then dip the flat side of a cookie into the chocolate, then sandwich it together with another cookie – repeat until all the cookies have been sandwiched together.

4FD62847-81CB-4EC6-A7FC-904E824A8545

I love seeing your take on my recipes, so remember to share a snap of your Baci di Dama over on Facebook, twitter or Instagram using the hashtag #titchytonbakes.


Gluten Free Blueberry and Almond Muffins

Today I am going to share with you my recipe for my favourite weekend breakfast treat – Gluten Free Almond and Blueberry Muffins.

blueberry

When it comes to breakfast muffins, I think Blueberry muffins are right at the top of my list, but the flavour combination of almond and blueberry muffins is sheer heaven and are perfect with a frothy cappuccino.

bb2

These muffins are an ideal weekend bake – good for mornings where you typically have a bit more time to spare, but want a  treat which can whipped up quickly enough, leaving plenty of time to do that crossword in the morning paper.


Gluten Free Blueberry and Almond Muffins – GF/DF options
Makes 8

Ingredients:

300g gluten free self raising flour
1 tsp baking powder
1/2 tsp bicarbonate of soda
150g caster sugar
2 large eggs
75 ml sunflower oil
200ml milk
1 tsp vanilla extract
150g flaked almond
8 tsp blueberry jam

Method:

1. Preheat the oven to 180 C/160 C fan/gas mark 4 and line a muffin tin with 8 muffin cases.

2. In a large bowl, sift together the flour, baking powder and bicarbonate of soda, then stir through 100g of the almonds.

3. In separate bowl, whisk together eggs, sugar, oil, milk and vanilla extract until combined then add this to the dry ingredients.

4. Gently mix the ingredients together until they form a batter which is only just combined (don’t worry too much if there are any lumps).

5. Spoon approximately 1 and a half tablespoons of batter into each case, followed by a teaspoon of jam then fill the muffin cases with a further tablespoon of batter, ensuring the jam is fully covered. Top each muffin with the remaining flaked almonds.

6. Bake the muffins for 25 minutes, until golden brown.

7. Enjoy warm, or leave them to cool on a wire rack before storing in an airtight container. Finish the muffins off with a dusting of icing sugar, if you wish.

bb4

I love seeing your take on my recipes, so remember to share a snap of your muffins over on Facebook, twitter or Instagram using the hashtag #titchytonbakes.

Gluten Free Nutella Marble Cake

New Year is that time of year where we seek to return some balance to our lives, whether that be through setting New Year resolutions or undertaking a detox to repair our bodies after the hectic and often overindulgent festive season.

Personally, I have never managed to stick to a New Years resolution or detox diet, and although I do understand I can’t over indulge all year round, I do think that January is a time for comforting feel good food – after all, it can be a cold and bleak month.

nutella 5

As far as comforting feel good food goes, I think my Gluten Free Nutella Marble cake fits the bill… I’d just better be sure to strike some balance in my diet by making sure I eat my greens, too!

nutella 2


Nutella Marble Cake – GF/DF options

Ingredients

For the cake:
175g unsalted butter, softened
175g caster sugar
175g gluten free self raising flour
1 tsp baking powder
4 eggs
2 tbsp milk (or dairy free alternative)
1 tsp vanilla extract
2 tbsp cocoa powder
3 tbsp Nutella or similar hazelnut spread (or dairy free alternative)

For the chocolate glaze:
2 tbsp cocoa powder
4 tbsp golden syrup
25g butter (or dairy free alternative)

To decorate:
A handful of roughly chopped hazelnuts

Method:

1. Preheat the oven to 170 C/150 C fan/ mark 3, then grease and line a 2lb loaf tin with baking parchment.

2. In a large bowl, sift together the flour and baking powder.

3. In a separate bowl, cream together the butter and sugar with an electric hand mixer until light and fluffy. Add the eggs one at a time along with one tablespoon of the flour to stop the mixture from curdling. Add the remaining flour and milk, then beat until the ingredients are fully combined.

4. Divide the mixture between two bowls – add the vanilla extract to one half of the mixture, then stir the cocoa powder and the Nutella through the other half.

5. Spoon the vanilla and hazelnut mixtures into the prepared tin, alternating between the two colours – to create a marble effect, gently swirl a skewer through the mixture.

6. Bake for 60 – 80 minutes – or until a skewer inserted into the centre of the cake comes out clean.

7. Allow the cake to cool in the tin before turning it out on a wire rack. Leave to cool while you make the chocolate glaze.

8. To make the glaze: place the butter, golden syrup and cocoa powder into a small saucepan. Heat the ingredients over a medium heat and stir until the butter has melted and the ingredients are combined.

9. Drizzle the icing over the cake and finish with the chopped hazelnuts.

nutella 1

I love seeing your take on my recipes, so remember to share a snap of your marble cakes over on Facebook, twitter or Instagram using the hashtag #titchytonbakes.