
For me, every Christmas table should have a showstopper, something extra special which makes the family go “Wow!”
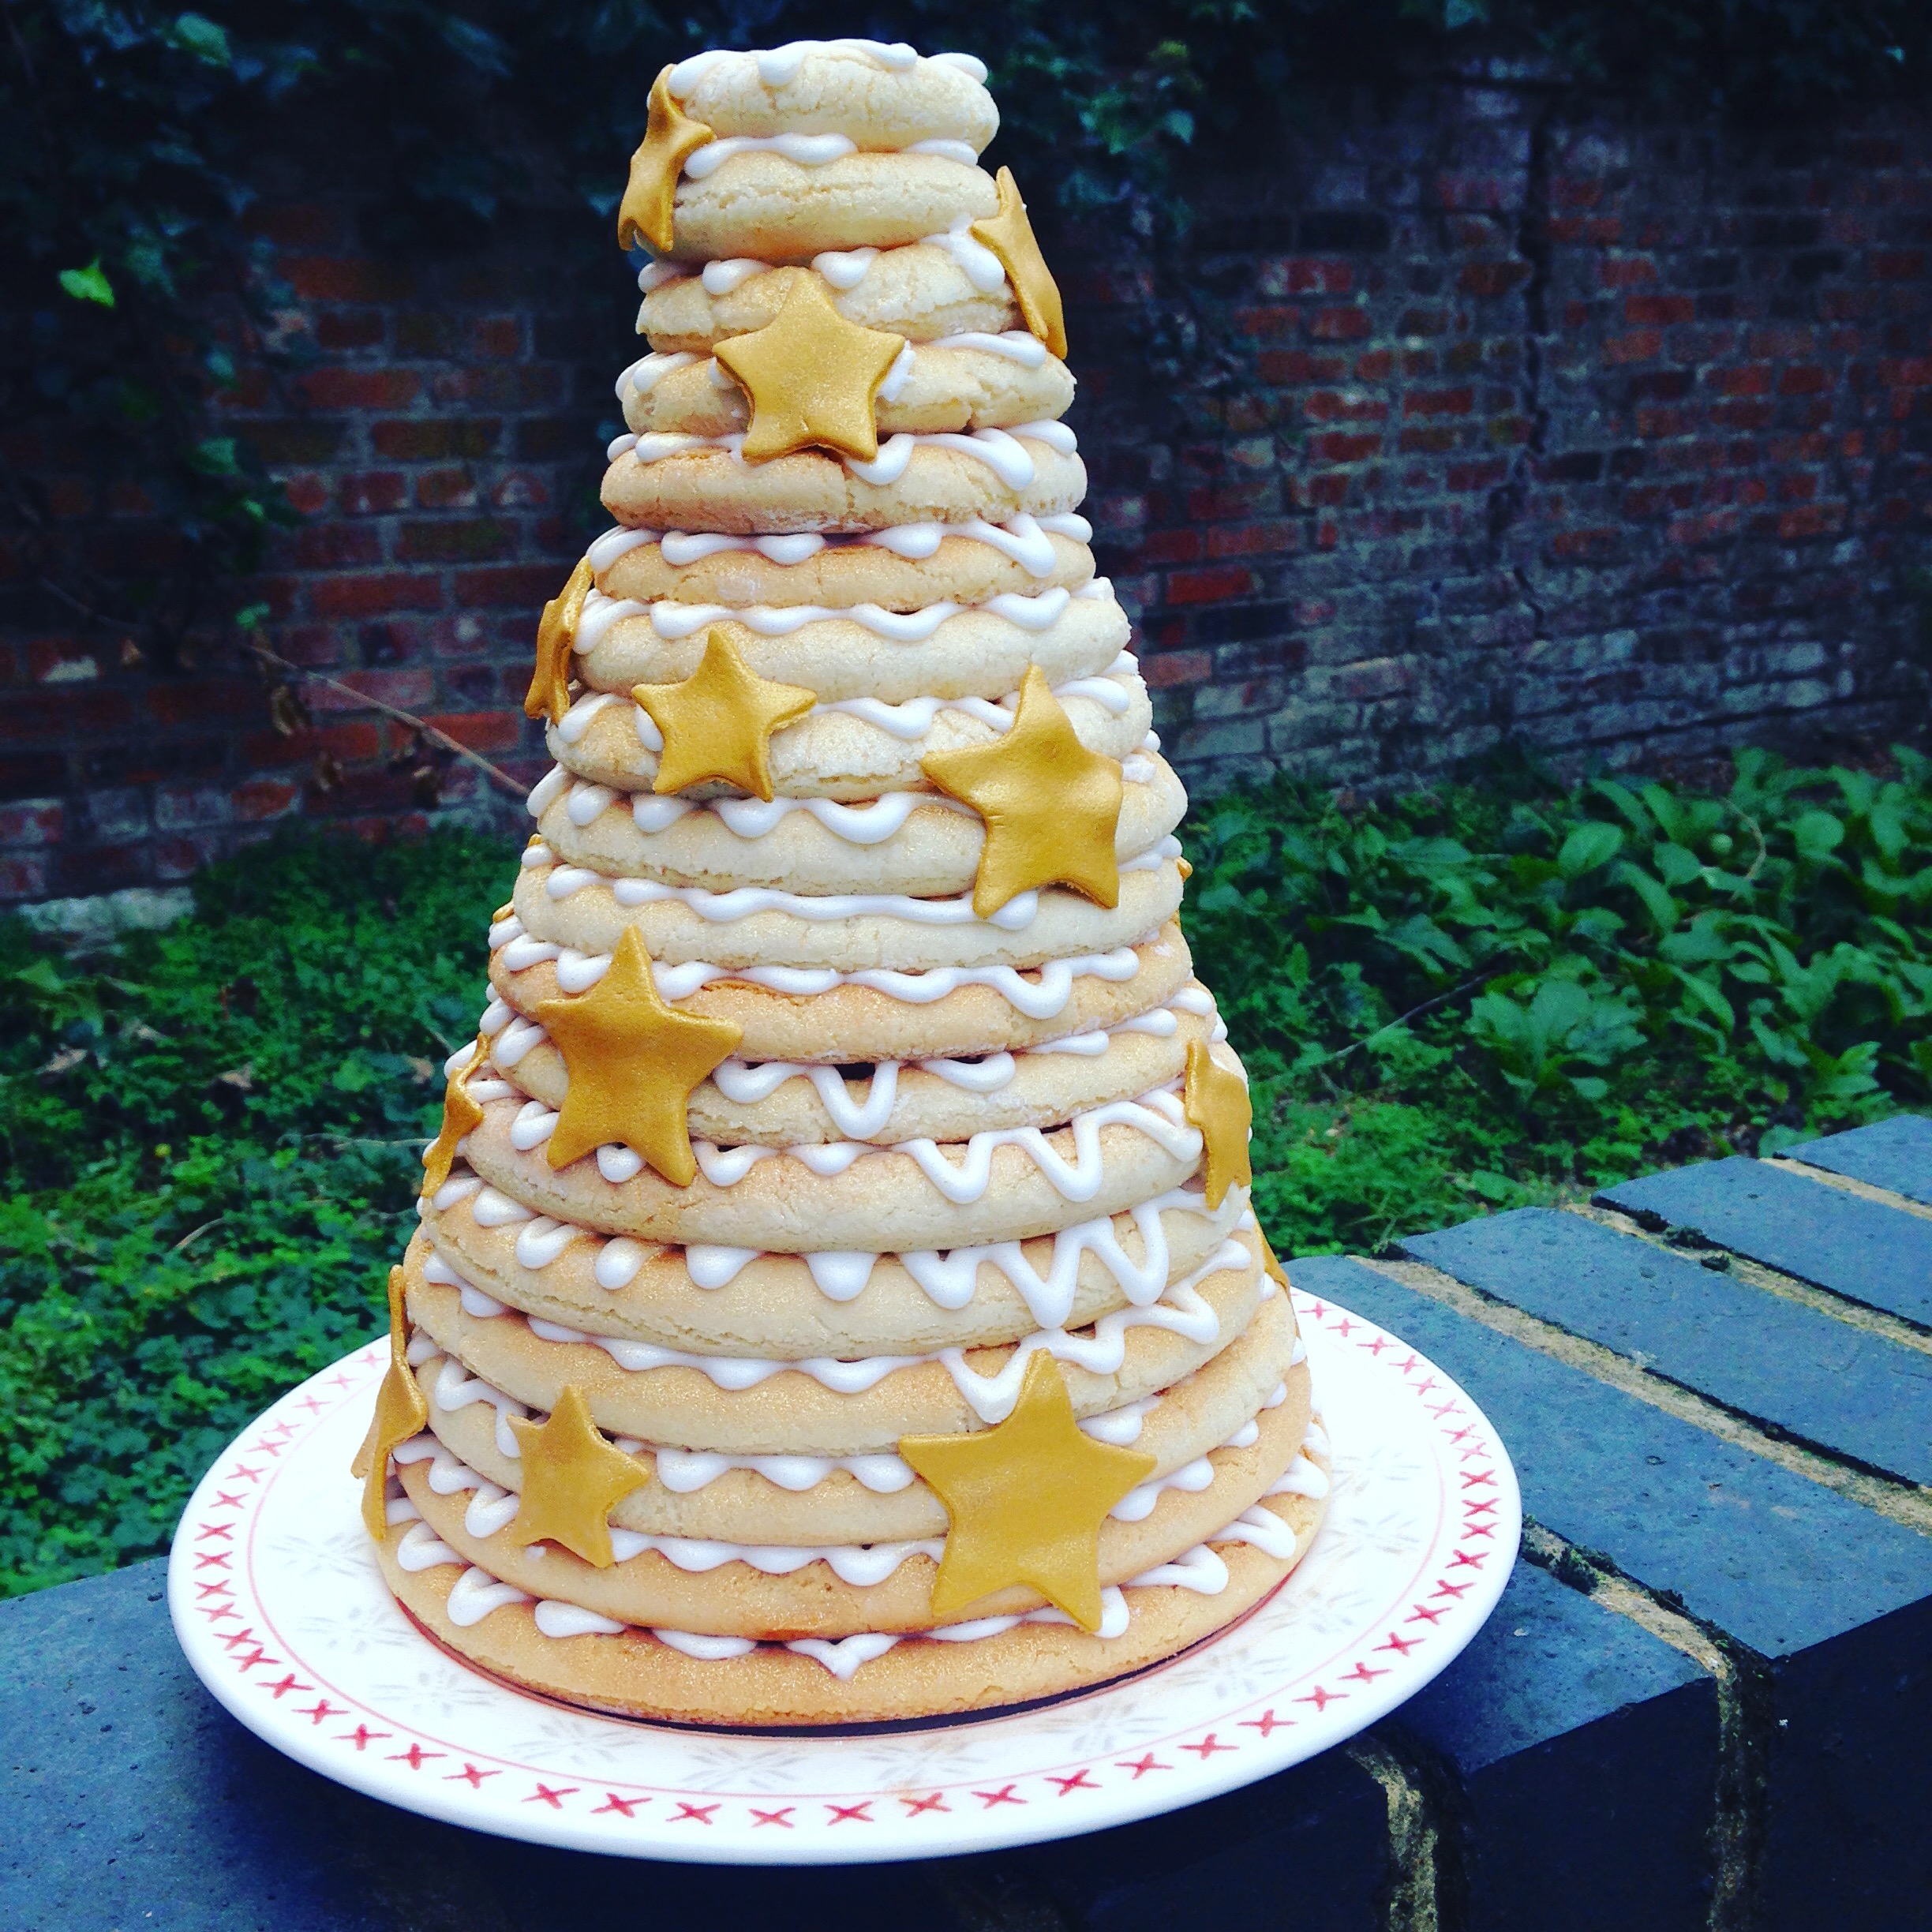
I don’t know about you, but I don’t think there is anything more show stopping than the towering Kransekake Cake which would look simply spectacular at the centre of any Christmas dinner table!

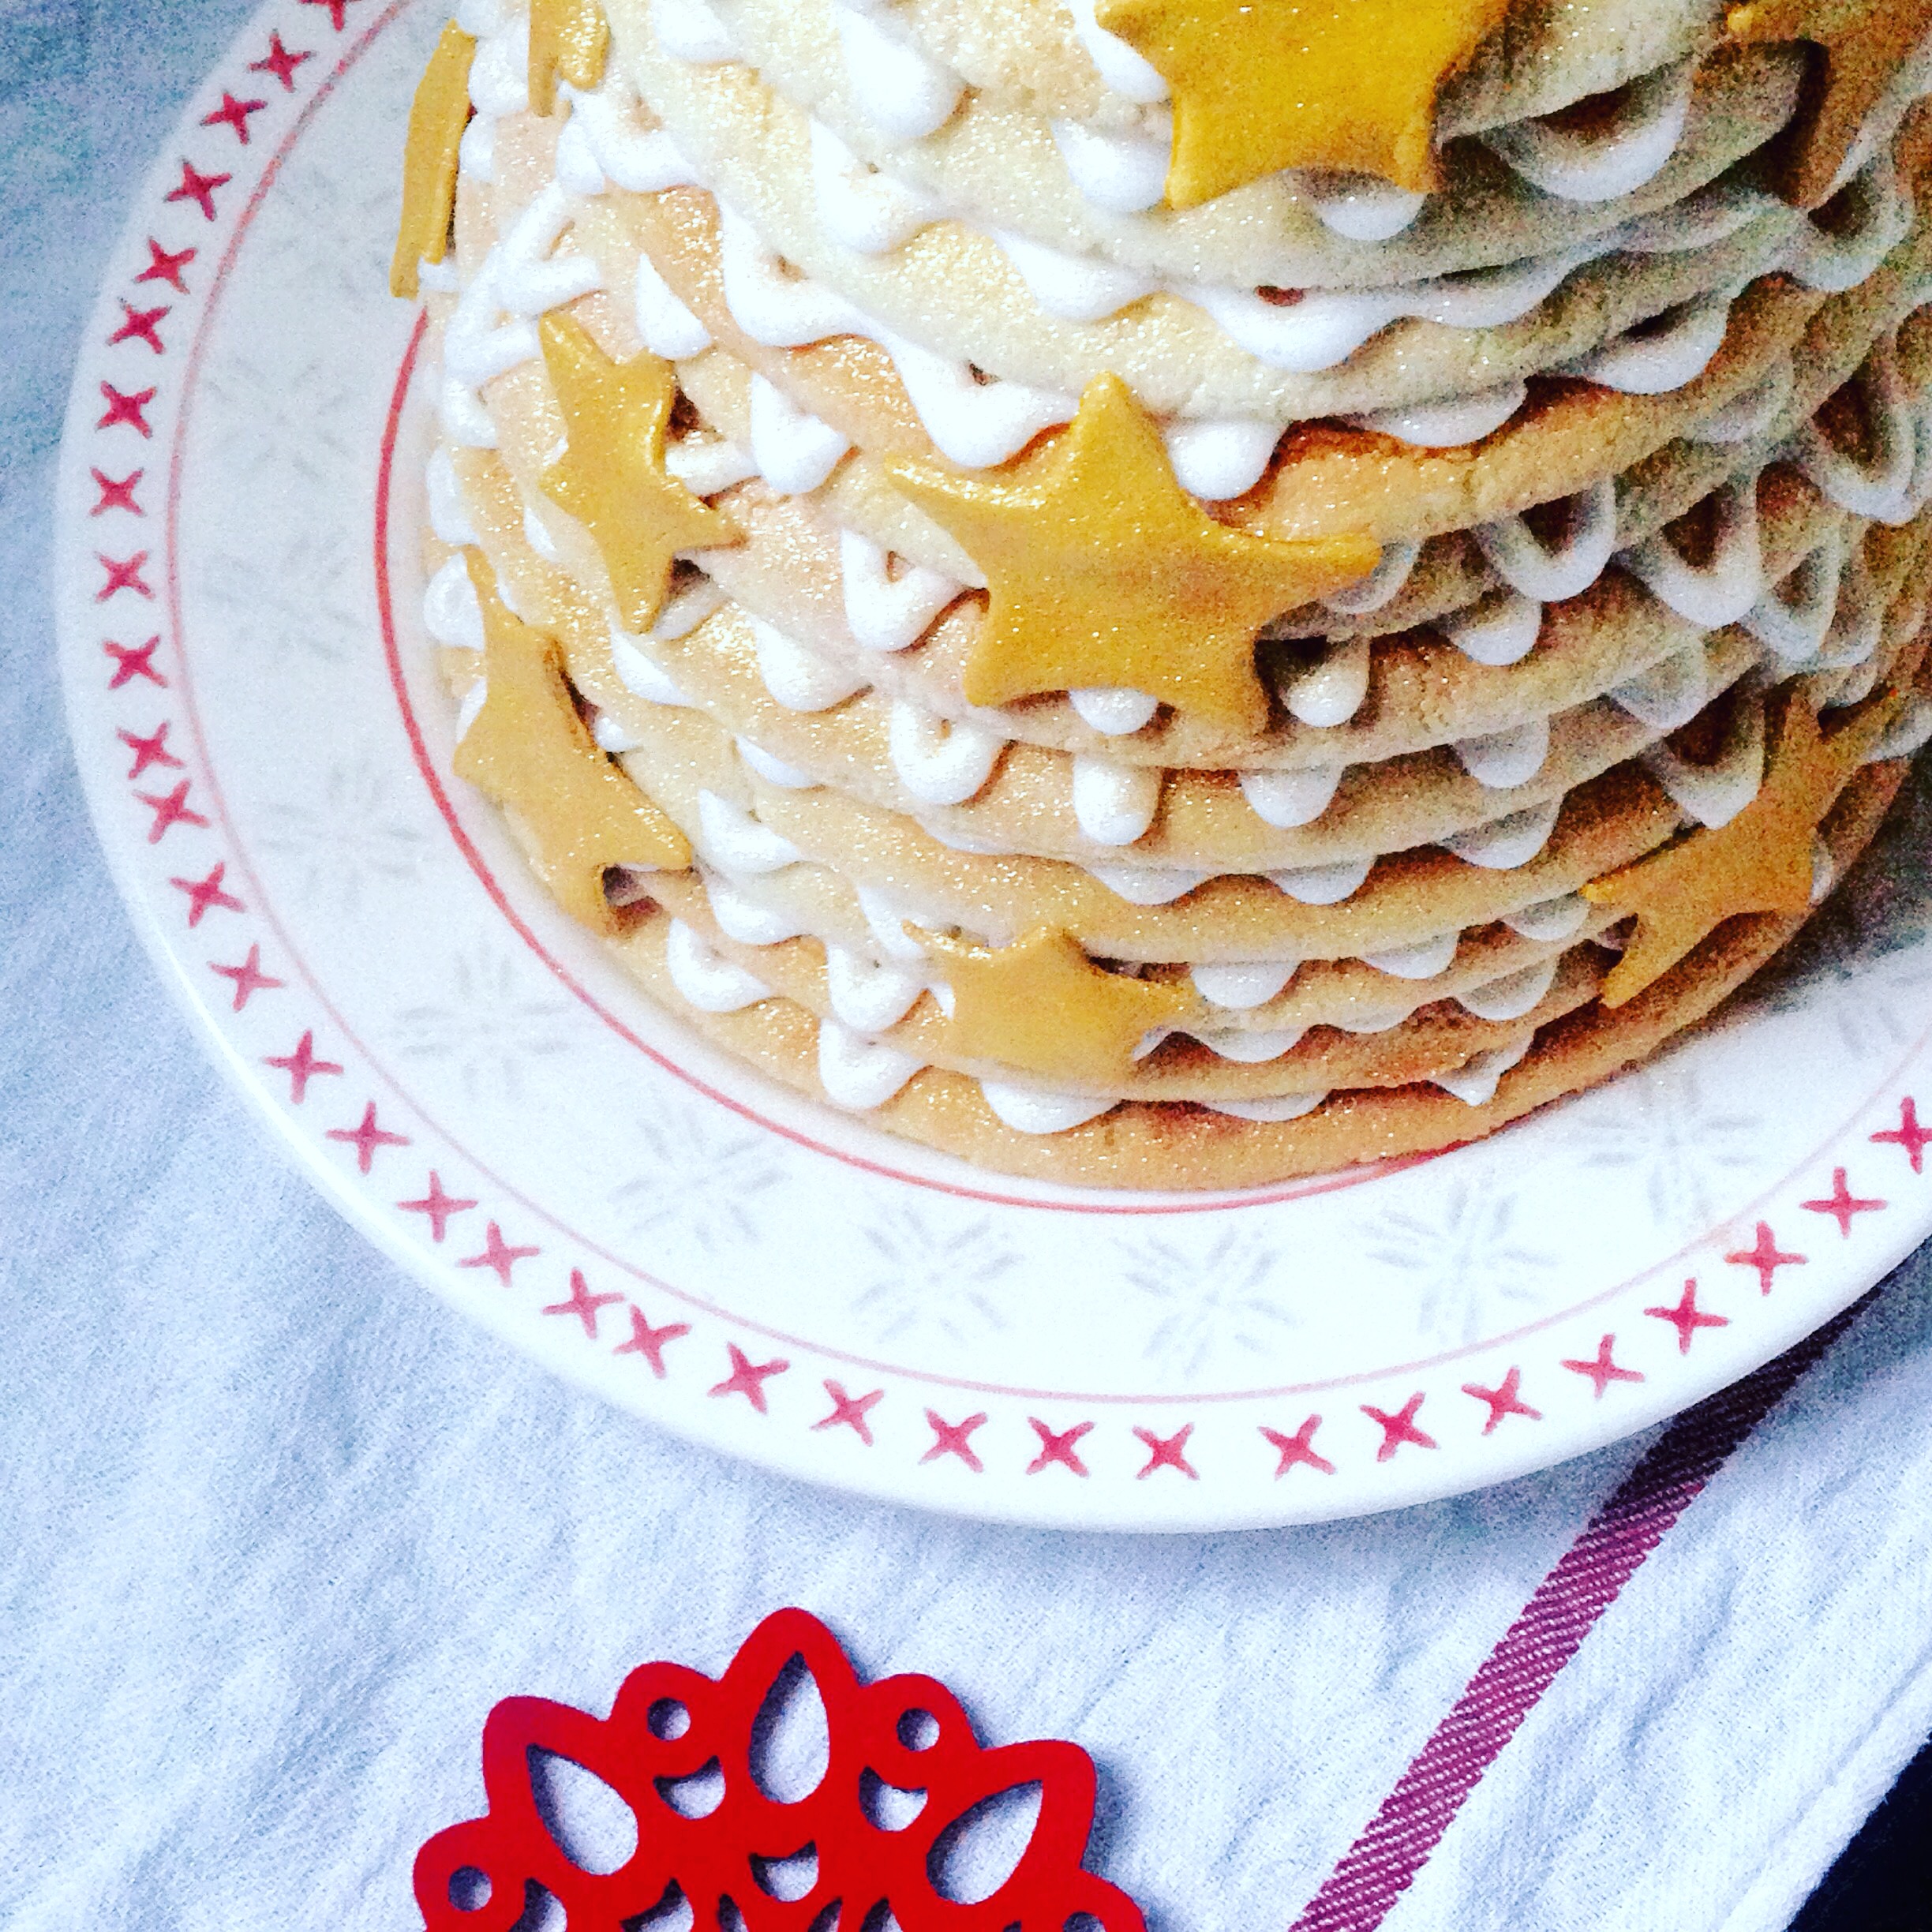
The Kransekake is a traditional Scandinavian cake which is often served at special occasions including weddings and Christmas celebrations. It consists of 18 almond flavoured rings which are stacked on top of each other to form an impressive tower – If you’re a Marzipan fan, you’ll love this cake!
 My Kransekake Design
Although it looks very impressive, it’s actually quite straight forward to make! The rings are made from a dough consisting of ground almonds, icing sugar and egg whites which is shaped to fit Kransekake moulds which can be found at Lakeland.
Kransekake Cakes are usually gluten free, although dough is sometimes rolled out in Semolina flour which is not suitable for Coeliacs. For my Kransekake cake, I rolled the dough out in Cornflour instead of Semolina.
Gluten Free Kransekake Recipe – GF/DF
Recipe inspired by Paul Hollywood’s Recipe from ‘The Great British Bake Off’
Ingredients
500g ground almonds, plus cornflour for dusting
500g icing sugar
4 egg whites
1 tsp almond extract
sunflower oil spray
For the Decoration:
2 egg white
500g icing sugar
edible spray glitter
fondant stars (optional)
You will also need 6 Kransekake Moulds (I bought mine from Lakeland)
Method
1. In a large bowl mix together the ground almonds and icing sugar.
2. Add the egg whites and almond extract, then using your hands work the ingredients into a smooth ball of slightly sticky dough.
3. Chill the dough in the fridge for at least two hours.
4. Preheat the oven to 200 C/180 C Fan/gas mark 6.
5. Spray the Kransekake moulds with oil and dust them generously with cornflour.
6. Dust a work surface with cornflour and split the dough into 6 equally sized pieces.
7. Split one of the pieces of dough into three different sized pieces: one large, one medium and one small.
8. Roll the balls of dough out into pieces which are approximately a finger-width and long enough to wrap round the Kransekake moulds.
9. Place the first piece into the Kransekake mould and pinch the ends together. Repeat with all the other pieces until all the moulds are filled.
10. Place the moulds onto a baking tray and bake for 10 minutes or until golden brown.
11. Remove the Kransekake rings from the oven and allow them to set in their moulds – if you try to remove them while they are warm they will break! Once the Kransekake are cool remove them from their moulds and set them aside while you make the icing.
12. To make the Royal Icing, place the egg whites in a bowl and slowly sift in the icing sugar in batches. In between each batch of sugar stir the icing with a wooden spoon or a balloon whisk until the icing thickens up.
13. Spoon the icing into a piping bag fitted with a small round writing nozzle.
14. Before you begin to decorate, sort the rings out into size order.
15. Place the largest ring onto your serving plate (you could use a bit of icing to adhere it to the plate and stop it from slipping around). Pipe a zig-zag pattern onto the ring and place the second largest ring on top. Repeat until all the rings have been neatly stacked.
16. To finish, spray the Kransekake with edible spray glitter. I made mine extra special by covering it in gold stars made from fondant icing.
I hope you all enjoy the Christmas season and have a go at my Christmas recipes this year, which also include my Gluten Free Gingerbread Cookies which I posted last Christmas, my Hazelnut Cranberry and Orange Biscotti and my Cointreau Christmas Cake.

I am taking a well deserved Christmas break, but I will be back in the New Year with plenty more gluten free recipes for you all to try. In the meantime, why not check out my out my Instagram page or my Facebook page to see what else I get up to over Christmas!
Wishing you all a very Merry Christmas and a Happy New Year! xxx


