Gluten Free Bakewell Tart (Inspired by ‘The Great British Bake Off’)

Today I’m going to share with you my gluten free take on Mary Berry’s Bakewell Tart, as featured on the latest episode of ‘The Great British Bake Off’.

image

This week the bakers had to tackle pastry and they were tasked with making Danish Pastries, Filo Pastry Amuse Bouches and a Bakewell Tart, which was this week’s technical challenge.

There was some controversy on Twitter after the show aired that Mary’s bake was not a Bakewell Tart, but in fact a Cherry Bakewell because it was topped with an almond flavoured icing – apparently a traditional Bakewell Tart is supposed to be topped with layer of flaked almonds, not icing.

It may annoy traditionalists, but I decided to stay true to Mary’s recipe and go for a layer of icing…  but I did add some flaked almonds for good measure!

image

The challenge making a gluten free version of this bake is coming with a good shortcrust pastry recipe.

Gluten free pastry can tend to be a little on the crumbly side, so it’s important that there is enough liquid in the mixture to help bind the ingredients together. My recipe uses a combination of egg yolks and butter to achieve this, but if the mixture is being little stubborn, a drop of water can be added to help bring it together.

It’s also incredibly important to chill your pastry before using it, as it this really does help to make it more pliable.

Finally, a good quality non stick tart or flan tin with a loose base is essential, or you will struggle to get your tart of its tin!

image

Gluten Free Cherry Bakewell Tart – GF/DF/

(Recipe inspired by Mary Berry’s Bakewell Tart recipe from ‘The Great British Bake Off’)

You will need a 8″ inch fluted flan or tart tin with a loose base.

Ingredients

For the Pastry:

200g plain gluten free flour

50g ground almonds

75g  icing sugar

2 egg yolks

125g butter (Or gluten free alternative like Stork Baking Block)

A drop of water

For the filling:

4 tbsp seedless raspberry jam

150g butter, softened (or gluten free alternative)

150g caster sugar

150g ground almonds

1 large free-range egg, beaten

1 tsp almond extract

For the icing: 

300g icing sugar

1 tsp almond extract

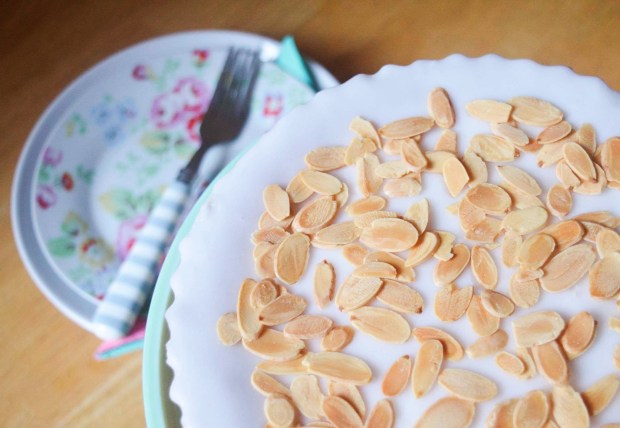
A handful of toasted flaked almonds to finish

Method

1) To make the pastry, stir together the flour, ground almonds and icing sugar in a large mixing bowl.

2) Rub together the flour mixture and the butter, add the egg yolks and start to bring the mixture together your hands.

3) Tip the contents of the bowl out onto a floured work surface and knead the dough until it comes together in a smooth ball – you can add a few drops of water to help, if necessary.

4) Wrap the pastry in cling film and put it in the fridge to cool for about 30 minutes to an hour – this is very important as the colder the pastry is, the easier it is to work with.

5) Preheat the oven to 180 C/160 C fan/gas mark 4, then throughly grease your tart tin with butter.

6) Roll out the chilled pastry between two sheets of greaseproof baking paper (this will prevent the pastry from sticking to your work surface) until it is about the thickness of a 1 pound coin.

7) Use greaseproof paper to help you get the pastry into the tin safely. Firstly, peel off the top layer of baking paper, place the tin upside down into the middle of the pastry then carefully flip the pastry over with the help of the bottom sheet of baking paper. Peel off the bottom baking sheet and gently press the pastry down into the tin, insuring it’s pressed right into each groove – don’t panic if you do get any tears or any holes, just neatly patch it up with some spare pastry.

8) Trim off any excess pastry. Place some baking paper into the case and fill it baking beans (any dried beans or rice will do) then blind bake the pastry case for 10 minutes. Remove the baking beans and bake the case for a further 5 minutes to help dry it out.

9. Meanwhile make the Frangipane: cream together the butter and sugar until light and fluffy. Beat in the egg, ground almonds and almond extract until the ingredients are combined.

10. Leave the pastry case to cool down slightly before spreading the jam over the base of the case in an even layer. Next, spoon the Frangipane into the case and smooth it out with a palate knife.

11. Bake the tart for 25 – 30 minutes or until the Frangipane is golden brown and firm to touch. If the pastry starts to get a little too much colour, put some tin foil over the tart, this will prevent it from burning.

12. Leave the tart to cool completely before decorating. While you are waiting, toast your flaked almonds by spreading them over a lined baking sheet and baking them at 180 degrees for about 5 minutes until toasted.

13. To make the icing, sift the icing sugar into a bowl. Add the almond extract and 2 to 3 tablespoons of cold water and mix until you are left with a thick but spreadable icing.

14. Spread the icing over the cooled tart using a palate knife. Sprinkle over the toasted almonds, then serve!

image

I hope you enjoy this recipe and all other recipes I have recreated during this series of ‘The Great British Bake Off’ so far.

I love seeing your bakes, so if you try any of my recipes please take a snap and share it on Instagram or Twitter by using the hashtag #titchytonbakes or post a picture on my Facebook page.


Gluten Free Battenberg featuring Delicious Alchemy’s Gluten Free Vanilla Sponge Mix

There is less than a week until ‘The Great British Bake Off’ returns to our screens, and even though it’s been delayed slightly thanks to the Rio Olympics, I am no less excited to see what surprises lie in store this year.

The return of Bake Off means that Delicious Alchemy’s Gluten Free Magic Bake Off is also back for another year and to celebrate I’m going to share with you my Gluten Free Battenberg Cake which I made using Delicious Alchemy’s Vanilla Sponge Mix

image

image

Back in 2014 I entered Delicious Alchemy’s Gluten Free Magic Bake Off for a bit of fun with a Gluten Free Red Velvet Cake that I made for my sister’s birthday. I ended up making it to the final three bakers and although I didn’t win the overall competition, I was chuffed to bits to make it that far. I hadn’t been on a gluten free diet that long and it gave me the confidence boost I needed to start writing that gluten free food blog my friends were always nagging me to write… the very blog you’re reading now!

Regular readers of my blog will know that I am an enormous fan of Delicious Alchemy’s products, particularly their baking mixes and I always have a few stashed away in cupboard for emergencies just incase I need to whip up something super quick.

Their Gluten Free Vanilla Cake Mix is perfect for this Battenberg Cake as it makes the process much simpler – you need very few ingredients, whipping up the mixture for the sponge takes only a matter of minutes and the construction of the cake isn’t too daunting as long as you follow the instructions step by step!


image

My top tip when making a Battenberg Cake is to use food colouring which is bake stable – I recommend using either a gel or a paste as many liquid food colourings aren’t bake stable which means the sponge won’t retain its colour when baked.


Gluten Free Battenberg (GF/DF options)

Ingredients

You will need one packet of Delicious Alchemy Vanilla Sponge Mix (400g) spilt into two 200g portions.

Yellow Sponge:
200g Delicious Alchemy Gluten Free Vanilla Sponge Mix
100g softened butter (or dairy free alternative)
2 eggs
2 tbsp milk (or dairy free alternative)
A few drops of a yellow food colouring (make sure it’s bake stable)

Pink Sponge:
200g Delicious Alchemy Gluten Free Vanilla Sponge Mix
100g softened butter (or dairy free alternative)
2 eggs
2 tbsp milk (or dairy free alternative)
A few drops of pink food colouring (make sure it’s bake stable)

For assembling the cake:
400g ready to roll white marzipan
3 tbsp apricot jam

Method:

1) Preheat the oven to 180 degrees C/gas mark 4 then grease and line a square tin with baking paper.

To save time (and washing up) I decided to bake both sponges in the same tin. To do this, I made a divider out tin foil and placed it down the centre of tin. The divider should fit snuggly into the tin which and should be sturdy enough to stand up by itself. Make sure you grease the divider too so that you can remove the cake more easily.

3) Firstly make the yellow sponge: Place half (200g) of the Delicious Alchemy vanilla sponge mix in a large bowl with the butter, eggs and milk, then beat with a electric hand mixer for 15 seconds. Scrape down the sides of the bowl, add the yellow food colouring and mix for a further 10 – 15 seconds ensuring the food colouring is fully incorporated.

4) Next, make the pink sponge: Place the remaining half of the Delicious Alchemy vanilla sponge mix into a large bowl with the butter, eggs and milk, then beat with a electric hand mixer for 15 seconds. Scrape down the sides of the bowl, add the pink food colouring and mix for a further 10 – 15 seconds ensuring the food colouring is fully incorporated.

5) Carefully spoon the mixtures into the prepared tin ensuring the divider properly separates them.

6. Bake the sponges for 20 – 25 mins. Check the sponges are cooked by inserting a skewer into the middle of each sponge, if the skewer comes out clean then the sponges are ready.

7. Leave the sponges to cool in the tin for a moment and then transfer the cakes onto a wire rack to cool completely – If you attempt to assemble the cakes whilst they are still warm they will crumble.

8. Once your cake has cooled, trim the tops with a sharp knife or a cake wire to ensure they are flat and even in height.

9. Place the sponges on top of each other and trim the edges so that they are nice and neat.

10. Cut the sponges in half, straight down the middle so you are left with four long pieces of sponge.

11. Gently heat the jam in a pan or a microwave to make it easier to spread.

12. Take one of the yellow and one of the pink pieces of sponge, brush the top and sides lightly with the apricot jam then place them side by side. Brush the next two pieces of sponge with jam and then place them on top so that they create the iconic checked pattern.

13. Knead the marzipan in icing sugar until it becomes more pliable then roll it out into a large square which is longer than the length of the cake and wide enough to wrap around the cake.

14. Make sure the cake is evenly covered in apricot jam to ensure that the marzipan sticks to the sponge. Place the cake onto the marzipan and tightly wrap it around the cake.

15. Trim off the the excess marzipan to create neat edges and leave the ends exposed so the  checked pattern can clearly be seen.

16. Serve!

image

You can find out more about Delicious Alchemy’s Gluten Free Magic Bake Off, including how to enter, on their website.

They also have 25% off their baking and bread mixes on their online shop until the 4th October 2016 to celebrate the start of GFMBO so you can stock up and get practicing your skills!

Gluten Free Buckwheat and Peanut Butter Flapjacks (No Oats)

Today I’m going share with you my Gluten Free Buckwheat and Peanut Butter Flapjack recipe.

image

I have been working on this recipe for a while, after a kind request from a friend who struggles to tolerate oats. The objective was simple: create a flapjack that looks and tastes like a traditional flapjack but that doesn’t contain any oats, not even gluten free ones.

I happily excepted the challenge because there are many Coeliacs who struggle to tolerate gluten free oats (despite the fact that they are considered to be okay) and there are many looking for an alternative that will work for them.

When I was looking for an oat subsitute I came across some gluten free Buckwheat flakes in my local health food shop; they are slightly paler in colour than oats but are similar in size and texture so I thought they would work well – If you think you can tolerate buckwheat then this recipe might be worth a shot.

It took a few attempts to get the recipe just right. The first attempt resulted in a flapjack that was so crumbly that I couldn’t even cut it into squares and the second attempt was a complete disaster when I accidentally over baked them and they turned out as hard as rocks – oops!

It was definitely third time lucky. The final attempt resulted in the perfect buttery, and chewy flapjack which didn’t crumble at the slightest touch – result!

image

I deviated slightly from the brief and used peanut butter which I know isn’t particularly traditional, but I love the flavour! If you’d prefer a more traditional flapjack or have a nut allergy you can miss out this ingredient and they will work just as well.

Free Buckwheat and Peanut Butter Flapjacks – (GF/EG/DF options)

Makes approximately 16 flapjacks

Ingredients

175g unsalted butter (or dairy free alternative)
2 tbsp crunchy peanut butter
2 tbsp golden syrup
150g soft brown sugar
300g buckwheat flakes

Method

1. Preheat the oven to 150 C/130 C fan/gas mark 2, then throughly grease and line a square tin (20cm x 20cm) with greaseproof paper.

2. Melt the butter in a large heavy bottomed pan over a medium heat. Once the butter has melted add the peanut butter, golden syrup and brown sugar then stir until the sugar has completely dissolved and you can no longer feel any grains scraping the bottom of the pan.

3. Add the Buckwheat flakes and mix until all the ingredients are fully combined. Spoon the mixture into the prepared tin, spreading it right into the corners and pressing it down flat with the back of a spatula.

4. Bake for about 20 to 25 minutes. The flapjack is ready when the top becomes a beautiful golden brown and is soft to touch – do not be tempted to bake it for longer; although the flapjack will seem too soft, it will firm up as it cools down.

5. Leave the flapjack to cool completely before cutting into squares (5cm x 5cm) – if you attempt to cut the flapjacks before they are properly cold they will crumble, so patience is definitely a virtue!

I hope you like this recipe and give it try!

If you want to keep up to date with my kitchen adventures you can find me on Instagram @titchyton or on my Facebook page.

Honey Roasted Chicken, Feta and Quinoa Salad with Sticky Sautéd Tomatoes

Today I’m going to share with you one of my most favourite creations, my Chicken, Feta and Quinoa Salad with Sticky Sautéd Tomatoes. This is a recipe which I come back to time and time again because it’s super easy to prepare and incredibly tasty.

image

I made this for my sister on her most recent trip to London, I had offered to make us both lunch and wanted to serve something more interesting than your usual lunchtime fodder.

Personally I think this salad ticks all the boxes. For a start, there is not a bland lettuce leaf in sight which instantly makes it infinitely more appealing. The base of my salad is made up of quinoa, a grain which is a fantastic source of protein and dietary fibre, and if prepared in the right way can be incredibly flavoursome.

The rest of the ingredients are far from boring, the chicken breast is roasted in sweet and sticky honey which contrasts wonderfully to the salty feta and refreshing cucumber, but without a doubt the absolute star of this dish is my sticky sautéd tomatoes which I am completely obesessed with – you’ll know why, once you’ve tried them!

The salad is topped off with a handful of pomegranate seeds and a bunch of parsley… I tried to get some leaves in there, somewhere!

Honey Roasted Chicken, Feta and Quinoa Salad with Sticky Sautéd Tomatoes – GF/EF

Serves 2 – 3 

For the Salad:
120g Quinoa, rinsed (I used a mix of white/black/red quinoa)
500ml water, brought to the boil
1 chicken stock cube
400g diced chicken breast
1 tbsp olive oil
2 tbsp honey
1/2 a cucumber, deseeded and chopped into half moon shapes.
50g Feta cheese
A bunch of fresh parsley
12 cherry tomatoes
1 tbsp red wine vinegar
1/2 tsp caster sugar
A handful of pomegranate seeds (optional)

For the Dressing:
Lemon juice
Olive Oil
Salt and Pepper to season

Method:

1. Preheat oven to 180 degrees C/160 fan/gas mark 4.

2. Coat the chicken in olive oil and honey, then season it with black pepper.

3. Bake the chicken in the preheated oven for 20 minutes. To check the chicken is cooked, make sure the meat is white and that no pink remains.

4. Whilst the chicken is cooking, place the quinoa into pan of boiling water and crumble over a stock cube. Stir and reduce the pan to simmer, then cook for 15 minutes until the quinoa is soft.

5. Drain quinoa and leave it cool slightly.

6. To make the sticky tomatoes: heat up a dash of olive oil in a frying pan over a medium heat. Add the cherry tomatoes and cook for a minute or two, until they start to become slightly wrinkly. Add the red wine vinegar and sugar, then stir to coat the tomatoes until they become sticky.

7. Serve your salad on a large serving plate. Start with the quinoa on the bottom, layer up the slices of cucumber, feta, chicken and tomatoes, then top with fresh parsley and pomegranate seeds.

8. Drizzle over olive oil and a squeeze of lemon. Season with black pepper and serve with wedge of lemon on the side.

image


Gluten Free Lemon Drizzle Cake

Last weekend I went to stay with my sister and her boyfriend up in Leeds and on a rather dull and grey sunday afternoon, we decided to bake a Lemon Drizzle cake.

image

My family are not coeliac or on a gluten free diet, but they are always happy to try and critique my gluten free cakes whenever I’m around and I’m happy to report that they think they taste just as good as normal cakes!

image

When I was little, my mum used to make the most delicious lemon flavoured Madeira cake and have I tried to create a gluten free version of her Madeira cake as the base of my Lemon Drizzle.

Here a few snaps of our afternoon:

Lemon Drizzle Cake – GF/DF options

Ingredients

For the cake:

175g caster sugar
175g butter, softened
225g gluten free self raising flour
1 tsp baking powder
3 large eggs
1 tbsp lemon zest from an unwaxed lemon
3 tbsp lemon juice

To decorate:
150g icing sugar
3 – 4 tsp lemon juice
Finely grated lemon zest

Method

1. Preheat oven to 170 C/150 C fan/gas mark 4 then grease and line a 2 lb loaf tin with greaseproof paper.

2. Sift together flour and baking powder then stir through lemon zest.

3. In a separate bowl, cream together the butter and sugar with an electric hand mixer until pale, light and fluffy. Add the eggs one at a time along with one tablespoon of the flour to stop the mixture from curdling.

4. Stir through the remaining flour and lemon juice and mix until all ingredients are fully combined.

5. Spoon the mixture into the prepared loaf tin, then bake for 50 – 55 mins minutes.

Insert a skewer into the middle of the cake to check if it’s cooked– if it comes out clean the cake is ready.

6. Allow the cake to cool in the tin for a few minutes, before turning it out on a wire rack to cool completely before decorating.

7. To make the icing: sift the icing sugar into a bowl, add the water slowly whilst stirring – the icing shouldn’t be too runny but should be spreadable.

8. Spread the icing over the top of the cake, allowing it drip down the sides.

To finish, sprinkle finely grated lemon zest across the top of the cake.

image

Gluten Free American Style Chocolate Chip Cookies

Today I’m really excited to share with you my recipe for Gluten Free American Style Chocolate Chip Cookies!
image2-2
I’ve been having really bad cookie cravings since I caught a whiff of freshly baked cookies wafting out from Millie’s Cookies while I was walking around Westfield a few weeks ago…

I know you can buy gluten free cookies from the supermarket, but they’re not the same! You might think I am being picky, but supermarket versions are rather chunky and crunchy, not soft and chewy like the ones you can buy freshly made from bakeries.

I decided the only thing for it was to make my own and although I haven’t had a proper cookie in over three years, these cookies are exactly like what I remember! They have a slightly crunchy outside and a lovely soft and chewy centre bursting with chocolate chips.
image1
The trick to making the best chocolate chip cookies to make sure you don’t over bake them. I accidentally over baked the first few which made them a bit too hard, but if you take them out of the oven while they are still quite soft and leave them to set on the baking tray your cookies will retain their chewy centre.

Gluten Free American Style Chocolate Chip Cookies – GF/DF options

Ingredients
175g gluten free self raising flour
100g rice flour
2 tsp cornflour
A pinch of salt
150g butter, melted (or dairy free alternative like Stork Baking Block)
125g caster sugar
75g light brown sugar
2 tsp vanilla extract
2 egg yolks
1 tbsp milk
150g milk or dark chocolate chips (or dairy free alternative)

Method

1. In a large bowl, mix together the flours and the sugar.

2. Add the melted butter, vanilla extract, egg yolks and milk. Mix until all the ingredients are combined then fold through the chocolate chips.

3. Wrap the cookie dough in cling film, then chill the dough in the fridge for a few hours until it has firmed up.

4. Heat oven to 180 C/160 fan/gas mark 3.

5. Line two large baking trays with baking parchment.

6. Separate the dough into pieces that weigh approximately 35g each and roll each one into a ball shape.

7. Place the balls of dough on the prepared baking trays making sure you leave room for the cookies to spread out as they bake.

8. Bake the cookies for 12 – 15 minutes. The cookies should be golden brown and will remain quite soft – don’t be tempted to bake them for longer.  If the cookies have puffed up a bit, gently press them down with your fingers a few times towards the end of the bake so you don’t end up with cookies which are too dense and cake like.

9. Leave the cookies to firm up on the baking tray then carefully transfer them to a wire rack to cool completely.
image2
Tis almost the season to be jolly, so I will have plenty of Christmas recipes coming real soon. In the meantime, come and follow me over on Instagram or Facebook to see what else I’m getting up to!