Gluten Free Chouquettes

Out of all the cuisines the world has to offer, I have to admit (albeit with some trepidation) that French food is an area that I have left largely unexplored.

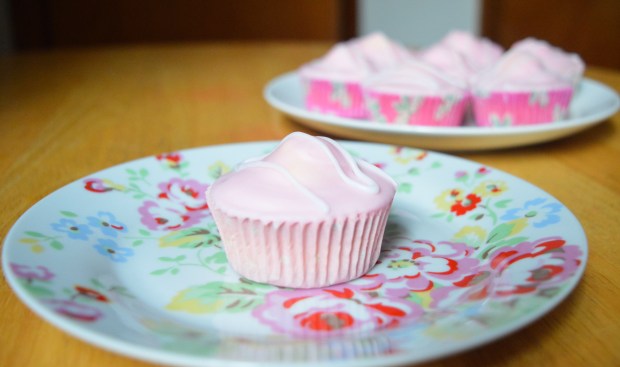
Maybe I am unsophisticated, or perhaps I’ve just been misled by the notion that French food is a little tricky – at this point I am thinking about my miserable attempts at Petit Four or Macarons…

After watching Rachel Khoo’s ‘Little Paris Kitchen’ (which is currently being re-aired on BBC 2) I’ve been feeling a little more enthusiastic about revisiting French cuisine – thanks to the show I’ve achieved the gooiest of Chocolate Fondants and have fine tuned my gluten free Choux pastry recipe.

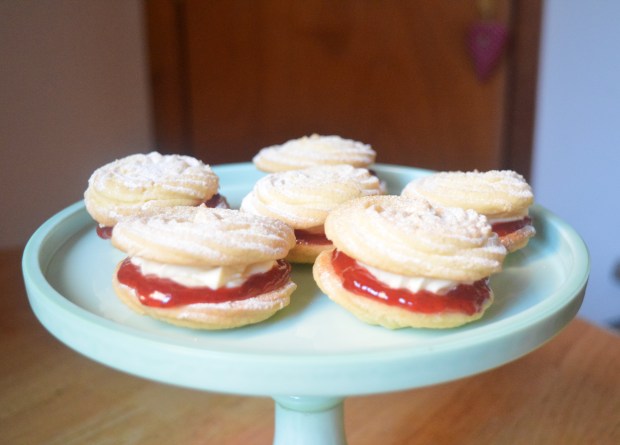
Speaking of Choux, I have made it in the past – and quite successfully (see my Profiteroles recipe) – but this time I definitely feel like I have perfected it.

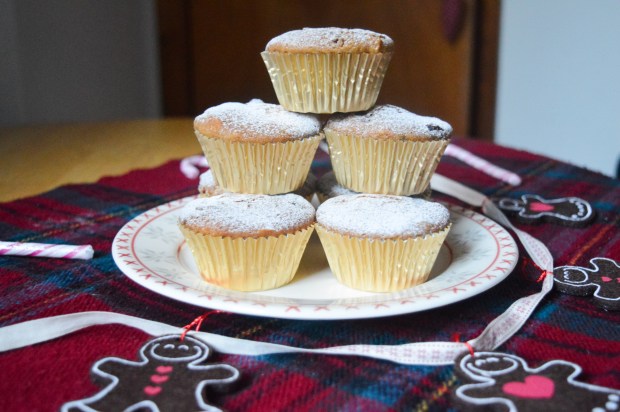
One of the recipes on the show was Chouquettes – a petit viennoiserie, consisting of  Choux pastry which are most often topped with pearl sugar or chocolate chips, although sometimes you might come across Chouquettes which have been dipped in chocolate or filled with mousse.

image

I decided to go for the traditional Chouquettes sprinkled with Pearl Sugar (or nib sugar) which I found in my local Waitrose and I also used Rachel Khoo’s recipe from the show, but with some vital tweaks to make the recipe work gluten free.

image

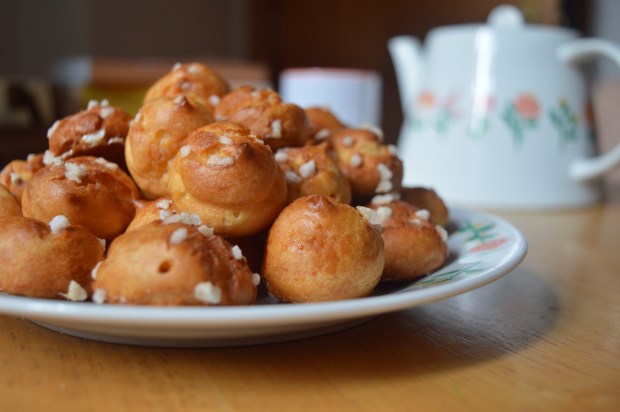
Chouquettes are definitely best eaten on the day they are baked, and I will be very surprised if they don’t gobbled up immediately!


Gluten Free Chouquettes

Recipe adapted from Rachel Khoo’s Little Paris Kitchen (recipe found on Almost Always Hungry).

Ingredients: 

170ml water

170ml semi skimmed milk

1 tsp salt

1 tsp sugar

100g butter

170g gluten free self-raising flour

1 tsp baking powder

3 eggs

Icing sugar for sprinkling

Pearl sugar to decorate (I found this in my local Waitrose).

Method:

1. Preheat the oven to 200c/ 180c fan/gas mark 6 and line two trays with greaseproof paper.

2. In a heavy bottomed pan, stir together the water, milk, salt and sugar. Place the pan over a medium heat, then add the butter and bring the ingredients to the boil. Once the butter has melted bring the pan off the heat.

3. In a separately bowl, stir together the gluten free flour and the baking powder. Add the flour mixture to the wet ingredients and beat vigorously until no flour remains and you are left with a smooth dough.

4. Transfer the dough to a bowl and leave it to cool for a few minutes. Stir the dough to help release the steam – once  the mixture has cooled down add the eggs, one at a time, beating until dough is smooth, glossy and elastic.

5. Place dough into a piping bag fitted with a plain nozzle and pipe bite-sized dollops onto a lined baking tray.

6. Sprinkle each dollop with icing sugar and pearl sugar, then give them another sprinkling of icing sugar.

7. Bake the Chouquettes in the oven for 25-30 minutes or until evenly browned. In the last few minutes, pierce the bottom of the Chouquettes with cocktail stick to help the insides to dry out – this will stop them from going soggy and help them to stay crisp.

8. Transfer the Chouquettes to a wire rack to finish cooling.

image

I love seeing your take on my bakes, so remember to share your a picture of your Chouquettes over on Facebook, twitter or Instagram using the hashtag #titchytonbakes.


Gluten Free American Style Pancakes with Chocolate Sauce

Today I’m going to share with you my recipe for Gluten Free American Style Pancakes and Chocolate Sauce – the perfect pancake recipe for the perfect Pancake Day!

image

I recently purchased a crêpe pan, so every day in February has been pancake day and this recipe has been more than triple tested!

When I put together this recipe my   scales had run out of battery, so I had to rely on measuring cups which I don’t often do with gluten free flour – but I think with batter recipes there is a little give and take with the ingredients and the recipe be easily adjusted if you accidentally add too much flour or milk.

Every time I made this batter it was spot on, but if you think your batter is a little thick and doesn’t spread out in the pan, add a little bit more milk, or, if it’s a little runny add a tablespoon of flour.

For a totally foolproof Pancake Day I highly recommend purchasing a crêpe pan or a good quality non stick frying pan – I speak from experience, as of my pancake day plans have been thwarted by a lack of a good frying pan!

image


American Pancakes with Homemade Chocolate Sauce – GF/DF options

Ingredients

For the Pancakes:

1 cup of gluten free self raising flour
1 tsp baking powder
2 tbsp caster sugar
1 tsp vanilla extract
2 tbsp melted butter, plus extra for frying (or dairy free alternative)
2  eggs
1 cup of semi skimmed milk

For the Chocolate Sauce:

100g good quality milk or dark chocolate (or dairy free alternative)
100ml double cream

You’ll also need a good quality non stick crêpe or frying pan. 

Method:

1. In a large bowl, mix together the gluten free flour, sugar and baking powder.

2. Add the egg and vanilla extract, then using a whisk start to bring the ingredients together.

3. Add the milk and butter and continue to whisk until you’re left with a smooth lump free batter.

4. Heat the oven to 100 degrees C/gas mark 1.

5. Leave the batter to stand while you heat up a non stick crêpe or frying pan. Brush the crêpe pan with butter using a pastry brush and wipe away any excess butter with kitchen towel. Place the pan over a medium to high heat until hot.

6. Spoon half a laddle of batter into the pan. Fry the pancake until bubbles form on top (this should take between 1 and 2 minutes) then flip your pancake over and cook the other side for a further minute or until golden brown. Place the pancake onto a non stick tray in the  preheated oven so that it stays warm.

7. Repeat with the remaining batter, brushing your pan with butter in between each pancake.

8. To make the chocolate sauce, gentle melt together the chocolate and the cream in heatproof bowl over a pan of simmering water. Stir until the ingredients are combined and then bring the bowl off the heat.

9. Serve the pancakes with the toppings of your choice – I highly reccomend strawberrries and chopped hazelnuts as they compliment the chocolate sauce beautifully.

image

I love seeing your take on my bakes, so remember to share your a picture of your perfect pancakes over on Facebook, twitter or Instagram using the hashtag #titchytonbakes.

Gluten Free & Dairy Free Jammy Dodger Recipe

Today I’m going to share with you my Gluten Free & Dairy Free Jammy Dodger Recipe – this recipe is also free from eggs and so is suitable for vegans.

image

I found gluten free biscuits a little tricky at first, but I’ve discovered over the course of many biscuit based experiments that success comes down to two things:

1. What type of flour(s) you use.

2. How you bind your ingredients.

I’ve found that good gluten free biscuits require a mix of different flours. I usually start with gluten free self raising flour as my base, then add other types of flour depending what kind of texture I want the finished bake to have. For biscuits, I wouldn’t recommend using self raising flour alone, as the biscuits will rise too much and be more cake like. Gluten free self raising flour is a useful base though, as it usually has added raising and binding agents, like Xanthan gum which helps to bind the ingredients together. To the self raising flour I like to add cornflour, which also helps bind the ingredients together, and ground almonds to add some bulk  – although I don’t like to add too much, as this could cause the biscuits to crumble.

In most of my cookie recipes I usually add an egg yolk to help bind the ingredients together – without an egg, I usually find that the dough is too crumbly and too difficult to handle. This time I decided to experiment with golden syrup, which in my opinion did the job just as well as an egg yolk – great news for vegans!

image


Jammy Dodgers – Gluten Free/Dairy Free/Egg Free/Vegan

Makes approximately 18 cookies

Ingredients

For the biscuits:

250g gluten free self raising flour

60g cornflour

40g ground almonds

100g caster sugar

150g dairy free spread

2 tbsp golden syrup

2 tsp vanilla extract

For the filling:

200g strawberry or seedless raspberry jam

1 tbsp cold water

Icing sugar for dusting

Method

1. In a large bowl, stir together the gluten free self raising flour, cornflour, ground almonds and sugar.

2. Rub the dairy free spread into the flour mixture until it starts to form a bread crumb like texture. Add the vanilla extract and golden syrup then start to bring the mixture together with your hands until it forms a dough – don’t worry if the dough seems quite soft at this point.

3. Wrap the dough in cling film then leave it to chill in a refrigerator for at least 30 minutes.

4. Whilst the dough chills, preheat the oven to 170 degrees C/gas mark 3 and line two large baking trays with baking parchment.

5. Roll out the dough onto a floured surface. Using a 6cm crimped scone or pastry cutter, stamp out 36 cookies – transfer the cookies to the baking trays using a palate knife or splatula.

6. Once the cookies are on the tray, cut holes in the centre of half the biscuits using small cookie cutters in any shape you fancy – I used a tiny flower cutters and a piping nozzle to cut out circles.

7. Bake the cookies for approximately 10 to 12 minutes or until golden brown – don’t worry if the cookies are a little soft, they will firm up when they cool down.

8. Leave the cookies to cool and firm up on the baking tray for a few minutes, then transfer them to a wire rack to finish cooling.

9. In a small bowl mix together strawberry jam (or the jam of you choice) with some cold water to make it more spreadable.

10. Lightly dust the cookies with the hole in the centre with icing sugar.

11. Spread the jam over the base of  the cookies without the holes, then sandwich them together the remaining cookies, so that the jam peeks through!

image


Gluten Free Christmas: Coconut Snow Cupcakes

It’s almost Christmas Day! It’s been a busy festive season for me, but I still have one Christmas recipe to share with you this year –  my Gluten Free Coconut Snow Cupcakes.imageThese cupcakes are a little different to your traditional Christmas bakes, perfect for anyone who isn’t a big fan of dried fruit but still festive enough to be served on Christmas Day – I think they would also be lovely served at a New Years Eve party! imageI got these cute star decorations from HEMA – they are actually cocktail sticks but I thought they would make cute cupcake toppers, but you can use any cupcake toppers or edible decorations of your choosing!


Coconut Snow Cupcakes – GF/DF options

Ingredients

For the sponge:

200g golden caster sugar

200g butter, softened (or dairy free alternative)

200 gluten free self raising flour

2 tbsp dessicated coconut

1 tsp baking powder

3 tbsp milk (or dairy free alternative)

1/2 vanilla pod deseeded (or 2 tsp of vanilla extract)

1/2 tsp coconut extract (optional)

2 large eggs

For the buttercream icing:

150g unsalted butter, softened (or dairy free alternative)

250g icing sugar, plus extra for dusting

1 tsp vanilla extract

To  decorate:

3 tbsp dessicated coconut

edible glitter (optional)

Method

1) Preheat the oven to 160 C/140 c fan/gas mark 3 and line a cupcake tray with cupcake cases.

2) In a large bowl, stir together the flour, baking powder and bicarbonate of soda.

3) In a separate bowl cream the butter, vanilla extract and sugar together with an electric hand mixer until light and fluffy.

4) Scrape down the sides of the bowl with a spatula. With the mixer on a low speed, add the egg a bit at a time along with a tablespoon of the flour mixture.

5) Once the egg is fully combined, add the rest of the flour and the milk until you are left with a smooth mixture.

6) Spoon approximately one and a half tablespoons of the mixture into each cupcake case, being careful not to overfill them.

7) Bake for approximately 20 – 22 minutes – the cupcakes are ready when they are golden brown and firm to touch.

8) Leave the cupcakes to cool in the tin for a few minutes, then transfer them to a wire rack to finish cooling while you prepare the buttercream icing.

9) To make the buttercream, beat the butter, icing sugar and vanilla extract with an electric hand mixer until light and fluffy and almost white in colour.

10) Once the cupcakes have cooled, spread the buttercream forest in over each cupcake using a palate knife, then sprinkle each one with desiccated coconut and a touch of edible glitter to finish.

image

That’s it for my Christmas recipes this year! If you’re looking for more gluten free Christmas baking inspiration why not check out my Gluten Free Stollen Muffins, Gluten Free Gingerbread Wreath or you can find a full list of my Christmas recipes over on my Recipes page.


Gluten Free Christmas: Gingerbread Wreath

We are 12 days into advent and I finally feel as though I’m getting into the full swing of the festivities. So far most of Advent has been spent in the kitchen working on festive bakes, most of which have involved copious amounts of edible glitter which I keep finding everywhere, including in my hair, on the floor, on the cat…

Today I’m going to share with you my recipe for this gingerbread wreath which is definitely an excuse to get out the edible glitter.

img_3316

The Gingerbread wreath is completely edible (except for the Red Ribbon) and although it looks impressive and difficult to achieve, it was actually incredibly easy! You don’t need any fancy equipment, just a large dinner plate, a sharp knife and a few different sized cookie cutters. Whipping up the gingerbread dough takes only a matter of minutes and the construction of the wreath isn’t too daunting, as long as you follow the instructions step by step. The wreath is not really design to be used as a decoration as the ribbon won’t support the weight of a wreath – but it would make a lovely edible Christmas gift.

img_3321


Gluten Free Gingerbread Wreath – GF/DF options

This recipe is inspired by Cassie Best’s Gingerbread Wreath for BBC Good Food

Ingredients

For the Gingerbread:
125g gluten free self raising flour blend
200g rice flour, plus extra for dusting
1 tsp bicarbonate of soda
2 tsp ground ginger
2 tsp cinnamon
125g unsalted butter (or dairy free alternative)
150g soft dark brown sugar
2 tbsp golden syrup
1 tbsp black treacle
1 large egg

To Decorate:
200g Ready to roll Icing
30 ml cold water
250g icing sugar
1 egg white
Edible glitter

You will also need:
A sharp knife
1 x large dinner plate
1 x inch piping nozzle
1 x 9cm round cutter
1 x small star cutter
1 x medium star cutter
1 x large star cutter
1 x small angel cutter
1 red ribbon

Method

1) In a large bowl, sift together the flours, bicarbonate of soda, ginger and cinnamon. Using your hands, rub the butter into the dry ingredients until it becomes like fine bread crumbs and then stir through the dark brown sugar.

2) In a separate bowl whisk the egg with a fork, then add this to the cookie mixture along with the golden syrup and black treacle. Mix until the ingredients come together. The cookie dough will appear quite wet at this stage but don’t be tempted to add more flour or you will dry out the dough!

3) Gently knead the dough on a floured surface with floured hands until it turns into a smooth, soft and slightly sticky ball of dough. Dust the dough with flour as you knead to stop it sticking to the work surface. Wrap the dough in cling film and leave to chill in the fridge for at least 2 hours – chilling helps the dough to firm up so it can be rolled out.

4) Preheat the oven to 180 C/160 fan/gas mark 4. Roll half of the dough out in between two sheets of greaseproof paper until it is the thickness of a 1 pound coin. Remove the top layer of greaseproof paper, then place a large dinner plate face down into the centre of the dough and use a sharp knife to cut out a large circular disc of gingerbread.

5) Transfer the gingerbread onto a baking tray (you can use the bottom sheet of baking paper to line your tray) then use a 9 cm circular cutter to cut out a circle of dough from the centre of the gingerbread disc and a 1 cm piping nozzle to cut out a hole for the ribbon.

6) Bake the base of your wreath for 10 to 12 minutes – watch out for the edges catching.
Once baked, leave the wreath to firm up on the baking tray for a few minutes before transferring it to wire rack to finish cooling.

7) Roll out the remaining dough and cut out 5 large stars, 4 medium stars, 11 small stars and 2 angel shapes. Arrange the shapes onto a baking tray and bake for 10 to 12 minutes – the smaller cookies will need checking after 8 minutes.

8) Once baked, leave the cookies to firm up on the baking tray for a few minutes bering transferring them to wire rack to finish cooling.

9) While the cookies cool, make the royal icing: place 1 egg white in a bowl and slowly sift icing sugar in batches. In between each batch of sugar, stir the icing with a wooden spoon or a balloon whisk until the icing thickens up, then transfer the icing into a piping bag fitted with a small writing nozzle.

10) Next, make the fondant icing: break the ready to roll icing into pieces and place them in a bowl. Add a splash of water and use a spatula to break up the icing until it starts to become more paste like, then add the rest of the water and beat with an electric hand mixer until the fondant becomes runny.

11) Spread the fondant icing over the 5 large star shapes and sprinkle each one with edible glitter. Decorate the remaining pieces with the royal icing and leave all the pieces to dry for about an hour before you assemble the wreath.

12) Use the remaining royal icing to stick the biscuits to the wreath. Sprinkle the wreath with edible glitter and thread a red ribbon through the hole to finish.

img_3343


There will be plenty of festive bakes coming your way really soon. Meanwhile, why not come and see what else I’m getting up to over the festive season by following me on Instagram or Facebook. Remember, If you give this recipe take a snap of it and share it with me on Instagram, Facebook or Twitter using the hashtag #titchytonbakes and I will share my favourites on my Facebook page!

Gluten Free Christmas: Stollen Muffins

It’s beginning to look a lot like Christmas… and I don’t know about you, but I’m rather glad. It’s been a scary and rather uncertain year with everything that has been going on in the world, so I’m grateful for a distraction and I hope that a bit of Christmas cheer will help to take my mind off it… and yours too!

So, get ready for my first Christmas recipe of the year and prepare to feel fabulously festive.

image

My Gluten Free and Dairy Free Stollen Muffins are every bit as tasty as actual Stollen and are the perfect way to get your Stollen fix, without the hassle of making bread.

Stollen is a German Christmas bread which usually contains dried fruit, almonds, marzipan and spices, such as cinnamon. These muffins are chock full of everything you’d find in traditional stollen, but with a dash of my favourite tipple for good measure, because it’s Christmas!

image


Stollen Muffins – GF/DF

Ingredients

2 – 3 tbsp Cointreau (you could also use Brandy, Rum or Amaretto)
200g mixed dried fruit (I used sultanas/raisins/cherries/mixed peel)
300g gluten free self raising flour
Zest of an orange
1 tsp ground cinnamon
1/2 tsp ground ginger
1 tsp baking powder
1/2 tsp bicarbonate of soda
150g ready to roll marzipan (chopped into small pieces)
100g caster sugar
50g light brown sugar
2 large eggs
100 ml sunflower oil
200 ml almond milk
1 tsp almond extract
1/2 vanilla extract
50g flaked almonds

Method

1) Leave the mixed fruit to soak in Cointreau overnight.

2) Preheat the oven to 180 C/160 C fan/gas mark 4 and line a muffin tin with muffin cases.

3) In a large bowl, stir together the flour, baking powder, bicarbonate of soda, orange zest, cinnamon and ginger, then stir through marzipan.

4) In a separate bowl, whisk together eggs, sugar, oil, almond milk, vanilla extract and almond extract until combined, then add this to the dry ingredients.

5) Gently mix together all the ingredients using a wooden spoon until you are left with a batter which is only just combined (don’t worry too much if there are any lumps), then stir through the dried fruit and the flaked almonds.

6) Spoon approximately 2 tablespoons of batter into each muffin case, then bake for 25 minutes, until golden brown.

7) Leave the muffins to cool completely on a wire rack, before dusting them with icing sugar to finish.

Be sure to store the muffins in an air tight container and they will last for 4 to 5 days.

image

Keep your eyes peeled for lots more Christmas recipes coming soon, but in the meantime why not try some of my Christmas recipes from previous years:

Gluten Free Gingerbread Cookies

Gluten Free Hazelnut, Cranberry and Orange Biscotti

Gluten Free Cointreau Christmas Cake

Gluten Free Kransekake (Traditional Scandinavian Cake)

Gluten Free Red Velvet Cupcakes

Today I’m going to share with you a recipe for one of my favourite bakes – Gluten Free Red Velvet Cupcakes.

image

My love affair with Red Velvet Cake started a few years ago when my little sister asked me to make a Red Velvet Cake for her Birthday. I had never eaten or made Red Velvet Cake before, but I was nevertheless happy to oblige – my Mum was less happy when my first attempt erupted all over the oven because I’d used shallow tins and too much bicarbonate of soda… sorry Mum!

It wasn’t until my first taste of Red Velvet Cake I realised what I had been missing – Chocolate sponge flavoured with sharp buttermilk, topped off with cream cheese frosting. What’s not to like?

Making a Red Velvet Cake can be quite time consuming, especially if you are going for the traditional three or more layers, so I’ve adapted my Red Velvet Cake recipe to a more simple cupcake recipe, so that you can get your Red Velvet fix much quicker!

image


Red Velvet Cupcakes – GF

Ingredients

For the Cupcakes:
100g gluten free self raising flour
10g cocoa powder
100g caster sugar
50g butter
1 large egg
100ml buttermilk
1 tsp vanilla extract
1/2 tsp red food colouring (gel not liquid)
1/2 tsp cider vinegar
1/2 tsp bicarbonate of soda

For the Cream Cheese Topping:
250g mascarpone cheese
150ml double cream
50g icing sugar
1/2 tsp vanilla extract

To Decorate:
Freeze dried raspberry pieces

Method

1) Preheat the oven to 170 C/150 C fan/gas mark 3) and a cupcake tray with cupcake cases.

2) In a large bowl sieve together the flour and cocoa powder, then set aside for later.

3) In a separate bowl cream the butter, vanilla extract and sugar together with an electric hand mixer until light and fluffy.

4) Scrape down the sides of the bowl with a spatula. With the mixer on a low speed, add the egg a bit at a time along with a tablespoon of the flour mixture. Once the egg is fully combined, add the rest of the flour.

5) Pour your buttermilk into a measuring jug, then add the red food colouring a little at a time until it turns a turns a deep red –  I found about half a teaspoon did the trick, but you may find you need more or less depending on the food colouring you are using.

6) With the mixture on a low speed, add the buttermilk to your cake mixture a bit at a time, keep mixing until all the buttermilk is combined.

7) In a small bowl mix together the bicarbonate of soda and vinegar until it starts to fizz, then quickly fold it into the cake mixture.

8) Working quickly, spoon two teaspoons of the mixture into each cupcake case

9) Bake for 15 – 18 minutes. The cupcakes are ready when they are firm to touch.

10) Leave the cupcakes to cool in the tin for a few minutes, then transfer them to a wire rack to finish cooling while you prepare the cream cheese topping.

11) Sift the icing sugar into a large bowl, add the vanilla extract and mascarpone then mix with a wooden spoon until the ingredients are just combined.

12) In a separate bowl whisk the double cream with an electric hand mixer until it almost reaches soft peaks, add the mascarpone and whisk for a couple of seconds until it is just combined.

13) Transfer the frosting into a piping bag fitted with a large star nozzle. Pipe the frosting onto each cupcake, then decorate with a sprinkling of freeze dried raspberry pieces.

image

If you give this recipe a try, or any of the other recipes on my blog remember to take a snap of your creation and share it with me on Instagram, Facebook or Twitter using the hashtag #titchytonbakes.

Gluten Free Fondant Fancy Cupcakes (Inspired by ‘The Great British Bake Off’)

Today I’m going to share with you my Gluten Free Fondant Fancy Cupcakes recipe which is inspired by the showstopper challenge from the Semi Final of ‘The Great British Bake Off’.

image

Last week’s show saw the remaining four bakers battling it out over Patisserie for a place in final, but sadly Selasi didn’t make the cut. He might not have made it to the final, but he did win over the hearts of the nation and I will definitely miss him during this week’s show. Speaking of this week, the final will be a very bittersweet occasion, as although I am excited to see who wins, I am sad that this is the last episode of GBBO as we know it.

What I’m going to miss most is how the show has inspired me to bake things I’d never thought of trying – this includes fondant fancies, which were featured on last week’s show.

I used to love Fondant Fancies and seeing them on the show has made me feel super nostalgic – I remember having them at my Grandma’s house when I was little and how I always would choose the pink ones, because I liked them best!

I will admit though, Fondant Fancies looked incredibly difficult and fiddly to make, so I decided to go for a more simple approach. My Fondant Fancy cupcakes are much a easier to achieve, but they are every bit as delicate, dainty and delicious as the fondant fancies I remember.

image

These cupcakes would be lovely served at afternoon tea or a birthday party and are sure to impress, despite being deceptively simple.

Fondant Fancy Cupcakes

Makes approximately 16 small cupcakes

Ingredients

For the cupcakes:

150g softened butter (or dairy free alternative)
150g caster sugar
150g gluten free self raising flour
1/2 tsp baking powder
2 eggs
1 tsp vanilla extract
1 tbsp milk (or dairy free alternative)

For the buttercream:

100g softened butter (or dairy free alternative)
100g icing sugar

For the fondant icing:

300g ready to roll icing
50ml cold water
A few drops of pink food colouring

Method

1. Preheat the oven to 160 C/140 C fan/gas mark 3 then line two cupcake trays with 16 cupcake cases.

2. In a large bowl, beat the butter, sugar and vanilla together with an electric hand mixer until light and fluffy.

3. Add a tablespoon of flour, then beat in the eggs a little bit a time before sifting in the remaining flour and baking powder. Add the milk, then beat the ingredients together with the electric hand mixer until combined.

4. Spoon two teaspoons of mixture into each cupcake case, being careful not to overfill them. Bake for 20 to 25 minutes until golden brown and firm to touch.

5. Leave the cupcakes to cool on a wire rack. To make the buttercream, beat the butter with an electric hand mixer until it’s very light and fluffy. Add the icing sugar and continue to beat until all the ingredients are combined, then transfer the buttercream to a piping bag fitted with a medium plain nozzle.

6. Once the cupcakes have cooled, pipe a blob of buttercream onto each cupcake then place them in freezer to firm up while you make the fondant icing.

7. Cut the ready to roll icing into pieces and place them in a large bowl. Add a splash of water and using a spatula start to break up the icing until it starts to become more paste like. Add the rest of the water and beat with an electric hand mixer until the fondant becomes more runny.

8. Save a couple of tablespoons of the white icing to decorate the top of the cupcakes. Add a couple of drops of pink food colouring to the remaining icing and mix until the fondant turns a light pink colour.

9. Remove the cupcakes from the freezer. Spoon a little of the pink fondant icing over each cupcake, then use a palate knife to spread out the icing making sure that the buttercream is covered.

10. Put the left over white icing into a piping bag fitted with a small writing nozzle. Pipe the icing across the top in a zig zag pattern.

image

Gluten Free Viennese Whirls (Inspired by ‘The Great British Bake Off’)

Bake Off is finally back on our TV screens, so queue the nationwide baking frenzie and attempts to recreate bakes from the show at home – sometimes with varing success!

This was certainly the case when I attempted to make a gluten free version of Viennese Whirls, the technical challenge from this year’s Biscuit Week.

image

I discovered Mary Berry’s recipe on the BBC Food website and decided to give it a whirl (see what I did there?) – I thought a gluten free version would work quite well and that all I needed to do was change the flour… I was quite wrong!

I followed Mary’s recipe to the letter and all the the tips the bakers mentioned on the show, including insuring the butter was soft enough and chilling the whirls before baking. Unfortunately, they turned out a crumbly mess and I couldn’t even get them off the baking tray without them disintegrating into a million pieces

The recipe definitely required a few further tweaks to work gluten free, so it was back to the drawing board.

I think that the first attempt went wrong because the mixture was too soft and a bit oily which resulted in the mixture melting in oven, despite the fact that I’d chilled the whirls in the freezer for 15 minutes prior to baking.

On my second attempt I decided to use margarine instead of butter, which combatted some of the oiliness, and I added a touch more dry ingredients, which resulted in a firm but pipeable mixture. Again, I  chilled the whirls before baking which helped them to keep their shape.

This time they came out overbaked, which I think is due to the oven temperature being quite high in Mary’s recipe – if you don’t check the biscuits every 30 seconds after the first 13 minutes, you might accidentally overbake them and I definitely wouldn’t recommend leaving them for the full 15 minutes without checking them!

By the third attempt, I knew I had found the right balance of ingredients but decided to drop the oven temperature from 190 degrees to 180 to help to slow down any potential overbaking.

It was definitely third time lucky. The result was a whirl that had kept its shape, was golden but not over baked and was actually stable enough to get off baking tray and be filled. They also tasted delicious and melted in the mouth – heaven!

image

Viennese Whirls – GF/EF/DF OPTIONS

Recipe adapted from Mary Berry’s Viennese Whirl Recipe from ‘The Great British Bake Off’ found on the BBC Food website.

Ingredients

For the biscuits:

250g soft margarine (or dairy free alternative)

70g icing sugar

225g gluten free self raising flour

50g cornflour

1/2 tsp vanilla extract

For the filling:

Strawberry Jam (Mary’s recipe said Raspberry, but I prefer Strawberry)

100g unsalted butter (or dairy free alternative)

200g icing sugar, plus extra for dusting

1/2 tsp vanilla extract

Method

1. Preheat the oven to 180 C/160 C fan/gas mark 4.

2. Line 3 baking trays with baking paper, then use a 5cm cutter to draw 8 circles onto each sheet of paper, making sure they are well spaced out. Turn the paper over so the circles are underneath.

3. In large bowl, cream together the margarine, sugar and vanilla with an electric hand mixer until light and fluffy. Add the gluten free flour and cornflour and beat with the hand mixer until all the ingredients are fully combined.

4. Transfer the mixture into a piping bag fitted with a medium star nozzle – I like to use plastic disposable piping bags because I think they are easier to use.

5. Pipe 24 swirls inside the circles on the baking sheets. Place the baking sheets in the freezer for 10 – 15 minutes to help the swirls firm up before baking.

6. Bake for 13—15 minutes, until  pale golden-brown in colour. I reccomend checking them every 30 seconds after the first 13 minutes as the edges can catch and they can easily overbake.

7. Leave the whirls to cool on the baking sheets for a few minutes then transfer them to wire rack to cool completely.

8. To make the butter cream, beat the butter, icing sugar and vanilla extract with an electric hand mixer until light and fluffy and almost white in colour. Transfer into a piping bag fitted with a large star nozzle.

9. To decorate: Spoon a little jam onto the flat side of half of the biscuits, then pipe a swirl of buttercream over the top. Place a biscuit on top of each one to create a sandwich, then dust with a little icing sugar to finish.

image

Gluten Free Battenberg featuring Delicious Alchemy’s Gluten Free Vanilla Sponge Mix

There is less than a week until ‘The Great British Bake Off’ returns to our screens, and even though it’s been delayed slightly thanks to the Rio Olympics, I am no less excited to see what surprises lie in store this year.

The return of Bake Off means that Delicious Alchemy’s Gluten Free Magic Bake Off is also back for another year and to celebrate I’m going to share with you my Gluten Free Battenberg Cake which I made using Delicious Alchemy’s Vanilla Sponge Mix

image

image

Back in 2014 I entered Delicious Alchemy’s Gluten Free Magic Bake Off for a bit of fun with a Gluten Free Red Velvet Cake that I made for my sister’s birthday. I ended up making it to the final three bakers and although I didn’t win the overall competition, I was chuffed to bits to make it that far. I hadn’t been on a gluten free diet that long and it gave me the confidence boost I needed to start writing that gluten free food blog my friends were always nagging me to write… the very blog you’re reading now!

Regular readers of my blog will know that I am an enormous fan of Delicious Alchemy’s products, particularly their baking mixes and I always have a few stashed away in cupboard for emergencies just incase I need to whip up something super quick.

Their Gluten Free Vanilla Cake Mix is perfect for this Battenberg Cake as it makes the process much simpler – you need very few ingredients, whipping up the mixture for the sponge takes only a matter of minutes and the construction of the cake isn’t too daunting as long as you follow the instructions step by step!


image

My top tip when making a Battenberg Cake is to use food colouring which is bake stable – I recommend using either a gel or a paste as many liquid food colourings aren’t bake stable which means the sponge won’t retain its colour when baked.


Gluten Free Battenberg (GF/DF options)

Ingredients

You will need one packet of Delicious Alchemy Vanilla Sponge Mix (400g) spilt into two 200g portions.

Yellow Sponge:
200g Delicious Alchemy Gluten Free Vanilla Sponge Mix
100g softened butter (or dairy free alternative)
2 eggs
2 tbsp milk (or dairy free alternative)
A few drops of a yellow food colouring (make sure it’s bake stable)

Pink Sponge:
200g Delicious Alchemy Gluten Free Vanilla Sponge Mix
100g softened butter (or dairy free alternative)
2 eggs
2 tbsp milk (or dairy free alternative)
A few drops of pink food colouring (make sure it’s bake stable)

For assembling the cake:
400g ready to roll white marzipan
3 tbsp apricot jam

Method:

1) Preheat the oven to 180 degrees C/gas mark 4 then grease and line a square tin with baking paper.

To save time (and washing up) I decided to bake both sponges in the same tin. To do this, I made a divider out tin foil and placed it down the centre of tin. The divider should fit snuggly into the tin which and should be sturdy enough to stand up by itself. Make sure you grease the divider too so that you can remove the cake more easily.

3) Firstly make the yellow sponge: Place half (200g) of the Delicious Alchemy vanilla sponge mix in a large bowl with the butter, eggs and milk, then beat with a electric hand mixer for 15 seconds. Scrape down the sides of the bowl, add the yellow food colouring and mix for a further 10 – 15 seconds ensuring the food colouring is fully incorporated.

4) Next, make the pink sponge: Place the remaining half of the Delicious Alchemy vanilla sponge mix into a large bowl with the butter, eggs and milk, then beat with a electric hand mixer for 15 seconds. Scrape down the sides of the bowl, add the pink food colouring and mix for a further 10 – 15 seconds ensuring the food colouring is fully incorporated.

5) Carefully spoon the mixtures into the prepared tin ensuring the divider properly separates them.

6. Bake the sponges for 20 – 25 mins. Check the sponges are cooked by inserting a skewer into the middle of each sponge, if the skewer comes out clean then the sponges are ready.

7. Leave the sponges to cool in the tin for a moment and then transfer the cakes onto a wire rack to cool completely – If you attempt to assemble the cakes whilst they are still warm they will crumble.

8. Once your cake has cooled, trim the tops with a sharp knife or a cake wire to ensure they are flat and even in height.

9. Place the sponges on top of each other and trim the edges so that they are nice and neat.

10. Cut the sponges in half, straight down the middle so you are left with four long pieces of sponge.

11. Gently heat the jam in a pan or a microwave to make it easier to spread.

12. Take one of the yellow and one of the pink pieces of sponge, brush the top and sides lightly with the apricot jam then place them side by side. Brush the next two pieces of sponge with jam and then place them on top so that they create the iconic checked pattern.

13. Knead the marzipan in icing sugar until it becomes more pliable then roll it out into a large square which is longer than the length of the cake and wide enough to wrap around the cake.

14. Make sure the cake is evenly covered in apricot jam to ensure that the marzipan sticks to the sponge. Place the cake onto the marzipan and tightly wrap it around the cake.

15. Trim off the the excess marzipan to create neat edges and leave the ends exposed so the  checked pattern can clearly be seen.

16. Serve!

image

You can find out more about Delicious Alchemy’s Gluten Free Magic Bake Off, including how to enter, on their website.

They also have 25% off their baking and bread mixes on their online shop until the 4th October 2016 to celebrate the start of GFMBO so you can stock up and get practicing your skills!