Gluten Free Scones Recipe

Scones have always been one of my  favourite bakes. They were the very first thing I was taught to bake at school and are a good bake for baking beginners.

image

I used to have a little trouble making good gluten free scones – the end result would often be quite crumbly and couldn’t get them to rise like I wanted.

I’ve discovered that an egg and a little milk is required to help bind the ingredients together – making the dough ever so slightly wetter than normal (but not sticky) helps to ensure that the scones don’t dry out during baking.

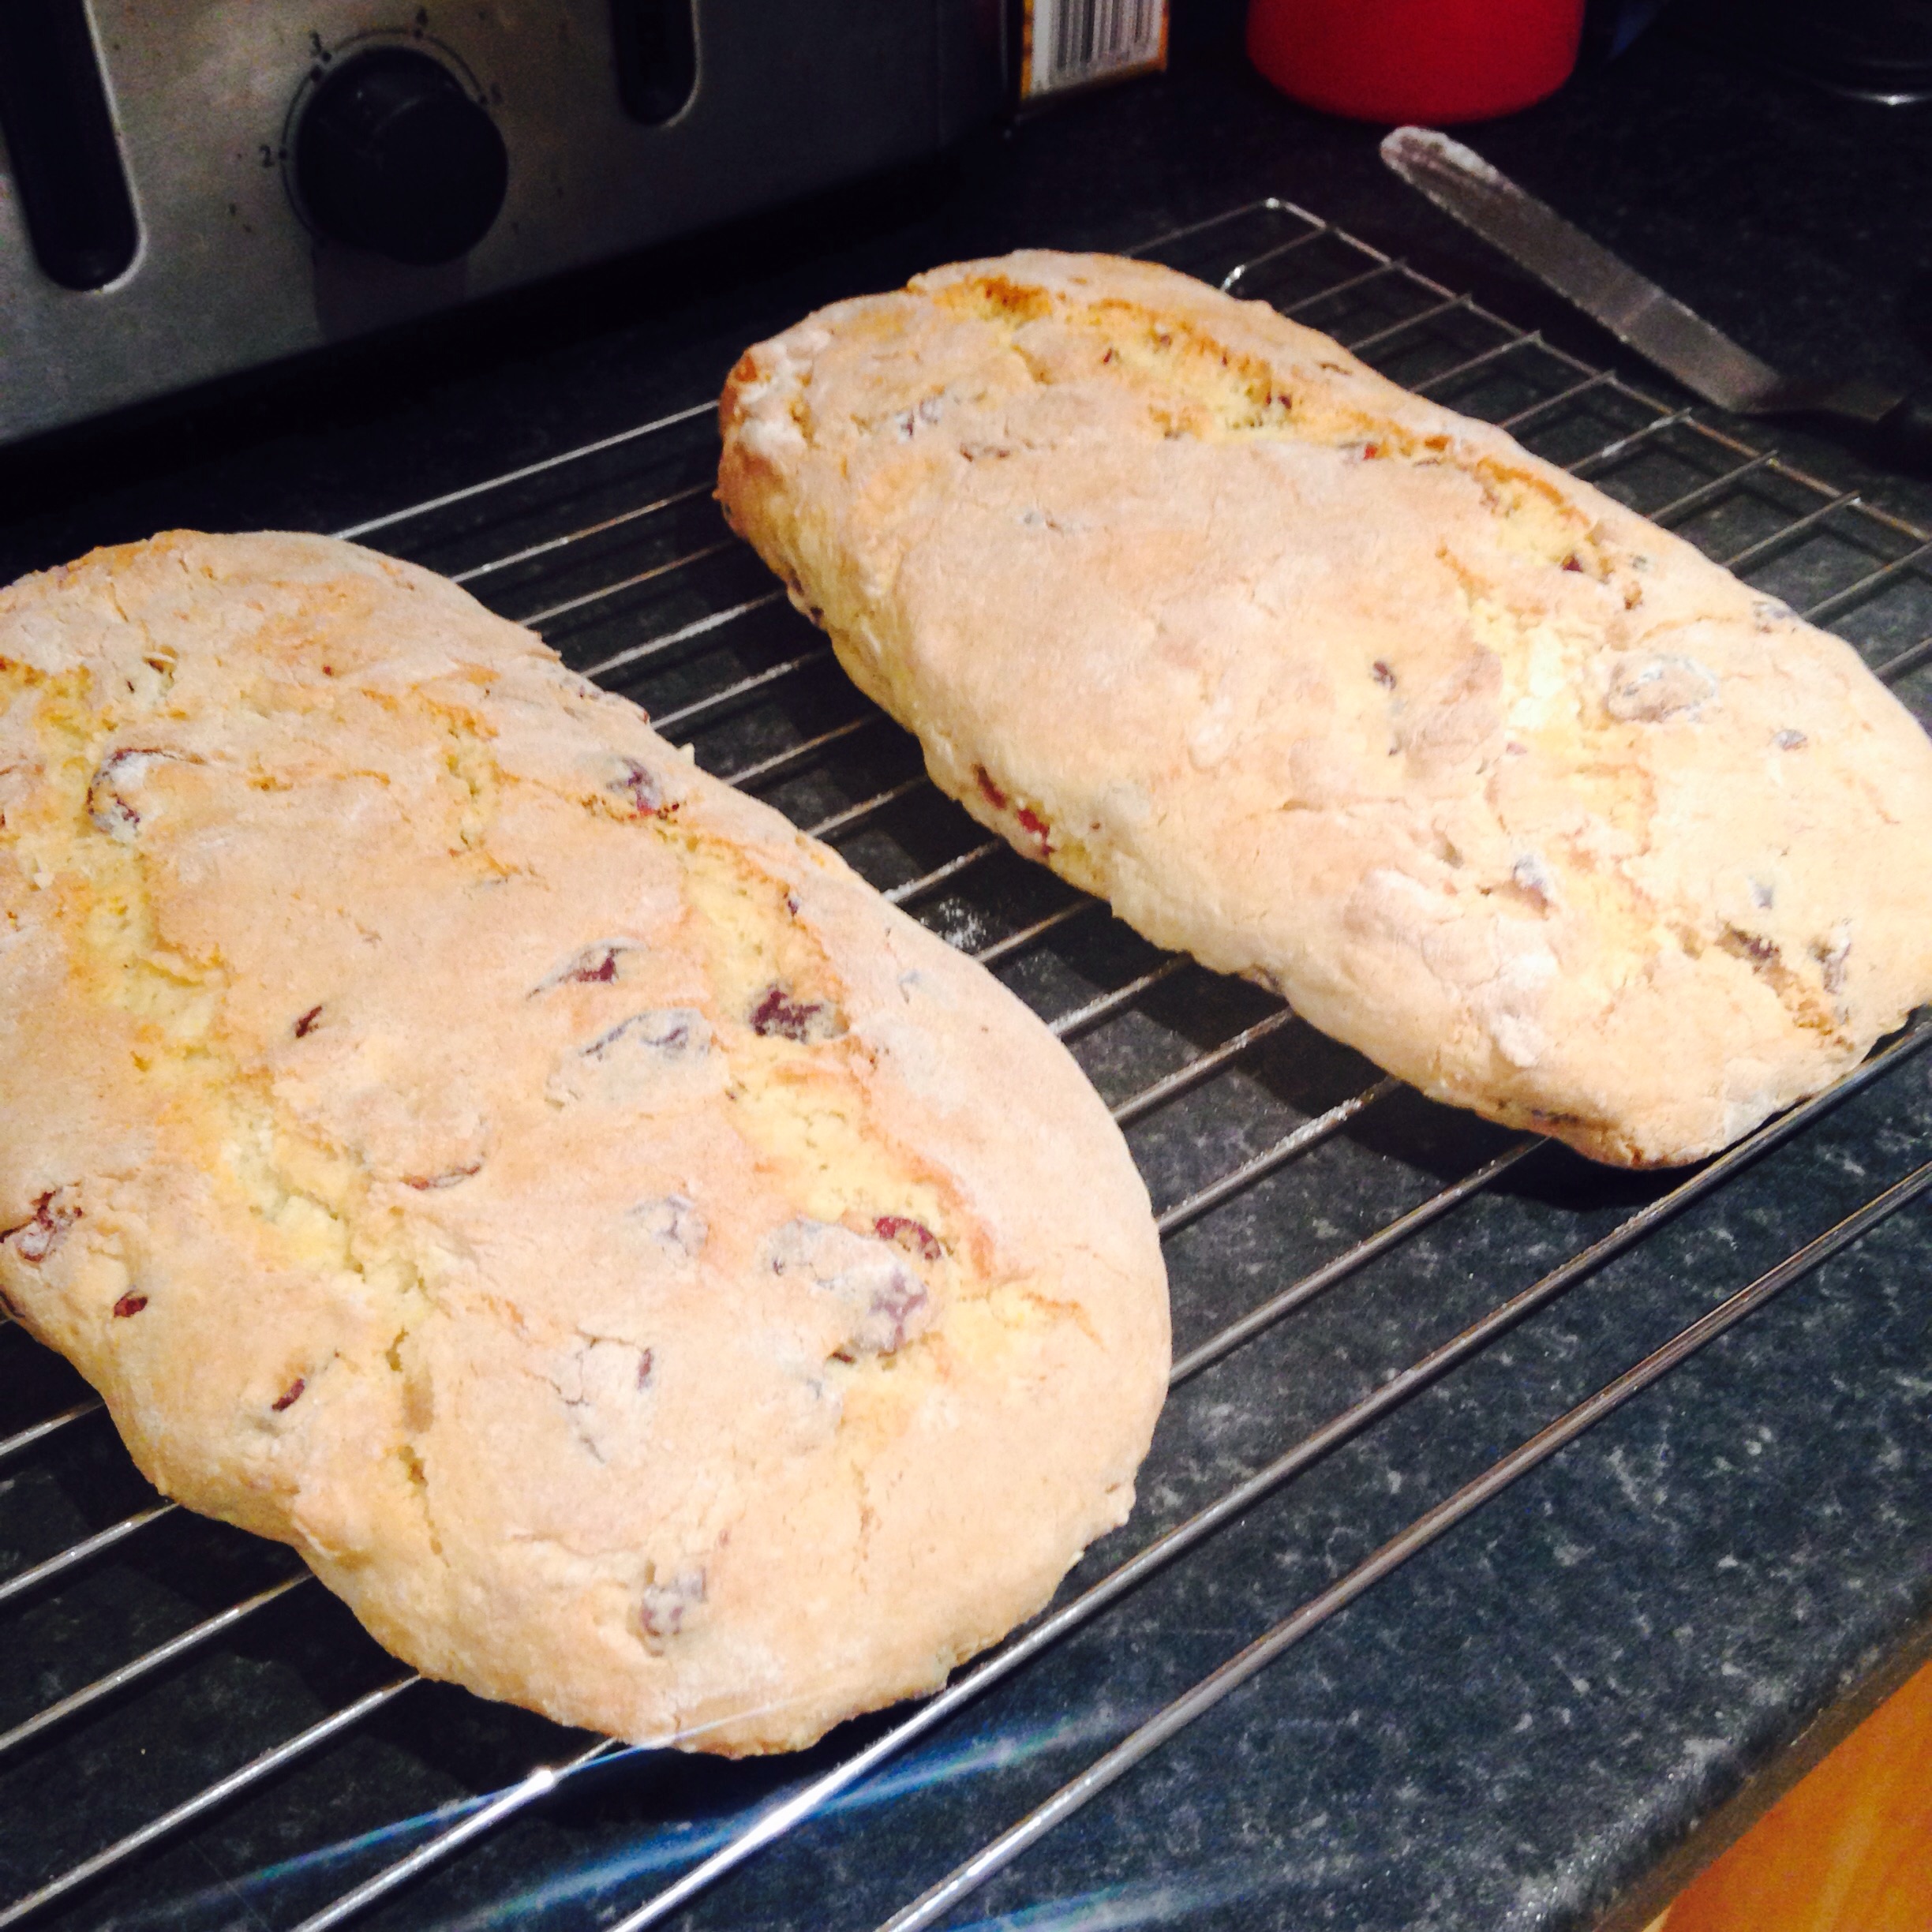
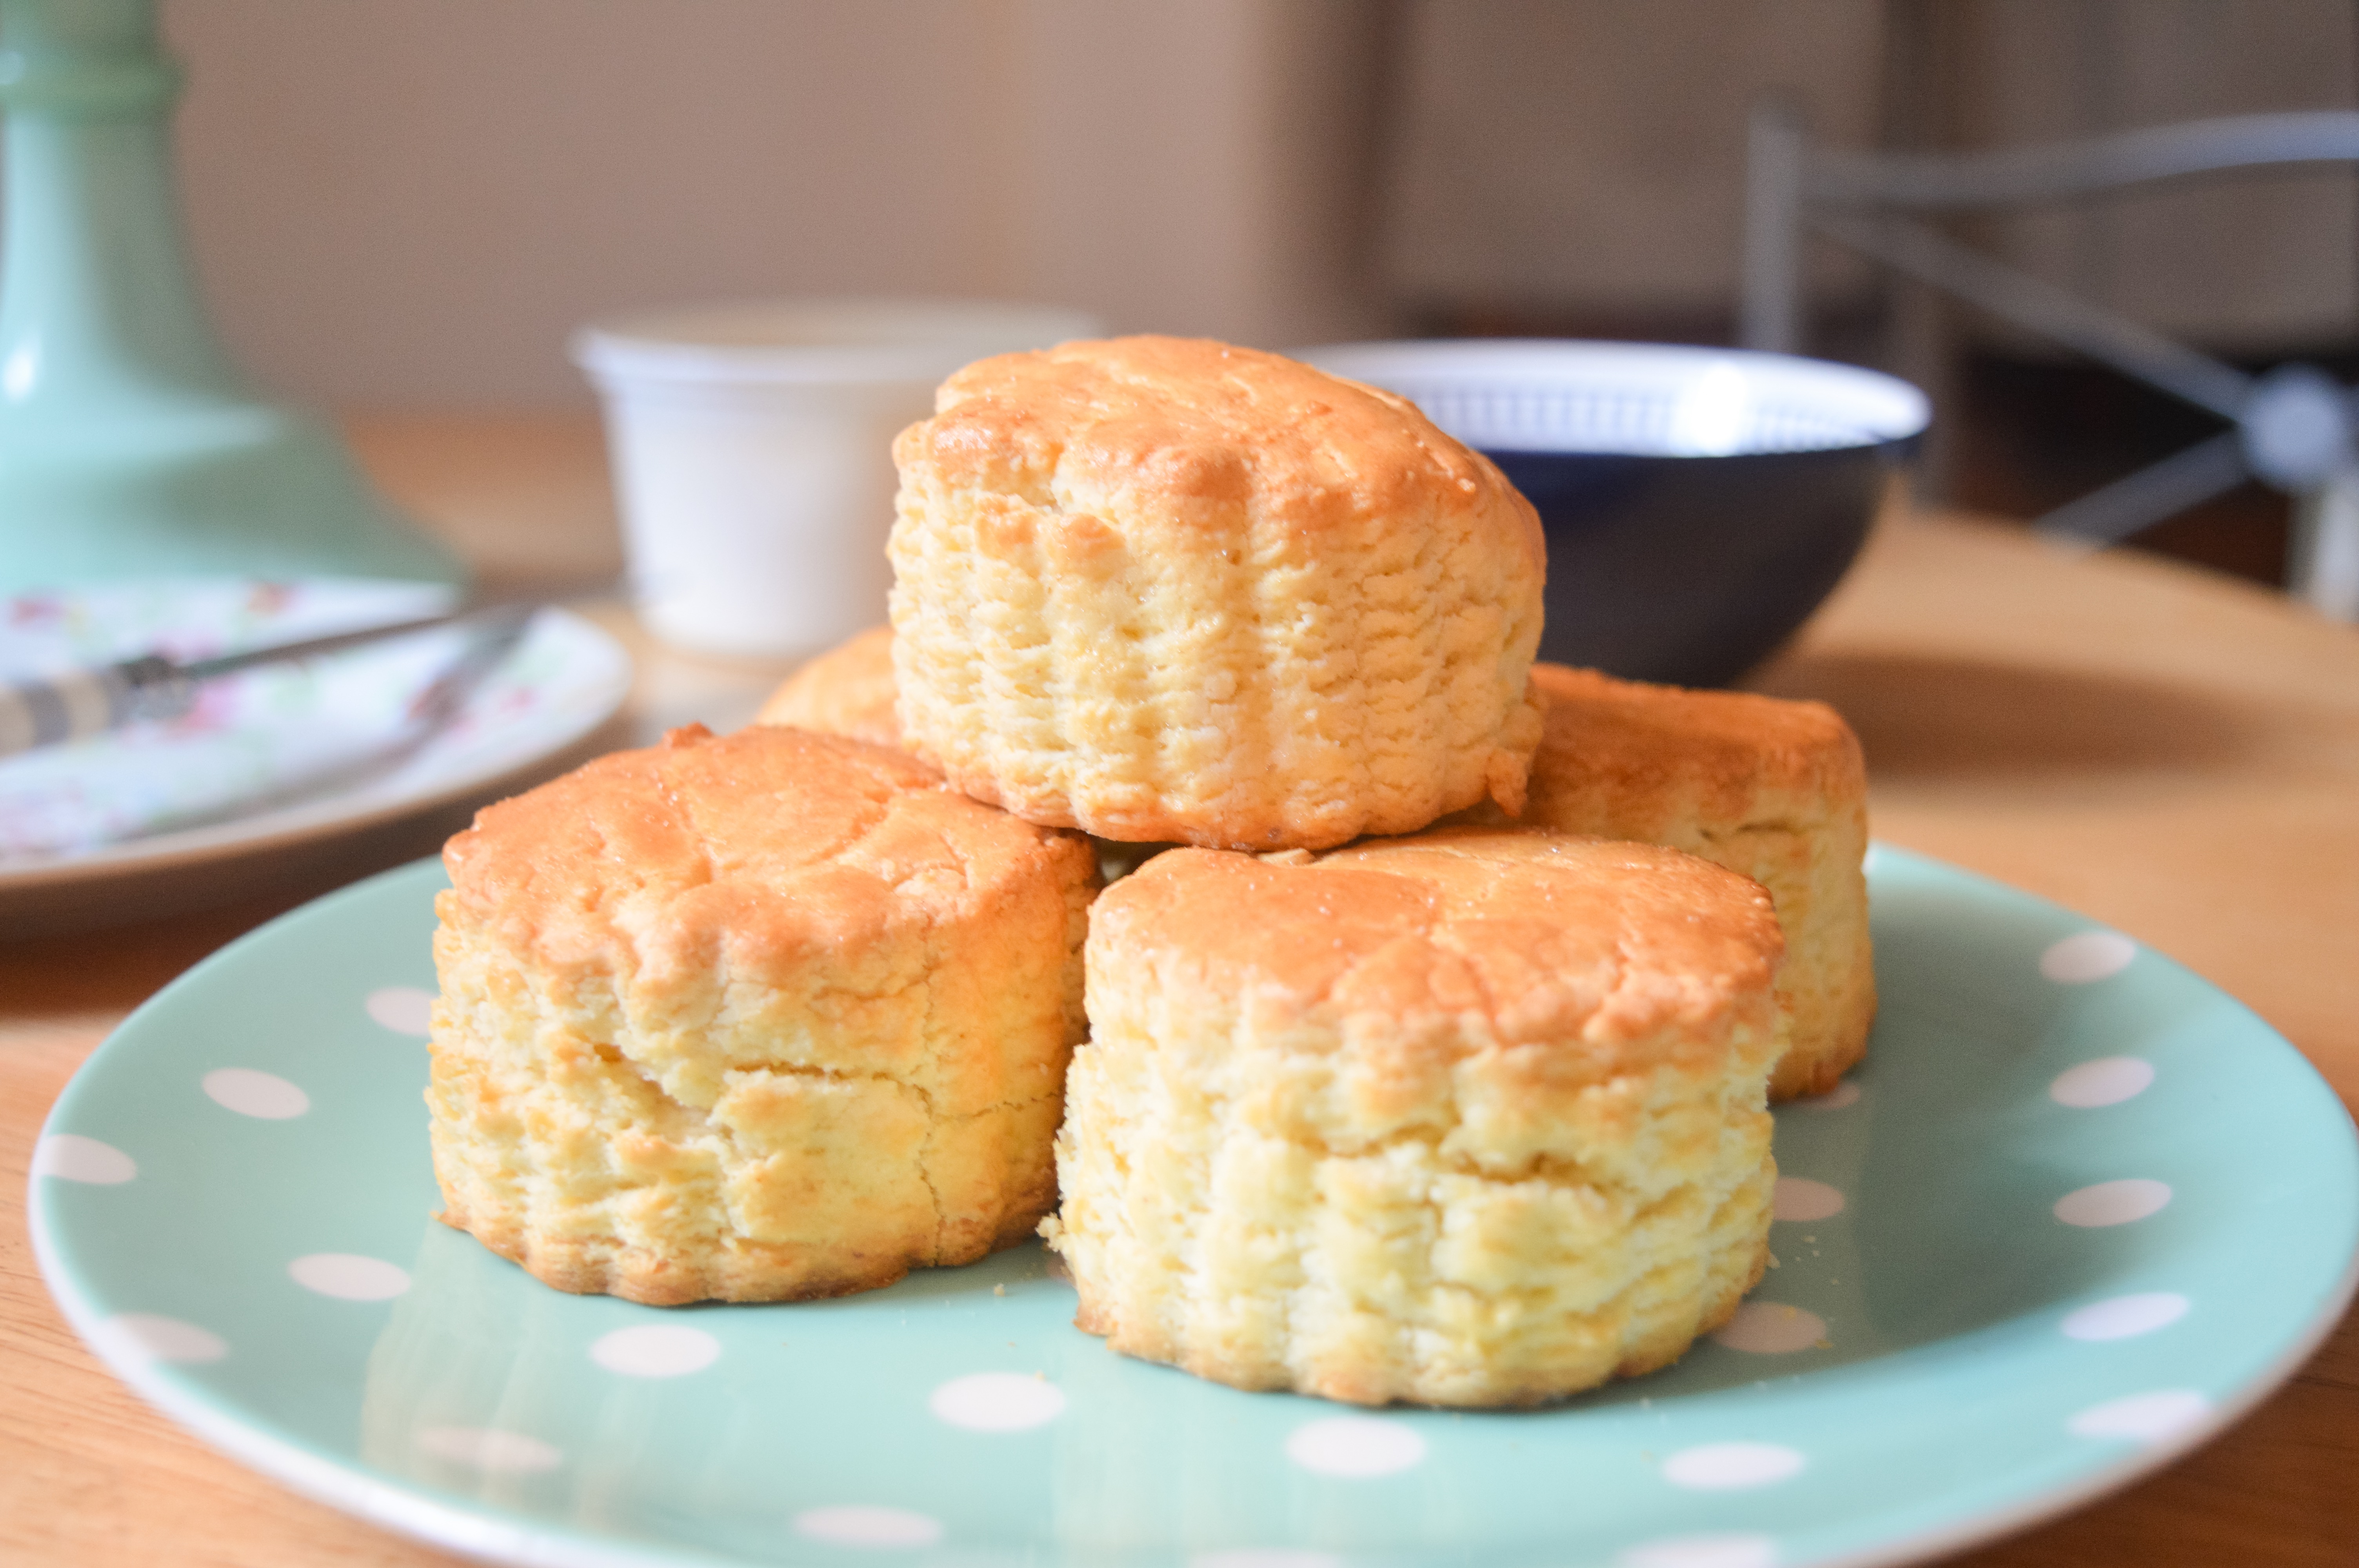
Possibly the most important tip is not to roll the dough out too thin, otherwise your scones will end up rather flat –  start off with a little height (at least 3cm) and you’ll end up with nice tall scones.

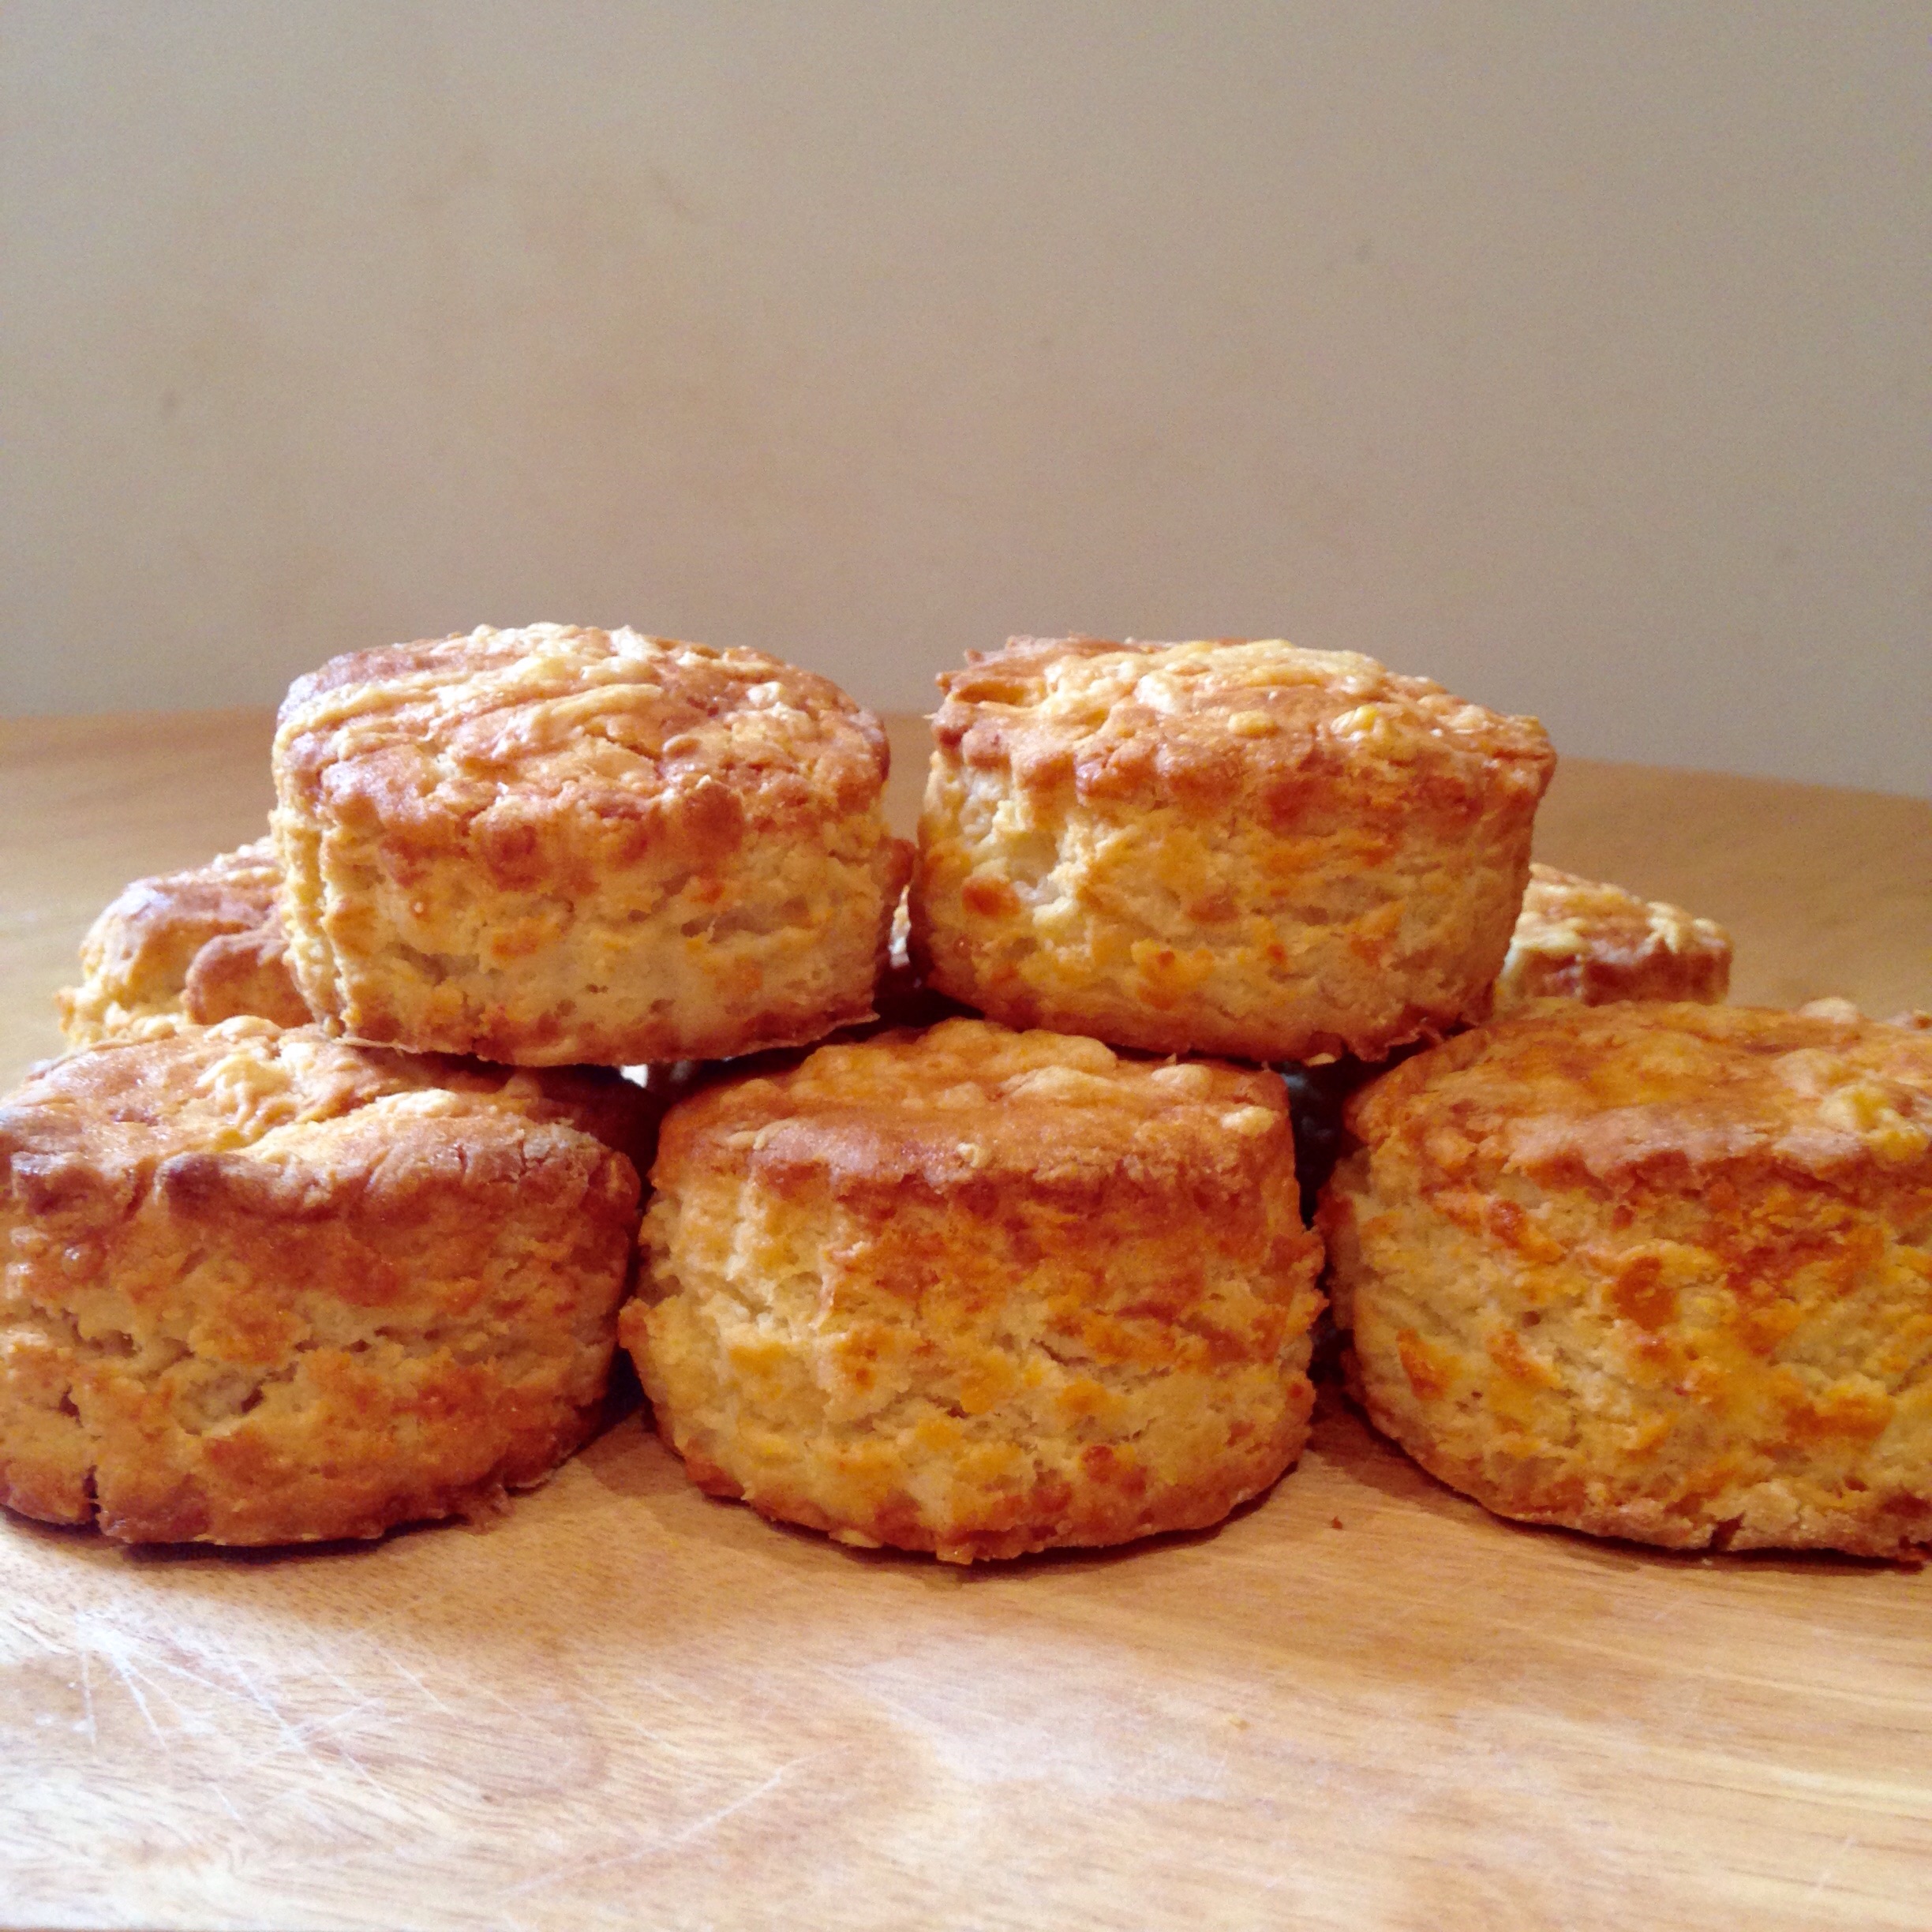
I chose to make some of the scones with glacé cherries and some without – feel free to leave them out if you’re not a fan, but if you do use cherries, make sure you wash the syrup off them as they can make the scones a bit soggy in places!

image


Scones – GF/DF options
Recipe makes approximately 6 – 8 Scones.

Ingredients:
250g gluten free self raising flour
1 tsp big powder
75g butter, unsalted (or dairy free alternative like Stork Baking Block)
40g caster sugar
75ml milk (or dairy free alternative)
2 eggs (one for glazing)
50g glacé cherries, chopped and rinsed (optional)

Method:
1) Preheat the oven to 220 C/200 fan C/gas mark 6.

2) In a large bowl, sift together the flour, baking powder and a pinch of salt.

3) Rub together the butter and flour mixture until you have a breadcrumb like texture, then stir through the sugar.

4) Add an egg and start to bring the mixture together using a wooden spoon.

5) Add the milk bit by bit (you might not need it all) and use your hands to bring the mixture together in a smooth dough.

6) Lightly dust a work surface with flour then roll out the dough to about 3 cm thick – don’t roll out the dough too flat or you will have very flat scones!

7) Cut the scones out with 6cm flutted scone cutter. Place the scones on a baking tray lined with greaseproof paper then lightly brush each one with beaten egg.

8) Bake the scones in a preheated oven for 12 to 15 minutes, until golden brown.

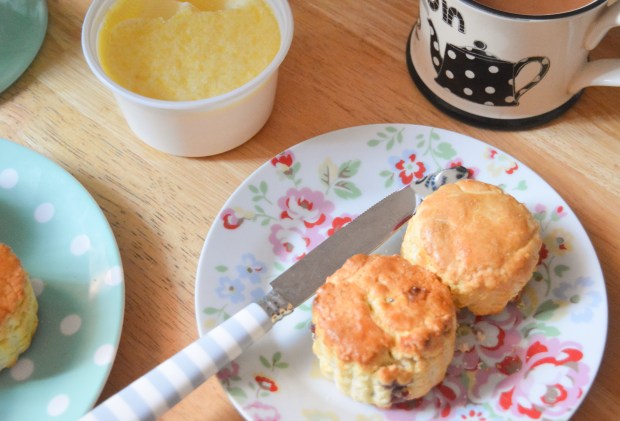
9) Leave the scones to cool on a wire rack before serving with jam and clotted cream!

image

If you want to keep up to date with my kitchen adventures you can find me on Instagram @titchyton or on my Facebook page.

Gluten Free Christmas: Hazelnut, Cranberry and Orange Biscotti Recipe

It’s December which means one thing and one thing only… IT’S CHRISTMAS!!!

We are only a week into December and my friends have already accused me of Buddy The Elf levels of excitement at least a hundred times… but I can’t help it because Christmas is my favourite time of the year!
image1
The decorations are up, I’ve made my first batch of gingerbread, I’ve drunk my first mulled wine of the season and I’ve listened to my Christmas playlist on loop for about a week so I can confirm that I am officially in full Christmas mode.
PicCollage
For me, the best thing about Christmas is the food. I love all the flavours that the season has to offer more than any other time of year and quite frankly it’s not christmas without spicy gingerbread, chewy chestnuts, juicy clementines or even Brussels sprouts!

Following a gluten free diet has never stopped me enjoying Christmas either. If anything, I’ve found more enjoyment in food because having to bake my own festive treats is all part of the fun.

I have tonnes of Christmas recipes which I cannot wait to share with you but I’m going to start with my Hazelnut, Cranberry and Orange Biscotti recipe.
image2
Since I shared my Cranberry, Almond and White Chocolate Biscotti recipe a few months back I’ve had it in my mind to create a version using more festive flavours for Christmas.

When my family and I arrive home from church on Christmas morning we usually enjoy a cup of tea or coffee with a sweet treat just before opening all the presents. I think this year these Biscotti would be absolutely perfect and I will definitely be making a batch for the big day.
image3
Hazelnut, Cranberry and Orange Biscotti – GF/DF

Ingredients:
150g caster sugar
1 tsp baking powder
300g gluten free self raising flour, plus extra for shaping the dough
3 large eggs
150g blanched hazelnuts, roughly chopped
75g dried cranberries
1 tsp orange zest
2 tsp hazelnut syrup or extract (I used Monin Hazelnut Syrup)

Method:

1. Preheat oven to 180 C/160 C fan/gas mark 4.

2. Line a large baking tray with greaseproof paper.

3. In a large bowl, stir together the caster sugar, baking powder and flour.

4. Add the eggs, cranberries and hazelnuts then mix until all the ingredients are combined.

The mixture will be slightly wetter than expected so please don’t panic and add more flour. Remember that gluten free flour needs more moisture than regular flour and these biscuits are going to be baked twice – if you add more flour you’ll end up with a very dry dough which will result in an overly dry biscotti that cannot be baked twice.

5. Separate the mixture into two halves and generously dust a work surface with a flour.

6. Spoon one half of the mixture onto the work surface into a rough log shape then dust the mixture with a generous layer of flour – do not knead or roll the mixture but gently use your hands to shape the mixture into a log shape. The flour will stick to the mixture like a coating which will help the log keep it shape whilst allowing the inside to stay soft.
image    image
7. Transfer to the log to a baking tray (you could use a cake lifter to help) then flatten the log slightly so it’s approximately the width of a ciabatta. Repeat the with the other half of the mixture then place the second log on the tray – make sure you leave a little room between to allow them to expand slightly.

8. Bake for 20 to 25 minutes or until the biscotti is golden brown. Transfer the biscotti to a wire rack to cool completely. Leave the oven on.

9. Once the biscotti is cool, slice it diagonally across into inch thick slices. Do not attempt to slice the biscotti whilst still warm or it will crumble.

10. Transfer the biscotti back onto the baking tray and bake for a further 6 to 8 minutes on each side. Leave the biscotti to cool completely before serving.
image1
I can’t wait to show you what else I have planned for Christmas, but if you are looking for more Christmas inspiration in the meantime, why not take a look at my Gluten Free Gingerbread Cookies recipe which I posted last Christmas, or, follow me over on Instagram or Facebook to see what else I’m getting up to.

Gluten Free American Style Chocolate Chip Cookies

Today I’m really excited to share with you my recipe for Gluten Free American Style Chocolate Chip Cookies!
image2-2
I’ve been having really bad cookie cravings since I caught a whiff of freshly baked cookies wafting out from Millie’s Cookies while I was walking around Westfield a few weeks ago…

I know you can buy gluten free cookies from the supermarket, but they’re not the same! You might think I am being picky, but supermarket versions are rather chunky and crunchy, not soft and chewy like the ones you can buy freshly made from bakeries.

I decided the only thing for it was to make my own and although I haven’t had a proper cookie in over three years, these cookies are exactly like what I remember! They have a slightly crunchy outside and a lovely soft and chewy centre bursting with chocolate chips.
image1
The trick to making the best chocolate chip cookies to make sure you don’t over bake them. I accidentally over baked the first few which made them a bit too hard, but if you take them out of the oven while they are still quite soft and leave them to set on the baking tray your cookies will retain their chewy centre.

Gluten Free American Style Chocolate Chip Cookies – GF/DF options

Ingredients
175g gluten free self raising flour
100g rice flour
2 tsp cornflour
A pinch of salt
150g butter, melted (or dairy free alternative like Stork Baking Block)
125g caster sugar
75g light brown sugar
2 tsp vanilla extract
2 egg yolks
1 tbsp milk
150g milk or dark chocolate chips (or dairy free alternative)

Method

1. In a large bowl, mix together the flours and the sugar.

2. Add the melted butter, vanilla extract, egg yolks and milk. Mix until all the ingredients are combined then fold through the chocolate chips.

3. Wrap the cookie dough in cling film, then chill the dough in the fridge for a few hours until it has firmed up.

4. Heat oven to 180 C/160 fan/gas mark 3.

5. Line two large baking trays with baking parchment.

6. Separate the dough into pieces that weigh approximately 35g each and roll each one into a ball shape.

7. Place the balls of dough on the prepared baking trays making sure you leave room for the cookies to spread out as they bake.

8. Bake the cookies for 12 – 15 minutes. The cookies should be golden brown and will remain quite soft – don’t be tempted to bake them for longer.  If the cookies have puffed up a bit, gently press them down with your fingers a few times towards the end of the bake so you don’t end up with cookies which are too dense and cake like.

9. Leave the cookies to firm up on the baking tray then carefully transfer them to a wire rack to cool completely.
image2
Tis almost the season to be jolly, so I will have plenty of Christmas recipes coming real soon. In the meantime, come and follow me over on Instagram or Facebook to see what else I’m getting up to!

Gluten Free Ginger Cake

Autumn is here and as the weather turns colder I look forward to all the flavours the new season has to offer. Gone are the summer fruits, in are the wintery comfort foods and what could be more comforting than slice of warm and spicy ginger cake?

image

In my opinion, comfort food should be as fuss free and simple to achieve as possible. My ginger cake recipe is exactly that and requires no advanced techniques – simply mix the ingredients together and bake!

This cake certainly packs a punch and has a very strong spicy ginger flavour, so feel free to use less ginger if you’d prefer a milder flavour.

image 
Ginger Cake – GF/DF options

Ingredients:
200g gluten free self raising flour
200g light brown sugar
2 – 3 tsp ground ginger
1 tsp bicarbonate of soda
55g unsalted butter, melted (or dairy free alternative)
2 large eggs
1 tbsp golden syrup
1 tbsp black treacle
100ml strong black tea, cooled

Method:

1. Preheat the oven to 180 C/160 C fan/gas mark 4 then grease and line a 2lb loaf tin with baking parchment.

2. In a large bowl: Mix together the flour, sugar, ginger and bicarbonate of soda.

3. In a separate bowl: whisk together the eggs, golden syrup and treacle.

4. Make a well in the centre of the ingredients, add the egg mixture, melted butter and tea then mix until you are left with a smooth and lump-free batter.

5. Pour the mixture into the prepared loaf tin. Bake for 30 – 35 minutes, when the cake is done it should be firm to touch.

6. Turn the cake out onto a wire rack and leave to cool before serving.

image

This cake matures really well and tastes even better after a day or two. If you can wait, wrap your cake in some greaseproof paper and store it in an air tight container for at least 12 hours before you tuck in – the longer you leave his cake, the sticker it gets! This cake will be at it’s best for at least 5 days and keeps for up to 7 days, if stored properly in an airtight container.

Gluten Free Cranberry, Almond and White Chocolate Biscotti (Inspired by ‘The Great British Bake Off’)

Today I’m going to share with you another gluten free version of a bake featured on ‘The Great British Bake Off’.

This week’s episode was Biscuit Week in which the remaining contestants baked no less than 748 biscuits plus a show-stopping edible and ornate biscuit box each, which had to be sturdy enough to encase their biscuits.

The Signature Challenge saw the bakers take on Italian Biscotti. Biscotti basically means the biscuits are ‘twice baked’ and are traditionally dry and quite hard biscuits, filled with nuts and fruit. They can be a little tricky to get right because whilst the biscuits need to be dry, there is a danger they will end up so brittle that they will break your teeth! The bakers had a relatively short amount of time in which to bake the Biscotti, which needs to be cooled down completely before it’s baked again so that it doesn’t crumble when sliced.

I decided to have a go at creating a gluten free version of the signature challenge and went for the quite classic flavour combination of cranberry, almond and white chocolate.
image
The key to baking excellent gluten free biscotti is to start with a slightly wetter mixture than you’d expect. Although Biscotti are typically quite dry biscuits, remember that gluten free flour requires more moisture than normal flour – without the extra moisture the Biscotti won’t survive being baked twice and will be a crumbly mess. If you follow my method carefully you should have no problems baking your very own gluten free Biscotti which has the texture and taste of proper Biscotti.

Gluten Free White Chocolate, Almond and Cranberry Biscotti – GF/DF options

Ingredients:
150g caster sugar
1 tsp baking powder
300g gluten free self raising flour + extra for shaping the dough
30g ground almonds
3 large eggs
125g dried cranberries
75g chopped blanched almonds
25g chopped cashew nuts
1 tsp lemon zest
1/2 tsp almond extract

To decorate:
300g good quality white chocolate (or dairy free alternative)

Method:

1. Preheat oven to 180 degrees C/160 C fan/gas mark 4 and line a large baking tray with greaseproof paper.

2. In a large bowl, stir together the caster sugar, baking powder, flour and ground almonds.

3. Add the eggs, cranberries and nuts then mix until all the ingredients are combined. The mixture will be much wetter than expected so please don’t panic and add more flour. Remember that gluten free flour needs more moisture than regular flour and these biscuits are going to be baked twice – if you add more flour you’ll end up with a very dry dough which will result in an overly dry biscotti that cannot be baked twice.

4. Separate the mixture into two halves and generously dust a work surface with a flour.

5. Spoon one half of the mixture onto the work surface into a rough log shape then dust the mixture with a generous layer of flour – do not knead or roll the mixture but gently use your hands to shape the mixture into a log shape. The flour will stick to the mixture like a coating which will help the log keep it shape whilst allowing the inside to stay soft.
image   image
6. Transfer to the log to a baking tray (you could use a cake lifter to help) then flatten the log slightly so it’s approximately the width of a ciabatta. Repeat the with the other half of the mixture then place the second log on the tray – make sure you leave a little room between to allow them to expand slightly.
image
7. Bake for 20 to 22 minutes, until the biscotti is golden brown. Remove the biscotti from the oven and transfer to a wire rack to cool completely. Leave the oven on.
image
8. Once the biscotti is cool, slice it diagonally across into inch thick slices. Do not attempt to slice the biscotti whilst still warm or it will crumble.

9. Transfer the biscotti back onto the baking tray and bake again for 6 to 8 minutes on both sides, then leave the biscotti to cool on a wire rack.
image
10. Melt the chocolate slowly in a heatproof bowl over a pan of simmering water. Dip the base of each biscuit into the chocolate, gently shake off any excess chocolate, then leave each one to set on a sheet of greaseproof paper.

Once set, enjoy in the traditional Italian style with a cup of coffee!
image
If you’re not feeling all baked out, why not check out my take on the classic Madeira cake as featured on episode one of this years ‘Bake Off’.

Gluten Free Marmalade and Yorkshire Tea Loaf

Happy 1st of August, or, as we Yorkshire folk like to call it – Yorkshire Day!

As a Yorkshire lass I had to come up with something special to celebrate today and what could be more appropriate than this Gluten Free Marmalade and Yorkshire Tea Loaf?
image
This loaf isn’t just the perfect accompaniment to a cup of tea, it actually contains tea, which helps to keep the cake nice and moist – what could be better and than a cake made out of tea?

The cake is also lightly flavoured with spicy ginger and orange and is smothered in a thick layer of marmalade glaze which, again, provides moisture and ensures the cake keeps well.

So, pop t’kettle, sit yer sen down and read on to find out how to make your very own Yorkshire Tea Loaf…

Marmalade and Yorkshire Tea Loaf – GF/DF options

Ingredients

100g sultanas
100ml Yorkshire Tea (hot and strongly brewed)
225g gluten free self raising flour
1 tsp baking powder
100g brown sugar
Zest of 1 orange
2 tsp ginger
50g butter, melted (or dairy free margarine)
3 tbsp, marmalade melted (1 tbsp for glazing the cake)
2 eggs

Method:

1. Preheat the oven to 160 C/140 C fan/gas mark 3 then grease and line a 2lb loaf tin with baking parchment.

2. Place the sultanas in a bowl, pour over the tea then leave to soak.

3. Into a large bowl, sift the flour and baking powder, then stir in the sugar, orange zest and ginger.

4. Add the eggs, melted butter and 2 tablespoons of the melted marmalade to the dry ingredients, then pour over the tea soaked sultanas and beat until all the ingredients are combined.

5. Pour the mixture into the prepared tin – don’t worry if the mixture is a little wetter than a normal tea loaf mixture should be as gluten free flour requires a little more moisture.

6. Bake for about 40 – 45 minutes until the cake is firm to touch.

7. Remove the cake from the oven and leave it to cool in the tin for a few minutes before turning it out onto a wire rack.

8. While the cake is warm spoon over the remaining marmalade – which you can reheat a little if it’s cooled down.

image

Happy Yorkshire Day!

Coeliac Awareness Week: Gluten Free Cheese Scones

Here in the UK it is Coeliac Awareness Week and to help raise awareness of this important campaign I am posting very simple Gluten Free recipes to help any newly diagnosed Coeliacs get started.

My first post was my Victoria Sandwich Recipe and today I will be sharing my recipe for Gluten Free Cheese Scones.
image
Scones are a true classic and a bake that should be in every baker’s repertoire. They are perfect for beginners (they were certainly the first thing I learnt to make) and possible to achieve Gluten Free – you just need to make sure the dough is moist enough!

Gluten Free Cheese Scones – GF/DF options

This recipe makes approximately 8 scones.

Ingredients:
250g gluten free self raising flour
1 tsp baking powder
75g butter, unsalted
A pinch of salt
75g mature cheddar, plus extra for the top.
2 eggs (one for glazing)
75ml milk (or dairy free alternative)

Method:

1) Preheat the oven to 220 C/200 fan C/gas mark 6.

2) In a large bowl, sift together the flour, baking powder and salt.

3) Rub together the butter and flour mixture until you have a breadcrumb like texture, then stir through the cheese.

4) Add an egg and start to bring the mixture together using a wooden spoon.

5) Add the milk bit by bit and use your hands to bring the mixture together in a smooth dough.

6) Lightly dust a work surface with flour then roll out the dough to 3/4cm thick – don’t roll out the dough too flat or you will have very flat scones!

7) Place the scones on a baking tray lined with greaseproof paper. Lightly brush the top of each scone with beaten egg then sprinkle over a little bit more cheese.

8) Bake the scones in a preheated oven for 15 – 18 minutes until they are golden brown.

9) Leave the scones to cool on a wire rack or enjoy warm with lashings of butter! To refresh the scones, sprinkle them with a little cold water and gently warm them in the oven.

Please don’t forget to check out my Victoria Sandwich Recipe for Coeliac Awareness Week or if you are looking for more inspiration take a look at my Recipes Page.

You can also keep up to date with my kitchen adventures on:
Instagram: https://instagram.com/titchyton/
Facebook – https://www.facebook.com/titchyton