Mojito Recipe

Could there be a more perfect summer cocktail than the Mojito? Easy to make and super refreshing – I’ll definitely be making my fair share of these over the the bank holiday weekend.

C4E5C9CB-9F0C-44C9-A6F9-FFF34E8369B8

I am sure many Mixologists would baulk at the thought of 7up in a Mojito – but l when you don’t have all the ingredients to hand, sometimes you’ve got to improvise! And so, I have named my version of this drink the “mo-chea-to” because it’s not a traditional mojito, but it definitely tastes as good.


Mojito Recipe

Makes 1 Cocktail

Ingredients

Half a lime, cut into four pieces

8 fresh mint leaves, plus extra for garnish 

35ml White Rum 

A dash of 7 Up Free (or Sprite)

A few handfuls of crushed ice

Method: 

1) Place the lime and the mint leaves into glass or a kilner jar. Gently muddle the ingredients until the lime start to release  its juice.

2) Add a few handful of ice, followed by the rum. Top up with 7up and garnish each glass with a sprig of mint and a paper straw.

11FF1E66-65CF-4C97-AD8A-5414365C051D

Gluten Free Party Rings Recipe

If you’ve run out of Summer holiday activities to do with the kids, why not give my Gluten Free Party Rings recipe a go?

IMG_5921

This is the perfect bake for the weekend or the holidays, as it’s super easy and a really good one to get the kids involved in –  I’m sure they’ll love helping icing the biscuits… and eating them!

It’s a great recipe for us big kids too – because when are you too old for Party Rings?


Party Rings – GF/DF

Ingredients:

For the biscuits:
150g sugar
150g butter (or dairy free alternative like Stork Margarine Block)
320g gluten free all purpose flour (I used Schär All Purpose Baking Mix)
1 egg
1 tsp vanilla extract

For the Icing:
400g icing sugar
Food colouring

Method:

1) In a large bowl, stir together the gluten free flour and sugar until combined.

2) Rub in the butter until you have a bread crumb like texture.

3) Add the egg and vanilla essence, then start bringing the ingredients together using a wooden spoon.

4) Use your hands to work the ingredients into a soft dough. Don’t worry if the dough seems a little sticky as it will be chilled for a while to help it firm up – don’t be tempted to add more flour!

5) Wrap the dough in cling film and place in the fridge for at least and hour.

6) Preheat the oven to 170 C/150 C fan/gas mark 4 and line two baking trays with greaseproof paper.

7) Dust a clean surface with gluten free flour and roll out the dough using a floured rolling pin.

8) Cut out circle shapes using a 6cm pastry cutter, then transfer them to the prepared tray using a palate knife. When the biscuits are on the trays, use a pipping nozzle to stamp a hole through the middle of each one.

9) Bake for 10 minutes or until they are a light golden brown – be sure to keep an eye on this biscuits as they could quickly over-bake.

10) Leave the biscuits to cool on the tray for a few minutes to help them firm up,  then transfer the biscuits to a wire rack to finish cooling completely.

11) To make the icing: place icing sugar in a large bowl with a few teaspoons of cold water, then mix the ingredients until they form a spreadable paste. You may need to add a little more water if the icing is too thick.

12) Divide the mixture into different bowls . Leave the icing in one bowl white, then add a little food colouring to each of the other bowls – the colours are up to you! Transfer the white icing to a piping bag fitted with a small writing nozzle.

13) To decorate, spread a little icing over the biscuit using a palate knife. Pipe three lines of the white icing across the biscuit, then run a cocktail stick through the lines to feather the icing – repeat until all the biscuits have been iced.

IMG_6171

I love seeing your take on my bakes, so remember to share your a picture of your Party Rings over on Facebook, twitter or Instagram using the hashtag #titchytonbakes.

Gluten Free Fondant Fancy Cupcakes (Inspired by ‘The Great British Bake Off’)

Today I’m going to share with you my Gluten Free Fondant Fancy Cupcakes recipe which is inspired by the showstopper challenge from the Semi Final of ‘The Great British Bake Off’.

image

Last week’s show saw the remaining four bakers battling it out over Patisserie for a place in final, but sadly Selasi didn’t make the cut. He might not have made it to the final, but he did win over the hearts of the nation and I will definitely miss him during this week’s show. Speaking of this week, the final will be a very bittersweet occasion, as although I am excited to see who wins, I am sad that this is the last episode of GBBO as we know it.

What I’m going to miss most is how the show has inspired me to bake things I’d never thought of trying – this includes fondant fancies, which were featured on last week’s show.

I used to love Fondant Fancies and seeing them on the show has made me feel super nostalgic – I remember having them at my Grandma’s house when I was little and how I always would choose the pink ones, because I liked them best!

I will admit though, Fondant Fancies looked incredibly difficult and fiddly to make, so I decided to go for a more simple approach. My Fondant Fancy cupcakes are much a easier to achieve, but they are every bit as delicate, dainty and delicious as the fondant fancies I remember.

image

These cupcakes would be lovely served at afternoon tea or a birthday party and are sure to impress, despite being deceptively simple.

Fondant Fancy Cupcakes

Makes approximately 16 small cupcakes

Ingredients

For the cupcakes:

150g softened butter (or dairy free alternative)
150g caster sugar
150g gluten free self raising flour
1/2 tsp baking powder
2 eggs
1 tsp vanilla extract
1 tbsp milk (or dairy free alternative)

For the buttercream:

100g softened butter (or dairy free alternative)
100g icing sugar

For the fondant icing:

300g ready to roll icing
50ml cold water
A few drops of pink food colouring

Method

1. Preheat the oven to 160 C/140 C fan/gas mark 3 then line two cupcake trays with 16 cupcake cases.

2. In a large bowl, beat the butter, sugar and vanilla together with an electric hand mixer until light and fluffy.

3. Add a tablespoon of flour, then beat in the eggs a little bit a time before sifting in the remaining flour and baking powder. Add the milk, then beat the ingredients together with the electric hand mixer until combined.

4. Spoon two teaspoons of mixture into each cupcake case, being careful not to overfill them. Bake for 20 to 25 minutes until golden brown and firm to touch.

5. Leave the cupcakes to cool on a wire rack. To make the buttercream, beat the butter with an electric hand mixer until it’s very light and fluffy. Add the icing sugar and continue to beat until all the ingredients are combined, then transfer the buttercream to a piping bag fitted with a medium plain nozzle.

6. Once the cupcakes have cooled, pipe a blob of buttercream onto each cupcake then place them in freezer to firm up while you make the fondant icing.

7. Cut the ready to roll icing into pieces and place them in a large bowl. Add a splash of water and using a spatula start to break up the icing until it starts to become more paste like. Add the rest of the water and beat with an electric hand mixer until the fondant becomes more runny.

8. Save a couple of tablespoons of the white icing to decorate the top of the cupcakes. Add a couple of drops of pink food colouring to the remaining icing and mix until the fondant turns a light pink colour.

9. Remove the cupcakes from the freezer. Spoon a little of the pink fondant icing over each cupcake, then use a palate knife to spread out the icing making sure that the buttercream is covered.

10. Put the left over white icing into a piping bag fitted with a small writing nozzle. Pipe the icing across the top in a zig zag pattern.

image

Gluten Free Black Forest Gâteau Recipe + My Gluten Free Birthday Party

Happy Monday Everyone!

I hope I can help get your week off to good start with my Gluten Free Black Forest Gâteau recipe, a quadruple layer cake, which I made for my Birthday last week.image

My birthday is usually a rather quiet affair, as it falls just after Christmas and people are usually a little too down to do anything because of Post-Christmas Blues.

I decided this year that I was going to have a little party, and that hopefully that would help to cheer people up! I wanted to come up with a menu that was both fun and most importantly quick, because when I have friends round for dinner I usually end up in the kitchen all night, rather than socialising.

Some of my guests were Vegetarian, so I decided to make the menu entirely Vegetarian as well as Gluten Free so that no one felt left out. One of my guests was also Egg Free and as my Black Forest Gateau contained eggs, I made them an alternative Egg Free dessert.

My Birthday Menu:

Drinks:
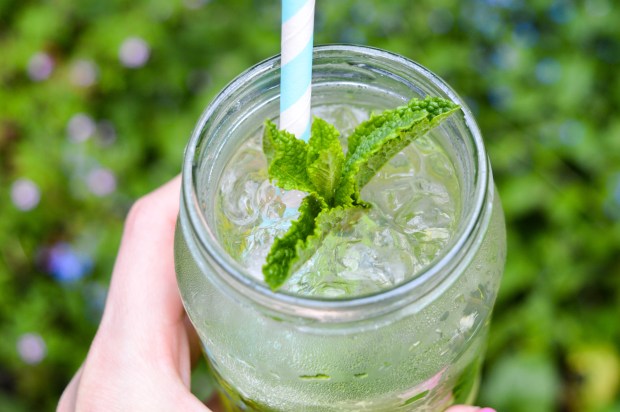
Lime and Pomegrante Fizz Mocktail (Recipe at www.whatjessicabaked.com)

Prosecco

Nibbles:

Toasty Cups filled with Spicy Five

Bean Salad & Salsa (Inspired by this recipe on BBC Food)

Paneer Cheese Bites coated in

Sesame Seeds with a Chutney Dip

Cheesy Nachos with Homemade Salsa

Desserts:

Gluten Free Black Forest Gâteau

Homemade Nutella Ice Cream (Recipe at www.whatjessicabakednext.com)

image

The party went off without a hitch because the majority of the food was prepared the day before, such as the cake sponges and the ice cream, meaning the hours leading up to the party were just for finishing touches, including assembling the cake.

What I was most happy with was that the food was suitable for everyone attending, proving that with a little imagination you can prepare a menu suitable for all sorts of different dietary requirements.

Now, back to the main event and the showstopper of my party – my Gluten Free Black Forest Gâteau:
image

Black Forest Gâteau – GF

Ingredients

For the Sponges:
200g butter, softened
200g caster sugar
175 gluten free self raising flour
25g cocoa powder
1 tsp baking powder
4 large eggs
3 – 4 tbsp milk

To assemble the cake:
2 tbsp kirsch (optional, miss out if you want a non alcoholic version)
600ml double cream
400g black cherry jam
200g milk chocolate
A handful of black cherries to decorate

Method:

1. Preheat the oven to 180 C/160 fan/gas mark 4

2. Grease and line the bases of two 9 inch cake tins.

3. In a large mixing bowl sift together the gluten free flour, baking powder, and cocoa powder.

4. In a separate mixing bowl cream together the butter and sugar with an electric hand mixer until light and fluffy.

5. In a small separate bowl add the eggs and whisk them throughly with a fork.

6. Using your electric hand mixture, beat the egg alternated with large spoonfuls of the flour mixture into the butter and sugar. Scrape the bowl down well in between additions and continue until all the egg and flour has been fully incorporated.
Then, gently fold in the milk until fully combined.

7. Carefully spoon the cake mixture into the cake tins, ensuring both tins contain equal amounts of cake mixture.

8. Bake in the preheated oven for approximately 20 – 25 minutes. If baking the sponges on separate shelves, remember to swap the sponges around towards the end of the bake to ensure they are evenly baked.

9. To test the sponges insert a skewer into the centre of both sponges. If the skewer comes out clean the sponges are baked.

10. Leave the sponges to cool in their tins slightly before turning them out onto cooling racks. Allow both sponges to cool completely before storing them in the fridge to chill overnight (or for a few hours, at least). This will help make the cake easier to assemble.

11. Once the sponges have been chilled you are ready to assemble your cake: Firstly, use a wire cake cutter or a sharp knife to cut each sponge half horizontally so that you are left with 4 sponges.

12. Next whip the cream with an electric hand mixer until it resembles soft peaks and gently sieve the jam so that it spreads onto the sponges easier.

13.  Take your first piece of sponge and lay it flat onto your serving plate. Prick the sponge with a cocktail stick and gentle spoon over 1/2 tbsp kirsch (if using) then spread over a generous layer of cherry jam.

14. Using a palate knife gently spread a layer of cream over the the jam then place your second piece of sponge on top and repeat the steps until you have four layers of sponge and three layers of cream and jam. You should save some cream to decorate the top of the cake later.

15. Gently melt 175g of chocolate in a heatproof bowl over a pan of simmering water, saving the remaining 25g to decorate the top of the cake later.

15. Spread the chocolate over the top of the cake and leave to set.

16. Once the chocolate has set, pipe the remaining cream around the edge of cake to create a frame, then grate the remaining chocolate into the centre of the cake and gently place the fresh cherries around the the edge.

Voilà! One Black Forest Gâteau Showstopper!