Gluten Free Christmas: Raspberry and White Chocolate Trifles

I don’t know about you, but in my house it’s not Christmas Day without trifle – I’m pretty sure my family have had trifle every single Christmas day for as long as I can remember.

My Gluten Free Raspberry and White Chocolate Trifles are inspired by my mum because she is always in charge of the trifle. My mum’s recipe usually contains layers of sponge, jelly and fruit, custard and cream – I know the use of jelly can be quite controversial, but for me trifle is not trifle without jelly.

FE60904D-7DDA-4FB4-99EC-9ABEC19BF477

I have, however, made a few small additions to this criteria. Instead of traditional vanilla custard, I opted for an indulgent white chocolate custard and instead of the traditional sherry soaked sponges, I went for a Black Raspberry Liqueur for a twist.

4E40CB18-F73B-4139-8B78-0F10F4E81AA9

This recipe is fantastic option for Christmas Day or a Christmas dinner party, as the majority of the work can be done the day before and the desserts can be finished off before serving. If you want like to save even more time, you could always use shop bought cake – I think Sainsbury’s gluten free Madeira loaf works wonderfully in trifle.

For a non – alcoholic version, miss out the Chambord Liqueur.

64A6A7B4-C07C-46FC-9241-E84E4A1A0C34


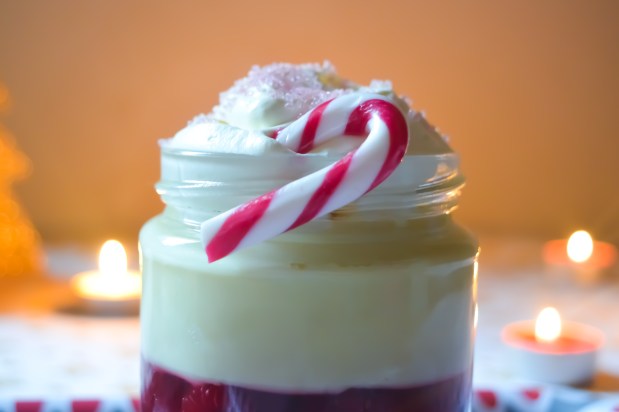
Raspberry and White Chocolate Trifles – GF/DF options

You’ll need 8 small jars or a large dessert bowl.

Ingredients

For the Sponge Layer:

80g golden caster sugar
3 large eggs
60g gluten free self raising flour
20g butter, melted and cooled (or dairy free alternative)
75ml Chambord Black Raspberry Liqueur

OR

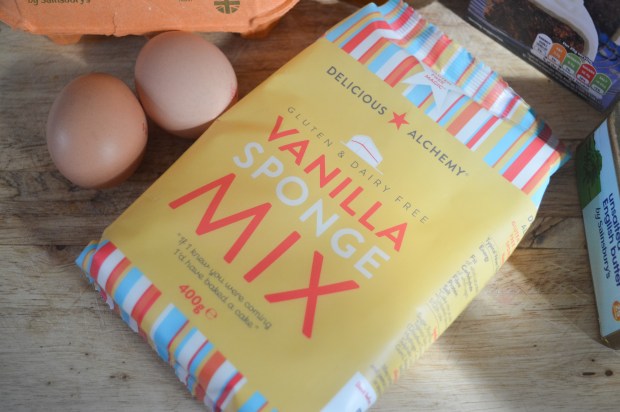
You could use shop bought cake (I like Sainsbury’s Gluten Free Madeira Loaf)

For the Jelly Layer:

1 x 135g packet Raspberry Jelly
290ml boiling water
290ml cold water
50ml Chambord Liqueur
300g Fresh Raspberries (or frozen berries if you prefer)

For the White Chocolate Custard:

3 large egg yolks
3 tsp cornflour
50g caster sugar
1/2 tsp vanilla extract
250ml whole milk (or dairy free alternative)
250ml double cream (or dairy free alternative)
250g white chocolate (or dairy free alternative)

For the Cream:

600ml double cream
50g icing sugar
2 tsp vanilla extract

To Decorate:

Pink edible glitter
Mini Candy canes (I found these in Flying Tiger)

Method:

1. To make the sponge:

– Preheat the oven to 200 C/180 fan/gas Mark 6), then grease and line a Swiss Roll tin or a baking tray with slightly raised sides.

– Place the eggs and sugar into large bowl and beat for 5 minutes using an electric hand mixer until the ingredients have tripled in volume and the mixture has reached ‘ribbon stage’.

– Sift in the gluten free flour and gently fold it through being careful not to knock out air out of the mixture, then fold through the cooled melted butter.

– Pour the mixture into the prepared tray and tilt to level out the mixture. Bake for 8 – 10 minutes or until the sponge starts to shrink away from the sides of the tin and the top is firm to touch.

– Turn the sponge out onto a wire wrack to cool, then using a 6cm round cutter, stamp out 8 sponge discs. Dip each sponge disc into the Black Rapsberry Liqueur, then place into the bottom of each jar. If you are using a large dessert bowl you can break the sponge into pieces, or cut out a disc to fit the bottom of the bowl.

2. To Make the Jelly:

– Place the Jelly cubes into a heatproof jug and add the boiling water. Stir until the cubes have dissolved, then pour in the cold water and the Black Raspberry Liqueur.

– Once the mixture has cooled, evenly distribute it between the 8 Jars, then add  a layer raspberries to each one. Each jar should have a layer of sponge and a layer of jelly and raspberries.

– Screw the lids onto each jar and leave them in fridge set overnight.

3) To make the White Chocolate Custard:

– Break the white chocolate into pieces and place them into a heatproof bowl over a pan of gently simmering water.

– Whilist the chocolate melts, place the  the sugar, egg yolks, cornflour and vanilla extract into a heavy bottomed pan and whisk until combined. Pour over the milk and double cream, then place the pan over a low heat. Whisk the mixture until it begin to thicken and can coat the back of a wooden spoon.

– Pour the custard mixture into the white chocolate and whisk until combined. Leave the mixture to cool, then place cling film over the surface of the custard to prevent it forming a skin. Leave the custard to set in the fridge overnight.

4) Finish and decorate just before serving:

– Add a layer of custard to each jar.

– Whisk together the double cream, sugar and vanilla extract until it reaches soft peaks.

– Add a layer of cream to each jar – then top each one with a sprinkling of edible glitter and a candy cane.

98AE8F31-BDE2-4272-80D5-EF4C7740F070

I love seeing your take on my recipes, so remember to share a snap of your trifles over on Facebook, twitter or Instagram using the hashtag #titchytonbakes.

Gluten Free Pecan and Pumpkin Pie

Here it is, just in time for Thanksgiving  – my Gluten Free Pecan and Pumpkin Pie recipe.

FFA24DA1-E7F5-4EE0-883D-10099EB7F763

This is the perfect recipe for those of you who are obsessed with everything Pumpkin Spice. I have never actually tried Pumpkin Spice or Pumpkin Pie until now, but I can see the attraction – pumpkin and cinnamon are a match made in heaven!

B795BDE9-D86F-4D2D-9626-44F71AF9F0D1

I have also been working on perfecting my gluten free pastry. For this recipe I used the new Schär Universal Mix it; which is a gluten free all purpose blend that can be used for lots of different types of bakes, including cakes, biscuits and pastry. So far I’ve made both biscuits and pastry with it and I’ve had fantastic results – often I find that gluten free pastry is far too crumbly and biscuit-like, but this pastry melted in the mouth as was sturdy enough to encase the pie filling. Result!


Pecan and Pumpkin Pie (GF)

Ingredients

For the Pastry:

200g all purpose gluten free flour (I used Schär All Purpose Baking Mix)
50g ground almonds
75g icing sugar
2 egg yolks
125g unsalted butter, cold

For the Filling:

75g golden caster sugar
2 eggs
2 tsp ground cinnamon
1 tsp ground ginger
1 x 397g tin condensed milk
1 x 425g tin natural pumpkin purée (I used Baking Buddy Natural Pumpkin Purée)

For the Topping:

2 tbsp Pure maple syrup
A few handfuls of Pecan nuts

Method:

1) To make the pastry, stir together the flour, ground almonds and icing sugar in a large mixing bowl.

2) Rub together the flour mixture with the cold butter, then the egg yolks and start to bring the mixture together your hands.

3) Tip the contents of the bowl out onto a floured work surface and knead the dough until it comes together in a smooth ball – you can add a few drops of water to help, if necessary.

4) Wrap the pastry in cling film and put it in the fridge to cool for about 30 minutes to an hour – this is very important as the colder the pastry is, the easier it is to work with.

5) Preheat the oven to 180 C/160 C fan/gas mark 4, then throughly grease your tart tin with butter.

6) Roll out the chilled pastry between two sheets of greaseproof baking paper (this will prevent the pastry from sticking to your work surface) until it is about the thickness of a 1 pound coin.

7) Use greaseproof paper to help you get the pastry into the tin safely. Firstly, peel off the top layer of baking paper, place the tin upside down into the middle of the pastry then carefully flip the pastry over with the help of the bottom sheet of baking paper. Peel off the bottom baking sheet and gently press the pastry down into the tin, making sure it is pressed right into each groove – don’t panic if you do get any tears or any holes, just neatly patch it up with some spare pastry.

8) Trim off any excess pastry. Place some baking paper into the case and fill it baking beans (any dried beans or rice will do) then blind bake the pastry case for 10 minutes. Remove the baking beans and bake the case for a further 5 minutes to help dry it out.

9) Meanwhile make the pie filling: whisk together together the sugar, eggs, spices, condensed milk and pumpkin purée until smooth.!

10) Let the pastry case cool down slightly before pouring in the pie filling so that the case is completely fully

11) Bake the pie for approximately 25 minutes, then mix the pecan nuts with the maple syrup and neatly arrange them on top the pie. Bake the pie for a further 15 minutes until filling is firm to touch and the nuts toasted.

12) Leave the pie to cool before serving so that the filling can set properly.

3AF64AE4-B034-4ECD-B8DF-E79824249DC3

I love seeing your take on my recipes, so remember to share a snap of your Pies over on Facebook, twitter or Instagram using the hashtag #titchytonbakes.


Gluten Free Easter: Marmalade Simnel Cake

Today I am going to share with you my Gluten Free Marmalade Simnel Cake recipe.

IMG_4506For me, it simply wouldn’t be Easter without Simnel Cake – a traditional cake made up of a lightly spiced fruit sponge with a hidden marzipan layer. It is topped with 11 marzipan balls which are said to represent the 11 apostles, minus Judas.

My recipe is a slight twist on the traditional Simnel Cake. I have added a little more liquid in order to create a moist sponge, as Gluten Free Flour requires more moisture than normal flour – Simnel cakes are usually slowly baked on a low temperature for a long time, so the extra moisture is necessary to prevent a dry cake.

I also used Orange Zest instead of Lemon zest and instead of apricot jam I brushed the cake in a generous layer of marmalade.

IMG_4516

Simnel Cake would make a beautiful centrepiece for a special Easter Sunday meal, it is also easily prepared in advance and will comfortably feed a large family.

Orange and Marmalade Simnel Cake – GF/DF options

Ingredients

For the cake:

200g butter, softened (or dairy free butter/spread)
200g light brown sugar
1/2 tsp baking powder
200g gluten free self raising flour, sifted
3 large eggs, whisked
500g sultanas, raisins, mixed peel
Zest 1 orange, plus 2 tbsp of juice
2 tbsp marmalade, gently warmed
2 tsp ginger
1 tsp cinnamon
300g Marzipan, for the centre

To decorate:
2 tbsp Marmalade
500g Marzipan, to decorate

Method:

1) Preheat the oven to 140 C/120 C fan/gas mark 1 and grease and line a loose-bottomed cake tin.

2) In a large bowl cream together the butter and sugar with an electric hand mixer or a wooden spoon.

3) In a separate bowl mix together the dry ingredients: sift together the flour, baking powder and spices, then fold through the fruit and the orange zest.

4) Add the eggs one at a time to the wet ingredients along with a tablespoon of dry ingredients to stop the mixture from splitting. Ensure each egg is fully combined before adding the next one.

5) Fold in all the remaining dry ingredients, then add the marmalade and orange juice and mix until fully combined.

6) Spoon half the mixture into the prepared cake tin and smooth out with a spatula.

7) Roll out 300g of marzipan into a circle large enough to fit the tin and place it on top of the cake mixture

8) Spoon the remaining mixture on top of the marzipan and smooth out with spatula.

9) Bake in a preheated oven for 1 hour 40 – 50 minutes, until the cake is deep golden brown and firm to touch.

10) Leave the cake to cool in the tin slightly before turning it out onto a cooling rack to cool completely.

11) Once cake is cool, brush the top with a generous amount of marmalade which which will help the cake to stay moist.

12) Roll out 400g of Marzipan into a circle large enough to cover the top of the cake.

13) Place the marzipan on top of the cake and divide the remaining marzipan into 11 equal pieces. Roll the pieces into 11 balls and arrange them around the edge of the cake in a circle.

14) Place the cake under a grill high heat for a minute or so until the marzipan is golden brown – watch it like a hawk or the marzipan could burn!

15) Place the cake onto a serving plate and wrap it in a pretty ribbon.

You are now ready to proudly display your beautiful and entirely gluten free Easter centre piece for all the family to admire!

IMG_4512

I love seeing your take on my bakes, so remember to share your a picture of your bakes over on Facebook, twitter or Instagram using the hashtag #titchytonbakes.

Gluten Free Christmas: Stollen Muffins

It’s beginning to look a lot like Christmas… and I don’t know about you, but I’m rather glad. It’s been a scary and rather uncertain year with everything that has been going on in the world, so I’m grateful for a distraction and I hope that a bit of Christmas cheer will help to take my mind off it… and yours too!

So, get ready for my first Christmas recipe of the year and prepare to feel fabulously festive.

image

My Gluten Free and Dairy Free Stollen Muffins are every bit as tasty as actual Stollen and are the perfect way to get your Stollen fix, without the hassle of making bread.

Stollen is a German Christmas bread which usually contains dried fruit, almonds, marzipan and spices, such as cinnamon. These muffins are chock full of everything you’d find in traditional stollen, but with a dash of my favourite tipple for good measure, because it’s Christmas!

image


Stollen Muffins – GF/DF

Ingredients

2 – 3 tbsp Cointreau (you could also use Brandy, Rum or Amaretto)
200g mixed dried fruit (I used sultanas/raisins/cherries/mixed peel)
300g gluten free self raising flour
Zest of an orange
1 tsp ground cinnamon
1/2 tsp ground ginger
1 tsp baking powder
1/2 tsp bicarbonate of soda
150g ready to roll marzipan (chopped into small pieces)
100g caster sugar
50g light brown sugar
2 large eggs
100 ml sunflower oil
200 ml almond milk
1 tsp almond extract
1/2 vanilla extract
50g flaked almonds

Method

1) Leave the mixed fruit to soak in Cointreau overnight.

2) Preheat the oven to 180 C/160 C fan/gas mark 4 and line a muffin tin with muffin cases.

3) In a large bowl, stir together the flour, baking powder, bicarbonate of soda, orange zest, cinnamon and ginger, then stir through marzipan.

4) In a separate bowl, whisk together eggs, sugar, oil, almond milk, vanilla extract and almond extract until combined, then add this to the dry ingredients.

5) Gently mix together all the ingredients using a wooden spoon until you are left with a batter which is only just combined (don’t worry too much if there are any lumps), then stir through the dried fruit and the flaked almonds.

6) Spoon approximately 2 tablespoons of batter into each muffin case, then bake for 25 minutes, until golden brown.

7) Leave the muffins to cool completely on a wire rack, before dusting them with icing sugar to finish.

Be sure to store the muffins in an air tight container and they will last for 4 to 5 days.

image

Keep your eyes peeled for lots more Christmas recipes coming soon, but in the meantime why not try some of my Christmas recipes from previous years:

Gluten Free Gingerbread Cookies

Gluten Free Hazelnut, Cranberry and Orange Biscotti

Gluten Free Cointreau Christmas Cake

Gluten Free Kransekake (Traditional Scandinavian Cake)

Gluten Free Bakewell Tart (Inspired by ‘The Great British Bake Off’)

Today I’m going to share with you my gluten free take on Mary Berry’s Bakewell Tart, as featured on the latest episode of ‘The Great British Bake Off’.

image

This week the bakers had to tackle pastry and they were tasked with making Danish Pastries, Filo Pastry Amuse Bouches and a Bakewell Tart, which was this week’s technical challenge.

There was some controversy on Twitter after the show aired that Mary’s bake was not a Bakewell Tart, but in fact a Cherry Bakewell because it was topped with an almond flavoured icing – apparently a traditional Bakewell Tart is supposed to be topped with layer of flaked almonds, not icing.

It may annoy traditionalists, but I decided to stay true to Mary’s recipe and go for a layer of icing…  but I did add some flaked almonds for good measure!

image

The challenge making a gluten free version of this bake is coming with a good shortcrust pastry recipe.

Gluten free pastry can tend to be a little on the crumbly side, so it’s important that there is enough liquid in the mixture to help bind the ingredients together. My recipe uses a combination of egg yolks and butter to achieve this, but if the mixture is being little stubborn, a drop of water can be added to help bring it together.

It’s also incredibly important to chill your pastry before using it, as it this really does help to make it more pliable.

Finally, a good quality non stick tart or flan tin with a loose base is essential, or you will struggle to get your tart of its tin!

image

Gluten Free Cherry Bakewell Tart – GF/DF/

(Recipe inspired by Mary Berry’s Bakewell Tart recipe from ‘The Great British Bake Off’)

You will need a 8″ inch fluted flan or tart tin with a loose base.

Ingredients

For the Pastry:

200g plain gluten free flour

50g ground almonds

75g  icing sugar

2 egg yolks

125g butter (Or gluten free alternative like Stork Baking Block)

A drop of water

For the filling:

4 tbsp seedless raspberry jam

150g butter, softened (or gluten free alternative)

150g caster sugar

150g ground almonds

1 large free-range egg, beaten

1 tsp almond extract

For the icing: 

300g icing sugar

1 tsp almond extract

A handful of toasted flaked almonds to finish

Method

1) To make the pastry, stir together the flour, ground almonds and icing sugar in a large mixing bowl.

2) Rub together the flour mixture and the butter, add the egg yolks and start to bring the mixture together your hands.

3) Tip the contents of the bowl out onto a floured work surface and knead the dough until it comes together in a smooth ball – you can add a few drops of water to help, if necessary.

4) Wrap the pastry in cling film and put it in the fridge to cool for about 30 minutes to an hour – this is very important as the colder the pastry is, the easier it is to work with.

5) Preheat the oven to 180 C/160 C fan/gas mark 4, then throughly grease your tart tin with butter.

6) Roll out the chilled pastry between two sheets of greaseproof baking paper (this will prevent the pastry from sticking to your work surface) until it is about the thickness of a 1 pound coin.

7) Use greaseproof paper to help you get the pastry into the tin safely. Firstly, peel off the top layer of baking paper, place the tin upside down into the middle of the pastry then carefully flip the pastry over with the help of the bottom sheet of baking paper. Peel off the bottom baking sheet and gently press the pastry down into the tin, insuring it’s pressed right into each groove – don’t panic if you do get any tears or any holes, just neatly patch it up with some spare pastry.

8) Trim off any excess pastry. Place some baking paper into the case and fill it baking beans (any dried beans or rice will do) then blind bake the pastry case for 10 minutes. Remove the baking beans and bake the case for a further 5 minutes to help dry it out.

9. Meanwhile make the Frangipane: cream together the butter and sugar until light and fluffy. Beat in the egg, ground almonds and almond extract until the ingredients are combined.

10. Leave the pastry case to cool down slightly before spreading the jam over the base of the case in an even layer. Next, spoon the Frangipane into the case and smooth it out with a palate knife.

11. Bake the tart for 25 – 30 minutes or until the Frangipane is golden brown and firm to touch. If the pastry starts to get a little too much colour, put some tin foil over the tart, this will prevent it from burning.

12. Leave the tart to cool completely before decorating. While you are waiting, toast your flaked almonds by spreading them over a lined baking sheet and baking them at 180 degrees for about 5 minutes until toasted.

13. To make the icing, sift the icing sugar into a bowl. Add the almond extract and 2 to 3 tablespoons of cold water and mix until you are left with a thick but spreadable icing.

14. Spread the icing over the cooled tart using a palate knife. Sprinkle over the toasted almonds, then serve!

image

I hope you enjoy this recipe and all other recipes I have recreated during this series of ‘The Great British Bake Off’ so far.

I love seeing your bakes, so if you try any of my recipes please take a snap and share it on Instagram or Twitter by using the hashtag #titchytonbakes or post a picture on my Facebook page.


Gluten Free Churros (Inspired by ‘The Great British Bake Off’)

Over the past week there has been an uproar over the news that the BBC has lost the rights to host ‘The Great British Bake Off’ and that as of the next series it’s new home will be channel 4, after they paid double the amount than the BBC had offered to take the show. Mel and Sue stepped down from hosting the show saying that they are ‘not going with the dough’ and today Mary Berry has also announced that she will be exiting the show, leaving fans worried about the future of their favourite programme  – it’s been more dramatic than series 5, when Ian dumped his Baked Alaska in the bin!

I, for one, am absolutely gutted that this is the end of Bake Off as we know it, but I have a huge amount of respect for Mel, Sue & Mary for not selling out. I don’t know whether I will continue to watch the show over on channel 4, but I am determined to enjoy every second of the current series, while it lasts.

To help cheer everyone up, today I’m going to share my Gluten Free Churros Recipe, inspired by the showstopper challenge from this year’s Batter Week.

image

Batter week saw the bakers tackle stuffed Yorkshire puds, delicate lacey Pancakes and a simple Spanish street food called Churros, out of which they were expected to create a spectacular showstopper.

To achieve perfect Churros the bakers were tasked with making a choux pastry like dough that would be soft enough to pipe, but firm enough to keep its distinctive shape during frying. The Churros also had to be crisp on the outside and cooked to perfection on the inside, so it was essential to get the oil at the right temperature otherwise you may end up with uncooked dough inside… oh, and they had to be uniform in size!

Last year I worked a lot on perfecting my gluten free choux pastry, so as I already had a recipe which I thought would work, I decided I would give Churros a try.

image

My Churros plan – does anyone else make notes whilst watching bake off?

It took a few attempts to find the perfect balance of ingredients. I made my first batch of dough following my gluten free choux pastry recipe, but the result was a dough that was slightly too soft – perfect for choux buns, but not stiff enough to keep its shape in hot oil.

My second batch was much better as I used less egg which helped to give the dough a much firmer consistency. I also discovered that the pinch of baking powder I’d added to my choux pastry recipe was not required for Churros as it made them puff up and split during frying.

Getting the oil to the right temperature without a deep fat fryer was tricky, although not impossible – it’s a good idea to do a few testers first and adjust the temperature accordingly. I also found I had better success piping the Churros straight into the pan (as opposed to piping them onto parchment paper) which is fine as long as you don’t mind them not being uniform!

I’m pleased to say that once I had ironed out all these issues, the result was Churros which were beautifully crispy and light and fluffy on the inside.

imageI recommend eating them fresh as they don’t keep all that well. I served mine with a rich chocolate dipping sauce and together I think they would make a fantastically unique dessert for a dinner party.

Gluten Free Churros with Chocolate Dipping Sauce – GF/DF options

Ingredients

For the Churros:

60g gluten free self-raising flour

1 tbsp caster sugar

55g unsalted butter (or dairy free alternative)

110ml cold water

1 egg

1/2 tsp vanilla extract

For the Churro coating:

1 tsp cinnamon

2 tbsp caster sugar

Plus 1-litre sunflower oil for frying the Churros.

For the chocolate dipping sauce:

100g good quality milk or dark chocolate (or dairy free alternative)

100ml double cream (dairy free alternative)

1 tbsp golden syrup

Method

1. Place a heavy-bottomed saucepan over a low to medium heat, then add the water, sugar and butter and bring the ingredients to a gentle simmer.

2. Once the butter has melted, remove the pan from the heat and quickly beat in the flour until all the ingredients come together in a smooth ball. It’s important to cook out all the flour, so if you can still see some flour keeping beating.

3. Transfer the dough to a large mixing bowl and beat it gently for a few seconds with a wooden spoon to help release some steam – this will help the mixture to cool down.

4. In small bowl whisk the egg to break up the yolk.

5. Once the pastry mixture is cool, add the vanilla extract and then the egg a bit at a time whilst beating with an electric hand mixer – don’t add the egg whilst the mixture is hot or you will end up with scrambled eggs!

6. At first the mixture will look a little bit lumpy but keep beating and adding the egg bit by bit until it becomes a smooth and stiff dough.

7. Transfer the mixture to piping bag fitted with a star nozzle then  place the dough in the fridge to chill for 15 minutes.

8. Meanwhile, slowly heat up the oil in a large saucepan over a medium to high heat while you make the chocolate sauce.

9. To make the chocolate dipping sauce, together the chocolate, cream and golden syrup slowly in a heatproof bowl over a pan of simmering water. Gently stir until all the ingredients together, then set aside the sauce to cool.

10. Once the dough has chilled, you can fry your churros – you’ll know the oil is ready when the surface starts to shimmer.

To double check the temperature of the oil, test a little bit of the mixture and adjust the heat accordingly. If it takes more than a few minutes for the dough to turn golden brown, your oil needs to be slightly hotter, but if the dough turns a deep golden brown after about 30 seconds it’s too hot and the oil needs to cool down slightly. The perfect Churros should be ready within 4 to 5 minutes and should be crispy.

Whatever you do, don’t leave leave the hot oil unattended at any point.

11. Pipe 3 to 4 Churros directly into the hot oil and use scissors to snip off each one. Don’t cook too many at once as this can reduce the temperature of the oil and your Churros will take longer to cook – the longer they take to cook means they are exposed to the oil for longer, this can make them soggy!

Fry each Churro for 4 to 5 minutes, turning them over occasionally with kitchen tongs to make sure they are cooked on all sides. Transfer them to kitchen paper to soak up any excess oil. Keep going until all the dough is used up.

12. Mix together your caster sugar and cinnamon, then roll each Churro in the mixture until they are coated.

13. Serve immediately accompanied with the chocolate dipping sauce.


Gluten Free Viennese Whirls (Inspired by ‘The Great British Bake Off’)

Bake Off is finally back on our TV screens, so queue the nationwide baking frenzie and attempts to recreate bakes from the show at home – sometimes with varing success!

This was certainly the case when I attempted to make a gluten free version of Viennese Whirls, the technical challenge from this year’s Biscuit Week.

image

I discovered Mary Berry’s recipe on the BBC Food website and decided to give it a whirl (see what I did there?) – I thought a gluten free version would work quite well and that all I needed to do was change the flour… I was quite wrong!

I followed Mary’s recipe to the letter and all the the tips the bakers mentioned on the show, including insuring the butter was soft enough and chilling the whirls before baking. Unfortunately, they turned out a crumbly mess and I couldn’t even get them off the baking tray without them disintegrating into a million pieces

The recipe definitely required a few further tweaks to work gluten free, so it was back to the drawing board.

I think that the first attempt went wrong because the mixture was too soft and a bit oily which resulted in the mixture melting in oven, despite the fact that I’d chilled the whirls in the freezer for 15 minutes prior to baking.

On my second attempt I decided to use margarine instead of butter, which combatted some of the oiliness, and I added a touch more dry ingredients, which resulted in a firm but pipeable mixture. Again, I  chilled the whirls before baking which helped them to keep their shape.

This time they came out overbaked, which I think is due to the oven temperature being quite high in Mary’s recipe – if you don’t check the biscuits every 30 seconds after the first 13 minutes, you might accidentally overbake them and I definitely wouldn’t recommend leaving them for the full 15 minutes without checking them!

By the third attempt, I knew I had found the right balance of ingredients but decided to drop the oven temperature from 190 degrees to 180 to help to slow down any potential overbaking.

It was definitely third time lucky. The result was a whirl that had kept its shape, was golden but not over baked and was actually stable enough to get off baking tray and be filled. They also tasted delicious and melted in the mouth – heaven!

image

Viennese Whirls – GF/EF/DF OPTIONS

Recipe adapted from Mary Berry’s Viennese Whirl Recipe from ‘The Great British Bake Off’ found on the BBC Food website.

Ingredients

For the biscuits:

250g soft margarine (or dairy free alternative)

70g icing sugar

225g gluten free self raising flour

50g cornflour

1/2 tsp vanilla extract

For the filling:

Strawberry Jam (Mary’s recipe said Raspberry, but I prefer Strawberry)

100g unsalted butter (or dairy free alternative)

200g icing sugar, plus extra for dusting

1/2 tsp vanilla extract

Method

1. Preheat the oven to 180 C/160 C fan/gas mark 4.

2. Line 3 baking trays with baking paper, then use a 5cm cutter to draw 8 circles onto each sheet of paper, making sure they are well spaced out. Turn the paper over so the circles are underneath.

3. In large bowl, cream together the margarine, sugar and vanilla with an electric hand mixer until light and fluffy. Add the gluten free flour and cornflour and beat with the hand mixer until all the ingredients are fully combined.

4. Transfer the mixture into a piping bag fitted with a medium star nozzle – I like to use plastic disposable piping bags because I think they are easier to use.

5. Pipe 24 swirls inside the circles on the baking sheets. Place the baking sheets in the freezer for 10 – 15 minutes to help the swirls firm up before baking.

6. Bake for 13—15 minutes, until  pale golden-brown in colour. I reccomend checking them every 30 seconds after the first 13 minutes as the edges can catch and they can easily overbake.

7. Leave the whirls to cool on the baking sheets for a few minutes then transfer them to wire rack to cool completely.

8. To make the butter cream, beat the butter, icing sugar and vanilla extract with an electric hand mixer until light and fluffy and almost white in colour. Transfer into a piping bag fitted with a large star nozzle.

9. To decorate: Spoon a little jam onto the flat side of half of the biscuits, then pipe a swirl of buttercream over the top. Place a biscuit on top of each one to create a sandwich, then dust with a little icing sugar to finish.

image

Gluten Free Battenberg featuring Delicious Alchemy’s Gluten Free Vanilla Sponge Mix

There is less than a week until ‘The Great British Bake Off’ returns to our screens, and even though it’s been delayed slightly thanks to the Rio Olympics, I am no less excited to see what surprises lie in store this year.

The return of Bake Off means that Delicious Alchemy’s Gluten Free Magic Bake Off is also back for another year and to celebrate I’m going to share with you my Gluten Free Battenberg Cake which I made using Delicious Alchemy’s Vanilla Sponge Mix

image

image

Back in 2014 I entered Delicious Alchemy’s Gluten Free Magic Bake Off for a bit of fun with a Gluten Free Red Velvet Cake that I made for my sister’s birthday. I ended up making it to the final three bakers and although I didn’t win the overall competition, I was chuffed to bits to make it that far. I hadn’t been on a gluten free diet that long and it gave me the confidence boost I needed to start writing that gluten free food blog my friends were always nagging me to write… the very blog you’re reading now!

Regular readers of my blog will know that I am an enormous fan of Delicious Alchemy’s products, particularly their baking mixes and I always have a few stashed away in cupboard for emergencies just incase I need to whip up something super quick.

Their Gluten Free Vanilla Cake Mix is perfect for this Battenberg Cake as it makes the process much simpler – you need very few ingredients, whipping up the mixture for the sponge takes only a matter of minutes and the construction of the cake isn’t too daunting as long as you follow the instructions step by step!


image

My top tip when making a Battenberg Cake is to use food colouring which is bake stable – I recommend using either a gel or a paste as many liquid food colourings aren’t bake stable which means the sponge won’t retain its colour when baked.


Gluten Free Battenberg (GF/DF options)

Ingredients

You will need one packet of Delicious Alchemy Vanilla Sponge Mix (400g) spilt into two 200g portions.

Yellow Sponge:
200g Delicious Alchemy Gluten Free Vanilla Sponge Mix
100g softened butter (or dairy free alternative)
2 eggs
2 tbsp milk (or dairy free alternative)
A few drops of a yellow food colouring (make sure it’s bake stable)

Pink Sponge:
200g Delicious Alchemy Gluten Free Vanilla Sponge Mix
100g softened butter (or dairy free alternative)
2 eggs
2 tbsp milk (or dairy free alternative)
A few drops of pink food colouring (make sure it’s bake stable)

For assembling the cake:
400g ready to roll white marzipan
3 tbsp apricot jam

Method:

1) Preheat the oven to 180 degrees C/gas mark 4 then grease and line a square tin with baking paper.

To save time (and washing up) I decided to bake both sponges in the same tin. To do this, I made a divider out tin foil and placed it down the centre of tin. The divider should fit snuggly into the tin which and should be sturdy enough to stand up by itself. Make sure you grease the divider too so that you can remove the cake more easily.

3) Firstly make the yellow sponge: Place half (200g) of the Delicious Alchemy vanilla sponge mix in a large bowl with the butter, eggs and milk, then beat with a electric hand mixer for 15 seconds. Scrape down the sides of the bowl, add the yellow food colouring and mix for a further 10 – 15 seconds ensuring the food colouring is fully incorporated.

4) Next, make the pink sponge: Place the remaining half of the Delicious Alchemy vanilla sponge mix into a large bowl with the butter, eggs and milk, then beat with a electric hand mixer for 15 seconds. Scrape down the sides of the bowl, add the pink food colouring and mix for a further 10 – 15 seconds ensuring the food colouring is fully incorporated.

5) Carefully spoon the mixtures into the prepared tin ensuring the divider properly separates them.

6. Bake the sponges for 20 – 25 mins. Check the sponges are cooked by inserting a skewer into the middle of each sponge, if the skewer comes out clean then the sponges are ready.

7. Leave the sponges to cool in the tin for a moment and then transfer the cakes onto a wire rack to cool completely – If you attempt to assemble the cakes whilst they are still warm they will crumble.

8. Once your cake has cooled, trim the tops with a sharp knife or a cake wire to ensure they are flat and even in height.

9. Place the sponges on top of each other and trim the edges so that they are nice and neat.

10. Cut the sponges in half, straight down the middle so you are left with four long pieces of sponge.

11. Gently heat the jam in a pan or a microwave to make it easier to spread.

12. Take one of the yellow and one of the pink pieces of sponge, brush the top and sides lightly with the apricot jam then place them side by side. Brush the next two pieces of sponge with jam and then place them on top so that they create the iconic checked pattern.

13. Knead the marzipan in icing sugar until it becomes more pliable then roll it out into a large square which is longer than the length of the cake and wide enough to wrap around the cake.

14. Make sure the cake is evenly covered in apricot jam to ensure that the marzipan sticks to the sponge. Place the cake onto the marzipan and tightly wrap it around the cake.

15. Trim off the the excess marzipan to create neat edges and leave the ends exposed so the  checked pattern can clearly be seen.

16. Serve!

image

You can find out more about Delicious Alchemy’s Gluten Free Magic Bake Off, including how to enter, on their website.

They also have 25% off their baking and bread mixes on their online shop until the 4th October 2016 to celebrate the start of GFMBO so you can stock up and get practicing your skills!

Gluten Free Buckwheat and Peanut Butter Flapjacks (No Oats)

Today I’m going share with you my Gluten Free Buckwheat and Peanut Butter Flapjack recipe.

image

I have been working on this recipe for a while, after a kind request from a friend who struggles to tolerate oats. The objective was simple: create a flapjack that looks and tastes like a traditional flapjack but that doesn’t contain any oats, not even gluten free ones.

I happily excepted the challenge because there are many Coeliacs who struggle to tolerate gluten free oats (despite the fact that they are considered to be okay) and there are many looking for an alternative that will work for them.

When I was looking for an oat subsitute I came across some gluten free Buckwheat flakes in my local health food shop; they are slightly paler in colour than oats but are similar in size and texture so I thought they would work well – If you think you can tolerate buckwheat then this recipe might be worth a shot.

It took a few attempts to get the recipe just right. The first attempt resulted in a flapjack that was so crumbly that I couldn’t even cut it into squares and the second attempt was a complete disaster when I accidentally over baked them and they turned out as hard as rocks – oops!

It was definitely third time lucky. The final attempt resulted in the perfect buttery, and chewy flapjack which didn’t crumble at the slightest touch – result!

image

I deviated slightly from the brief and used peanut butter which I know isn’t particularly traditional, but I love the flavour! If you’d prefer a more traditional flapjack or have a nut allergy you can miss out this ingredient and they will work just as well.

Free Buckwheat and Peanut Butter Flapjacks – (GF/EG/DF options)

Makes approximately 16 flapjacks

Ingredients

175g unsalted butter (or dairy free alternative)
2 tbsp crunchy peanut butter
2 tbsp golden syrup
150g soft brown sugar
300g buckwheat flakes

Method

1. Preheat the oven to 150 C/130 C fan/gas mark 2, then throughly grease and line a square tin (20cm x 20cm) with greaseproof paper.

2. Melt the butter in a large heavy bottomed pan over a medium heat. Once the butter has melted add the peanut butter, golden syrup and brown sugar then stir until the sugar has completely dissolved and you can no longer feel any grains scraping the bottom of the pan.

3. Add the Buckwheat flakes and mix until all the ingredients are fully combined. Spoon the mixture into the prepared tin, spreading it right into the corners and pressing it down flat with the back of a spatula.

4. Bake for about 20 to 25 minutes. The flapjack is ready when the top becomes a beautiful golden brown and is soft to touch – do not be tempted to bake it for longer; although the flapjack will seem too soft, it will firm up as it cools down.

5. Leave the flapjack to cool completely before cutting into squares (5cm x 5cm) – if you attempt to cut the flapjacks before they are properly cold they will crumble, so patience is definitely a virtue!

I hope you like this recipe and give it try!

If you want to keep up to date with my kitchen adventures you can find me on Instagram @titchyton or on my Facebook page.

Gluten Free Lemon Drizzle Cake

Last weekend I went to stay with my sister and her boyfriend up in Leeds and on a rather dull and grey sunday afternoon, we decided to bake a Lemon Drizzle cake.

image

My family are not coeliac or on a gluten free diet, but they are always happy to try and critique my gluten free cakes whenever I’m around and I’m happy to report that they think they taste just as good as normal cakes!

image

When I was little, my mum used to make the most delicious lemon flavoured Madeira cake and have I tried to create a gluten free version of her Madeira cake as the base of my Lemon Drizzle.

Here a few snaps of our afternoon:

Lemon Drizzle Cake – GF/DF options

Ingredients

For the cake:

175g caster sugar
175g butter, softened
225g gluten free self raising flour
1 tsp baking powder
3 large eggs
1 tbsp lemon zest from an unwaxed lemon
3 tbsp lemon juice

To decorate:
150g icing sugar
3 – 4 tsp lemon juice
Finely grated lemon zest

Method

1. Preheat oven to 170 C/150 C fan/gas mark 4 then grease and line a 2 lb loaf tin with greaseproof paper.

2. Sift together flour and baking powder then stir through lemon zest.

3. In a separate bowl, cream together the butter and sugar with an electric hand mixer until pale, light and fluffy. Add the eggs one at a time along with one tablespoon of the flour to stop the mixture from curdling.

4. Stir through the remaining flour and lemon juice and mix until all ingredients are fully combined.

5. Spoon the mixture into the prepared loaf tin, then bake for 50 – 55 mins minutes.

Insert a skewer into the middle of the cake to check if it’s cooked– if it comes out clean the cake is ready.

6. Allow the cake to cool in the tin for a few minutes, before turning it out on a wire rack to cool completely before decorating.

7. To make the icing: sift the icing sugar into a bowl, add the water slowly whilst stirring – the icing shouldn’t be too runny but should be spreadable.

8. Spread the icing over the top of the cake, allowing it drip down the sides.

To finish, sprinkle finely grated lemon zest across the top of the cake.

image