Gluten Free Strawberries and Cream Cheesecake Jars

It’s been a little too hot to bake recently, as here in the UK we’ve been experiencing a heatwave – I do like to see the sun out at last, but our country is not built to cope with heat… and neither are us Brits!

So, I’ve been eating a lot of lazy food; lots of salads (my particular favourite is a watermelon, cucumber and feta salad) and cured meats, like salami and prosciutto – basically anything that doesn’t involve standing in front of a hot stove.

I have been feeling a little sick of ice cream, so I wanted to come up with a quick, easy and refreshing no bake dessert to satisfy my sweet tooth.

My Gluten Free Strawberries and Cream Cheesecake Jars tick all the boxes – they take a matter of minutes to put together, there is no baking required and they don’t  need to be left to set.

IMG_5468

Strawberries are at their best right now and I absolutely adore them – but you could also use Raspberries or a mix of both if you prefer.

For the biscuit layer, I used Schär Gluten Free Digestive Biscuits – I prefer this brand because they are also free from oats, but you can use any kind of biscuits you like.

IMG_5473

These Cheesecake jars are best served right away, but they can be made ahead of time and popped in the fridge. They are also ideal for a picnic as they are portable – simply put the lids on and pop them in a cool bag to keep them fresh!

IMG_5471

Strawberries and Cream Cheesecake Jars – GF/EF

Makes 4 (depending on the size of your jars)

Ingredients

180g Philadelphia cheese, cold
330ml whipping cream
1 tsp vanilla extract
2 tablespoons icing sugar
150g gluten free digestive biscuits (I prefer ones by Schär, as they are also free from oats)
500g fresh strawberries, halved
Fresh mint to decorate

Method

1. Blitz the biscuits in a food processor (or crush them by hand) until they are the consistency of breadcrumbs.

2. In a large bowl, gently mix the cream cheese, icing sugar and vanilla extract together until combined. Add the whipping cream and whisk using a electric hand mixer until the ingredients form soft peaks.

3. Add a layer of the biscuit crumbs to the base of each jar, followed a layer of cream and a layer of strawberries. Repeat until the jars are full and top with mint leaves to decorate.

IMG_5474

I love seeing your take on my bakes, so remember to share your a picture of your Cheesecakes over on Facebook, twitter or Instagram using the hashtag #titchytonbakes.


Gluten Free Churros (Inspired by ‘The Great British Bake Off’)

Over the past week there has been an uproar over the news that the BBC has lost the rights to host ‘The Great British Bake Off’ and that as of the next series it’s new home will be channel 4, after they paid double the amount than the BBC had offered to take the show. Mel and Sue stepped down from hosting the show saying that they are ‘not going with the dough’ and today Mary Berry has also announced that she will be exiting the show, leaving fans worried about the future of their favourite programme  – it’s been more dramatic than series 5, when Ian dumped his Baked Alaska in the bin!

I, for one, am absolutely gutted that this is the end of Bake Off as we know it, but I have a huge amount of respect for Mel, Sue & Mary for not selling out. I don’t know whether I will continue to watch the show over on channel 4, but I am determined to enjoy every second of the current series, while it lasts.

To help cheer everyone up, today I’m going to share my Gluten Free Churros Recipe, inspired by the showstopper challenge from this year’s Batter Week.

image

Batter week saw the bakers tackle stuffed Yorkshire puds, delicate lacey Pancakes and a simple Spanish street food called Churros, out of which they were expected to create a spectacular showstopper.

To achieve perfect Churros the bakers were tasked with making a choux pastry like dough that would be soft enough to pipe, but firm enough to keep its distinctive shape during frying. The Churros also had to be crisp on the outside and cooked to perfection on the inside, so it was essential to get the oil at the right temperature otherwise you may end up with uncooked dough inside… oh, and they had to be uniform in size!

Last year I worked a lot on perfecting my gluten free choux pastry, so as I already had a recipe which I thought would work, I decided I would give Churros a try.

image

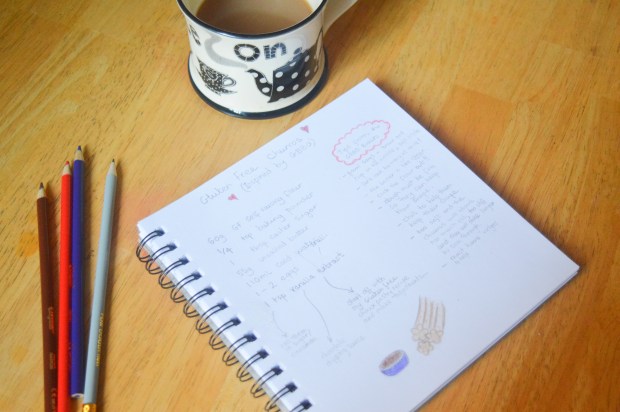
My Churros plan – does anyone else make notes whilst watching bake off?

It took a few attempts to find the perfect balance of ingredients. I made my first batch of dough following my gluten free choux pastry recipe, but the result was a dough that was slightly too soft – perfect for choux buns, but not stiff enough to keep its shape in hot oil.

My second batch was much better as I used less egg which helped to give the dough a much firmer consistency. I also discovered that the pinch of baking powder I’d added to my choux pastry recipe was not required for Churros as it made them puff up and split during frying.

Getting the oil to the right temperature without a deep fat fryer was tricky, although not impossible – it’s a good idea to do a few testers first and adjust the temperature accordingly. I also found I had better success piping the Churros straight into the pan (as opposed to piping them onto parchment paper) which is fine as long as you don’t mind them not being uniform!

I’m pleased to say that once I had ironed out all these issues, the result was Churros which were beautifully crispy and light and fluffy on the inside.

imageI recommend eating them fresh as they don’t keep all that well. I served mine with a rich chocolate dipping sauce and together I think they would make a fantastically unique dessert for a dinner party.

Gluten Free Churros with Chocolate Dipping Sauce – GF/DF options

Ingredients

For the Churros:

60g gluten free self-raising flour

1 tbsp caster sugar

55g unsalted butter (or dairy free alternative)

110ml cold water

1 egg

1/2 tsp vanilla extract

For the Churro coating:

1 tsp cinnamon

2 tbsp caster sugar

Plus 1-litre sunflower oil for frying the Churros.

For the chocolate dipping sauce:

100g good quality milk or dark chocolate (or dairy free alternative)

100ml double cream (dairy free alternative)

1 tbsp golden syrup

Method

1. Place a heavy-bottomed saucepan over a low to medium heat, then add the water, sugar and butter and bring the ingredients to a gentle simmer.

2. Once the butter has melted, remove the pan from the heat and quickly beat in the flour until all the ingredients come together in a smooth ball. It’s important to cook out all the flour, so if you can still see some flour keeping beating.

3. Transfer the dough to a large mixing bowl and beat it gently for a few seconds with a wooden spoon to help release some steam – this will help the mixture to cool down.

4. In small bowl whisk the egg to break up the yolk.

5. Once the pastry mixture is cool, add the vanilla extract and then the egg a bit at a time whilst beating with an electric hand mixer – don’t add the egg whilst the mixture is hot or you will end up with scrambled eggs!

6. At first the mixture will look a little bit lumpy but keep beating and adding the egg bit by bit until it becomes a smooth and stiff dough.

7. Transfer the mixture to piping bag fitted with a star nozzle then  place the dough in the fridge to chill for 15 minutes.

8. Meanwhile, slowly heat up the oil in a large saucepan over a medium to high heat while you make the chocolate sauce.

9. To make the chocolate dipping sauce, together the chocolate, cream and golden syrup slowly in a heatproof bowl over a pan of simmering water. Gently stir until all the ingredients together, then set aside the sauce to cool.

10. Once the dough has chilled, you can fry your churros – you’ll know the oil is ready when the surface starts to shimmer.

To double check the temperature of the oil, test a little bit of the mixture and adjust the heat accordingly. If it takes more than a few minutes for the dough to turn golden brown, your oil needs to be slightly hotter, but if the dough turns a deep golden brown after about 30 seconds it’s too hot and the oil needs to cool down slightly. The perfect Churros should be ready within 4 to 5 minutes and should be crispy.

Whatever you do, don’t leave leave the hot oil unattended at any point.

11. Pipe 3 to 4 Churros directly into the hot oil and use scissors to snip off each one. Don’t cook too many at once as this can reduce the temperature of the oil and your Churros will take longer to cook – the longer they take to cook means they are exposed to the oil for longer, this can make them soggy!

Fry each Churro for 4 to 5 minutes, turning them over occasionally with kitchen tongs to make sure they are cooked on all sides. Transfer them to kitchen paper to soak up any excess oil. Keep going until all the dough is used up.

12. Mix together your caster sugar and cinnamon, then roll each Churro in the mixture until they are coated.

13. Serve immediately accompanied with the chocolate dipping sauce.


Gluten Free Battenberg featuring Delicious Alchemy’s Gluten Free Vanilla Sponge Mix

There is less than a week until ‘The Great British Bake Off’ returns to our screens, and even though it’s been delayed slightly thanks to the Rio Olympics, I am no less excited to see what surprises lie in store this year.

The return of Bake Off means that Delicious Alchemy’s Gluten Free Magic Bake Off is also back for another year and to celebrate I’m going to share with you my Gluten Free Battenberg Cake which I made using Delicious Alchemy’s Vanilla Sponge Mix

image

image

Back in 2014 I entered Delicious Alchemy’s Gluten Free Magic Bake Off for a bit of fun with a Gluten Free Red Velvet Cake that I made for my sister’s birthday. I ended up making it to the final three bakers and although I didn’t win the overall competition, I was chuffed to bits to make it that far. I hadn’t been on a gluten free diet that long and it gave me the confidence boost I needed to start writing that gluten free food blog my friends were always nagging me to write… the very blog you’re reading now!

Regular readers of my blog will know that I am an enormous fan of Delicious Alchemy’s products, particularly their baking mixes and I always have a few stashed away in cupboard for emergencies just incase I need to whip up something super quick.

Their Gluten Free Vanilla Cake Mix is perfect for this Battenberg Cake as it makes the process much simpler – you need very few ingredients, whipping up the mixture for the sponge takes only a matter of minutes and the construction of the cake isn’t too daunting as long as you follow the instructions step by step!


image

My top tip when making a Battenberg Cake is to use food colouring which is bake stable – I recommend using either a gel or a paste as many liquid food colourings aren’t bake stable which means the sponge won’t retain its colour when baked.


Gluten Free Battenberg (GF/DF options)

Ingredients

You will need one packet of Delicious Alchemy Vanilla Sponge Mix (400g) spilt into two 200g portions.

Yellow Sponge:
200g Delicious Alchemy Gluten Free Vanilla Sponge Mix
100g softened butter (or dairy free alternative)
2 eggs
2 tbsp milk (or dairy free alternative)
A few drops of a yellow food colouring (make sure it’s bake stable)

Pink Sponge:
200g Delicious Alchemy Gluten Free Vanilla Sponge Mix
100g softened butter (or dairy free alternative)
2 eggs
2 tbsp milk (or dairy free alternative)
A few drops of pink food colouring (make sure it’s bake stable)

For assembling the cake:
400g ready to roll white marzipan
3 tbsp apricot jam

Method:

1) Preheat the oven to 180 degrees C/gas mark 4 then grease and line a square tin with baking paper.

To save time (and washing up) I decided to bake both sponges in the same tin. To do this, I made a divider out tin foil and placed it down the centre of tin. The divider should fit snuggly into the tin which and should be sturdy enough to stand up by itself. Make sure you grease the divider too so that you can remove the cake more easily.

3) Firstly make the yellow sponge: Place half (200g) of the Delicious Alchemy vanilla sponge mix in a large bowl with the butter, eggs and milk, then beat with a electric hand mixer for 15 seconds. Scrape down the sides of the bowl, add the yellow food colouring and mix for a further 10 – 15 seconds ensuring the food colouring is fully incorporated.

4) Next, make the pink sponge: Place the remaining half of the Delicious Alchemy vanilla sponge mix into a large bowl with the butter, eggs and milk, then beat with a electric hand mixer for 15 seconds. Scrape down the sides of the bowl, add the pink food colouring and mix for a further 10 – 15 seconds ensuring the food colouring is fully incorporated.

5) Carefully spoon the mixtures into the prepared tin ensuring the divider properly separates them.

6. Bake the sponges for 20 – 25 mins. Check the sponges are cooked by inserting a skewer into the middle of each sponge, if the skewer comes out clean then the sponges are ready.

7. Leave the sponges to cool in the tin for a moment and then transfer the cakes onto a wire rack to cool completely – If you attempt to assemble the cakes whilst they are still warm they will crumble.

8. Once your cake has cooled, trim the tops with a sharp knife or a cake wire to ensure they are flat and even in height.

9. Place the sponges on top of each other and trim the edges so that they are nice and neat.

10. Cut the sponges in half, straight down the middle so you are left with four long pieces of sponge.

11. Gently heat the jam in a pan or a microwave to make it easier to spread.

12. Take one of the yellow and one of the pink pieces of sponge, brush the top and sides lightly with the apricot jam then place them side by side. Brush the next two pieces of sponge with jam and then place them on top so that they create the iconic checked pattern.

13. Knead the marzipan in icing sugar until it becomes more pliable then roll it out into a large square which is longer than the length of the cake and wide enough to wrap around the cake.

14. Make sure the cake is evenly covered in apricot jam to ensure that the marzipan sticks to the sponge. Place the cake onto the marzipan and tightly wrap it around the cake.

15. Trim off the the excess marzipan to create neat edges and leave the ends exposed so the  checked pattern can clearly be seen.

16. Serve!

image

You can find out more about Delicious Alchemy’s Gluten Free Magic Bake Off, including how to enter, on their website.

They also have 25% off their baking and bread mixes on their online shop until the 4th October 2016 to celebrate the start of GFMBO so you can stock up and get practicing your skills!

Gluten Free Buckwheat and Peanut Butter Flapjacks (No Oats)

Today I’m going share with you my Gluten Free Buckwheat and Peanut Butter Flapjack recipe.

image

I have been working on this recipe for a while, after a kind request from a friend who struggles to tolerate oats. The objective was simple: create a flapjack that looks and tastes like a traditional flapjack but that doesn’t contain any oats, not even gluten free ones.

I happily excepted the challenge because there are many Coeliacs who struggle to tolerate gluten free oats (despite the fact that they are considered to be okay) and there are many looking for an alternative that will work for them.

When I was looking for an oat subsitute I came across some gluten free Buckwheat flakes in my local health food shop; they are slightly paler in colour than oats but are similar in size and texture so I thought they would work well – If you think you can tolerate buckwheat then this recipe might be worth a shot.

It took a few attempts to get the recipe just right. The first attempt resulted in a flapjack that was so crumbly that I couldn’t even cut it into squares and the second attempt was a complete disaster when I accidentally over baked them and they turned out as hard as rocks – oops!

It was definitely third time lucky. The final attempt resulted in the perfect buttery, and chewy flapjack which didn’t crumble at the slightest touch – result!

image

I deviated slightly from the brief and used peanut butter which I know isn’t particularly traditional, but I love the flavour! If you’d prefer a more traditional flapjack or have a nut allergy you can miss out this ingredient and they will work just as well.

Free Buckwheat and Peanut Butter Flapjacks – (GF/EG/DF options)

Makes approximately 16 flapjacks

Ingredients

175g unsalted butter (or dairy free alternative)
2 tbsp crunchy peanut butter
2 tbsp golden syrup
150g soft brown sugar
300g buckwheat flakes

Method

1. Preheat the oven to 150 C/130 C fan/gas mark 2, then throughly grease and line a square tin (20cm x 20cm) with greaseproof paper.

2. Melt the butter in a large heavy bottomed pan over a medium heat. Once the butter has melted add the peanut butter, golden syrup and brown sugar then stir until the sugar has completely dissolved and you can no longer feel any grains scraping the bottom of the pan.

3. Add the Buckwheat flakes and mix until all the ingredients are fully combined. Spoon the mixture into the prepared tin, spreading it right into the corners and pressing it down flat with the back of a spatula.

4. Bake for about 20 to 25 minutes. The flapjack is ready when the top becomes a beautiful golden brown and is soft to touch – do not be tempted to bake it for longer; although the flapjack will seem too soft, it will firm up as it cools down.

5. Leave the flapjack to cool completely before cutting into squares (5cm x 5cm) – if you attempt to cut the flapjacks before they are properly cold they will crumble, so patience is definitely a virtue!

I hope you like this recipe and give it try!

If you want to keep up to date with my kitchen adventures you can find me on Instagram @titchyton or on my Facebook page.

No Churn Raspberry and Mascarpone Ice Cream

After what has seemed like months of endless grey clouds and drizzle, the sun finally decided to grace the UK with its presence and Britain has just enjoyed a week of uncharacteristically warm weather, which some of us Brits are quite frankly not used to.

Despite the fact it has been uncomfortably hot at points, I have tried to make the most of the sunshine as it will be over all too soon and at the weekend I had my first (and probably last) barbecue of the year and made homemade ice cream.

image

When I think of summer one of the first things that pops into my mind is ice cream. When I was a little girl my dad worked as an ice cream man and the summer holidays consisted of playing outside with my sisters, endless supplies of ice cream and ice lollies and the occasional trip out in the ice cream van, if I was good!

So, I’m sure you’ll understand why the hot weather meant that I just had to have ice cream and what could be a more perfect excuse to make my own? It’s also surprisingly  easy – it’s a no churn recipe, so you don’t need an ice cream machine but an electric whisk is always a good idea.

When it came to choosing flavours, I decided to use mascarpone cheese as a nod to my Dad (he’s Italian so it seemed like the perfect ingredient) and raspberry which is a lovely sharp contrast to the creamy mascarpone – this recipe is incredibly versatile though, so you can go to town creating tonnes of interesting flavour combinations!

No Churn Mascarpone And Raspberry Ice Cream

For the Raspberry Sauce:
125g fresh raspberries
1 tbsp caster sugar
25 ml cold water

For the Ice Cream:
250g cheese mascarpone, room temperature
397g can sweetened condensed milk
600 ml double cream
1 tsp vanilla extract

Method: 

1. To make the raspberry sauce: place the raspberries, sugar and water into a food processor and blend to a puree. Push the purée through a sieve to remove the seeds then set it aside for later.

2. For the ice cream, soften the mascarpone cheese with an electric whisk until it is very soft, add the condensed milk and vanilla extract then whisk until the mixture is smooth. In a separate bowl, whisk the double cream until it forms soft peaks, gently fold through the condensed milk and mascarpone mixture without knocking too much volume from the cream, but ensuring that all the ingredients are combined.

3. Drizzle half of the raspberry sauce over the ice cream mixture but don’t fold it through. Spoon the mixture into a large freezable container and place in the freezer for at least 6 hours or overnight and refrigerate the remaining raspberry sauce.

4. Thaw the ice cream before serving with the remaining raspberry sauce.

Honey Roasted Chicken, Feta and Quinoa Salad with Sticky Sautéd Tomatoes

Today I’m going to share with you one of my most favourite creations, my Chicken, Feta and Quinoa Salad with Sticky Sautéd Tomatoes. This is a recipe which I come back to time and time again because it’s super easy to prepare and incredibly tasty.

image

I made this for my sister on her most recent trip to London, I had offered to make us both lunch and wanted to serve something more interesting than your usual lunchtime fodder.

Personally I think this salad ticks all the boxes. For a start, there is not a bland lettuce leaf in sight which instantly makes it infinitely more appealing. The base of my salad is made up of quinoa, a grain which is a fantastic source of protein and dietary fibre, and if prepared in the right way can be incredibly flavoursome.

The rest of the ingredients are far from boring, the chicken breast is roasted in sweet and sticky honey which contrasts wonderfully to the salty feta and refreshing cucumber, but without a doubt the absolute star of this dish is my sticky sautéd tomatoes which I am completely obesessed with – you’ll know why, once you’ve tried them!

The salad is topped off with a handful of pomegranate seeds and a bunch of parsley… I tried to get some leaves in there, somewhere!

Honey Roasted Chicken, Feta and Quinoa Salad with Sticky Sautéd Tomatoes – GF/EF

Serves 2 – 3 

For the Salad:
120g Quinoa, rinsed (I used a mix of white/black/red quinoa)
500ml water, brought to the boil
1 chicken stock cube
400g diced chicken breast
1 tbsp olive oil
2 tbsp honey
1/2 a cucumber, deseeded and chopped into half moon shapes.
50g Feta cheese
A bunch of fresh parsley
12 cherry tomatoes
1 tbsp red wine vinegar
1/2 tsp caster sugar
A handful of pomegranate seeds (optional)

For the Dressing:
Lemon juice
Olive Oil
Salt and Pepper to season

Method:

1. Preheat oven to 180 degrees C/160 fan/gas mark 4.

2. Coat the chicken in olive oil and honey, then season it with black pepper.

3. Bake the chicken in the preheated oven for 20 minutes. To check the chicken is cooked, make sure the meat is white and that no pink remains.

4. Whilst the chicken is cooking, place the quinoa into pan of boiling water and crumble over a stock cube. Stir and reduce the pan to simmer, then cook for 15 minutes until the quinoa is soft.

5. Drain quinoa and leave it cool slightly.

6. To make the sticky tomatoes: heat up a dash of olive oil in a frying pan over a medium heat. Add the cherry tomatoes and cook for a minute or two, until they start to become slightly wrinkly. Add the red wine vinegar and sugar, then stir to coat the tomatoes until they become sticky.

7. Serve your salad on a large serving plate. Start with the quinoa on the bottom, layer up the slices of cucumber, feta, chicken and tomatoes, then top with fresh parsley and pomegranate seeds.

8. Drizzle over olive oil and a squeeze of lemon. Season with black pepper and serve with wedge of lemon on the side.

image


Gluten Free Peanut Butter & Chocolate Chip Granola

It’s a well known fact that I love Peanut Butter and that I would put it in everything and anything, if I could!

In my opinion, granola is made infinitely better with the presence of peanut butter which not only delicious, but dairy free too. To make this granola recipe completely dairy free, just miss out the chocolate chips or use chunks of dairy free dark chocolate instead.

The recipe is easily adaptable, so you can change up the ingredients depending on what you fancy and it’s also lovely healthy way to start to the day, as the oats will give you that energy boost to get through until lunch time!

image

Gluten Free Peanut Butter Granola  – GF/DF/EF

Ingredients:
250g gluten free oats
3 tbsp Smooth Peanut Butter (preferably one containing only natural sugars)
1 tbsp Sunflower Oil
2 tbsp Maple Syrup
50g Dark Chocolate Chips (or dairy free alternative)
A handful of chopped unsalted peanuts

Method:

1) Preheat Oven to 180 C/160 C fan/gas mark 4.

2) In a large heavy bottomed pan mix the peanut butter, oil and maple syrup over a low heat, then add the oats and stir until combined.

3) Spread the oats into a thin layer across a baking tray lined with greaseproof paper, then scatter across the chopped peanuts.

4) Bake the mixture for 5 minutes, give the oats a a quick stir with a wooden spoon, then return them to the oven and to bake for a further 5 minutes or until golden brown.

5. Once the Granola has cooled completely, stir through the chocolate chips (optional).

If you want to keep up to date with my kitchen adventures you can find me on Instagram @titchyton or on my Facebook page.

Gluten Free Easter: Mini Egg Millionaire Shortbread

It doesn’t feel like two minutes since Christmas, but March is here, Easter is almost upon us and I’m excited to be sharing with you my first Easter recipe of the year – Gluten Free Mini Egg Millionaire Shortbread.

image
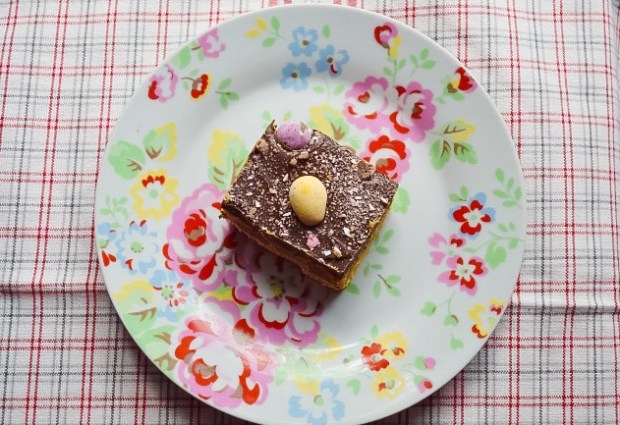
I’m rather obsessed with Millionaire Shortbread and Mini Eggs are quite possibly my favourite Easter confectionary, so I just had to put them together in a bake!
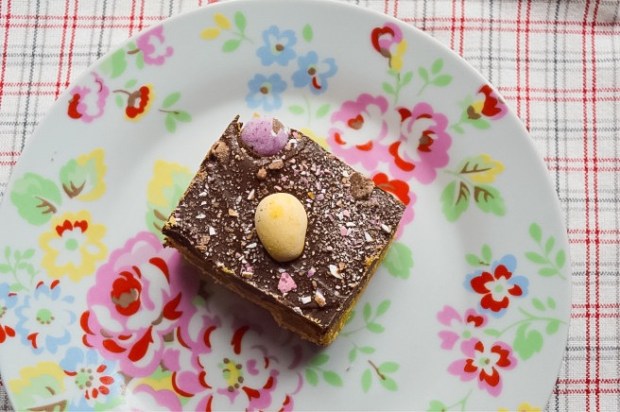
I don’t know what I’d do if Mini Eggs weren’t gluten free, but they do contain Maltodextrin, which whilst being a gluten free ingredient can sometimes prove troublesome for Coeliacs. There are a couple of supermarket alternatives out there, however, which don’t contain maltodextrin, including ‘Micro Easter Eggs‘ from Sainsbury’s and ‘Chicky Choccy Eggs’ from M&S. ‘Galaxy Golden Eggs‘ are also gluten free and would create and interesting finish.


This bake would make a lovely treat for the children after a busy Easter Egg hunt and is the perfect way to use up any left over Mini Eggs after Easter!

image

Ingredients

For the shortbread base:
275g gluten free self raising flour
175g unsalted butter, cut into cubes
100g caster sugar

For the caramel layer:
1 x 397g tin of condensed milk
100g unsalted butter
100g dark brown sugar

For the chocolate layer:
200g dark chocolate
100g milk chocolate

To decorate:
1 x bag of mini eggs

Method

1. Preheat oven to 160 degrees C/gas mark 3 then grease and line a 20 x 20 square tin with greaseproof paper.

2. To make the shortbread base, mix together the flour and sugar in large bowl, then rub in the butter until you are left with a breadcrumb like texture.

3. Start to bring mixture together with your hands until you have a smooth ball of dough.

4. Press the dough into the tin, smoothing it into an even layer that reaches the corners of the tin.

5. Bake for 25 – 30 minutes or until golden brown, then set it aside to cool whilst you make the caramel.

6. To make the caramel, place the butter into a large microwavable bowl and heat until melted. Add the sugar and give the ingredients a good mix until you can’t feel any grains of sugar on the bottom of the bowl – you may need to heat it again for another 30 seconds or so to encourage the sugar to dissolve throughly.

7. Add the condensed milk and heat for a further two minutes before whisking the ingredients throughly with a balloon whisk. Heat the caramel for a further 4 – 5 minutes, giving it a good whisk after each minute.

8. Drop a little bit of the caramel into a glass of cold water – if the mixture can be rolled into soft ball then it’s ready to be used, otherwise it may need another 30 seconds in the microwave.

9. Smooth the caramel in an even layer over the shortbread base, then leave to set.

10. For the chocolate layer, gently melt the chocolate in a heatproof bowl over a pan of simmering water. Pour the chocolate over the top of the shortbread and caramel layers and smooth out with a palate knife.

11. Decorate the top with mini eggs – I broke up a few mini eggs by bashing the bag with a rolling pin which I then scattered across the top – then leave to set before cutting into equally sized pieces.

image

There will be more Easter bakes coming up very soon, but in the meantime, you can keep up to date with my kitchen adventures on Instagram or on my Facebook Page.

UPDATE – Here in the UK Mini Eggs are definitely Gluten Free, but I’ve been informed that Mini Eggs in the US may contain gluten due to potential cross contamination risks during the manufacturing process.

Gluten Free Corn Tortillas Recipe

The art making of gluten free bread as always alluded me and unfortunately most of my attempts have ended in complete and utter disaster; so recently I’ve been trying to come of up with easy bread recipes to try and tackle my fear of making gluten free bread.

After a bit of thinking I thought that flatbreads would be a good place to start as they don’t need rise, eliminating many potential problems you find getting  gluten free bread to work – starting with flatbreads definitely made me feel much less daunted!

After a bit of research I decided to trying gluten free Tortilas after reading about an ingredient  called Masa Harina, a gluten free flour which is used in Mexico and South America to make Corn Tortillas.

image

Masa Harina is a type of cornflour, but it is very different from the cornflour you can buy in supermarkets here in the UK.

Masa Harina is made from corn kernels which have been soaked in limewater, this helps the corn to soften before it is ground into flour. As a result this flour can be made into a dough which is very malleable and easy to handle – Ideal for Tortillas!

So far, so good – the only problem is that Masa Harina is quite difficult to find here in the UK as it’s not readily available in supermarkets. I picked some up for £2.60 on my most recent trip to Borough Market, from Cool Chile Co who sell Mexican cooking supplies – good news for all you fellow Londoners, but if you live outside of London your best bet is to buy it online.

image

Making these Tortillas is incredibly simple – all you need to do is mix the flour with some water and a pinch of salt, then knead it into a dough.

I don’t own a Tortilla press so I rolled the dough into small balls and used a heavy pan to flatten them into round discs before frying them lightly on each side.

The Tortillas were strong enough to hold their filling and didn’t begin to disintegrate on contact with hot food, they were also pliable enough to be folded up properly.

image

I was very impressed with my first attempt at homemade Tortillas and was so happy to be able to try out an authentic and traditional way of making them without the stress of having to adapt the recipe to be gluten free!

They tasted amazing and I will definitely be making these again (despite the fact that getting hold of Masa Harina is a little difficult) because now I’ve tasted these these, I don’t think I could ever go back to shop bought!

Gluten Free Corn Tortillas Recipe
(Makes approximately 12 small Tortillas or 6 large Tortillas)

Gluten Free/Dairy Free/Egg Free

Ingredients:
150g Masa Harina (I used Co Chile Co Masa Harina Flour)
100ml cold water
Pinch of Salt

Method:

  1. In a large mixing bowl, mix the flour, salt and water until it comes together to form a soft dough that is not sticky or overly dry.
  2. If the dough is too dry, add slightly more water or if it’s too wet add more flour.
  3. Cover the dough and refrigerate for 10 – 15 minutes.
  4. Roll the dough out into 15 smalls balls (if you are making small tortillas) or 8 large balls.
  5. Use a Tortilla press to shape the the dough into flat discs. If you don’t own a tortilla press, place a ball of dough in-between two sheets of plastic wrap and use a heavy pan or plate to flatten them into shape.
  6. Place a lightly oiled frying pan over a high heat.
  7. Fry each Tortilla for about a minute on each side, then wrap them in a tea towel to stay warm until serving.

Gluten Free Rocky Road

During the dark and cold month of January, I am usually found seeking out delicious comfort foods to perk up my mood.

For me, nothing quite beats curling up on the sofa with a good book, a cuppa and slice of my Gluten Free Rocky Road, which is packed full of delicious sweet treats and is certain to banish those winter blues!

image


Most traditional Rocky Road recipes are not Gluten Free because they usually include biscuits, so instead of Biscuits I decided to use Nature’s Store Puffed Rice Cereal as a substitute. Puffed rice is 100% Gluten Free and a healthier option than biscuits as it contains no sugar. You can of course use Gluten Free Biscuits if you’d prefer, but I honestly prefer using puffed rice as it still provides crunch expected from Rocky Road.

This is recipe is wonderfully simple and so easily adaptable so if you fancy changing it up, why not use raisins or cranberries instead of cherries? It is also a no bake recipe (perfect if you are feeling a little bit lazy), simply pop it in the fridge and let the magic happen – what’s not to like?

Gluten Free Rocky Road – GF/DF/EF

Ingredients

300g milk or dark chocolate (or dairy free alternative)
125g butter, softened (or dairy free spread)
100g pink and white mini Marshmallows (plus an extra handful for the top)
75g glacé cherries cut in half
25g Rude Health Brown puffed rice
25g almonds
3 tbsp golden syrup

Icing Sugar to dust

Method

1) Grease and line a square tin with greaseproof paper.

2) Melt the chocolate in large heat proof bowl over a pan of simmering water.

3) In a separate pan melt together the butter and golden syrup, then add this to the melted chocolate and stir continuously until all the ingredients are combined.

4) Stir in the marshmallows, puffed rice, almonds and cherries until they are coated in a thick layer of the chocolate.

5) Pour the mixture into the prepared tin and use a greased palate knife to flatten down the mixture down and smooth it right to the corners of the tin.

6) Place a sheet of greaseproof paper on top of the mixture and press down firmly to help tightly pack the mixture into into the tin. Peel off the greaseproof paper and dot across the extra marshmallows.

7) Chill the Rocky Road in the fridge for at least two hours.

8) Use the greaseproof paper to help remove the slab of Rocky Road from the tin, then carefully cut it into equal pieces.

9) Lightly dust the Rocky Road with a little icing sugar and  enjoy!

Rocky Road should keep for up to a week stored in an airtight container, or you can keep it in the fridge if your home is a little warm.

image

If you want to keep up to date with my kitchen adventures on instagram, you can find me @titchyton.