Gluten Free Easter: Carrot Cake Recipe

Today, I’m going to share with you my Gluten Free Carrot Cake Recipe – perfect for those of you who aren’t too keen on chocolate but still want something sweet to celebrate the Easter weekend.  
image

I love Carrot cake, and whilst it isn’t necessarily thought of as a traditional Easter bake, I really can’t think of a better time of year to enjoy it. After all… Easter, Spring, Bunnies… it all makes sense really!

image

This cake is really quite simple to make and keeps really well –  In fact, it tasted as good, if not better a few days later. It can also be kept at room temperature, although, if your house is a bit warm it may be best kept in the fridge.

Carrot Cake with Cream Cheese Frosting – GF

Ingredients

For the cake:
300g gluten free self raising flour
1 tsp baking powder
1 tsp bicarbonate of soda
2 tsp ground cinnamon
1 tsp ground ginger
200g grated carrots
50g walnuts, roughly chopped
175g light brown sugar
1 tbsp maple syrup
150ml sunflower oil
3 large eggs

For the frosting:
2 x 180g tub philadelphia cheese
1 x 250g tub mascarpone cheese
4 tbsp icing sugar, sifted
1 tsp vanilla extract

Plus decorations, I used these House of Cake Carrot Sugar Decorations from Sainsbury’s.

Method:

1. Preheat the oven to 180 C/160 C fan/gas mark 4 and grease and line a round 7″ tin with greaseproof paper.

2. In a large bowl, sift together the flour, baking powder, bicarbonate of soda and spices, then stir through the grated carrots and chopped walnuts.

3. In a separate bowl, whisk together the eggs, sugar, sunflower oil and maple syrup, then add this to the dry ingredients, mixing until the ingredients are just combined.

4. Spoon the ingredients into the prepared tin and then bake for 50 – 55 minutes or until a skewer inserted through the middle comes out clean.

5. Remove the cake from the tin and leave to cool completely before assembling. `

6. For the frosting, gently mix together the Philadelphia, Mascarpone and vanilla extract then gently fold through the icing sugar.

7. Carefully cut the cake into two halves using a sharp knife or cake cutting wire.

8. Place the base of the cake onto a serving plate, cover it with and even layer of frosting then place the second piece of cake on top. Spread remaining frosting across the top using a palate knife and finish off the cake with your chosen decorations.

I hope you have a wonderful Easter weekend. If you are looking for any more Easter baking inspiration why not check out my Gluten Free Mini Egg Ice Cream recipe which can be found over on The Daily Spectacle website. It’s a no churn recipe and it can be prepared ahead – the perfect dessert for Easter Sunday Lunch.

image
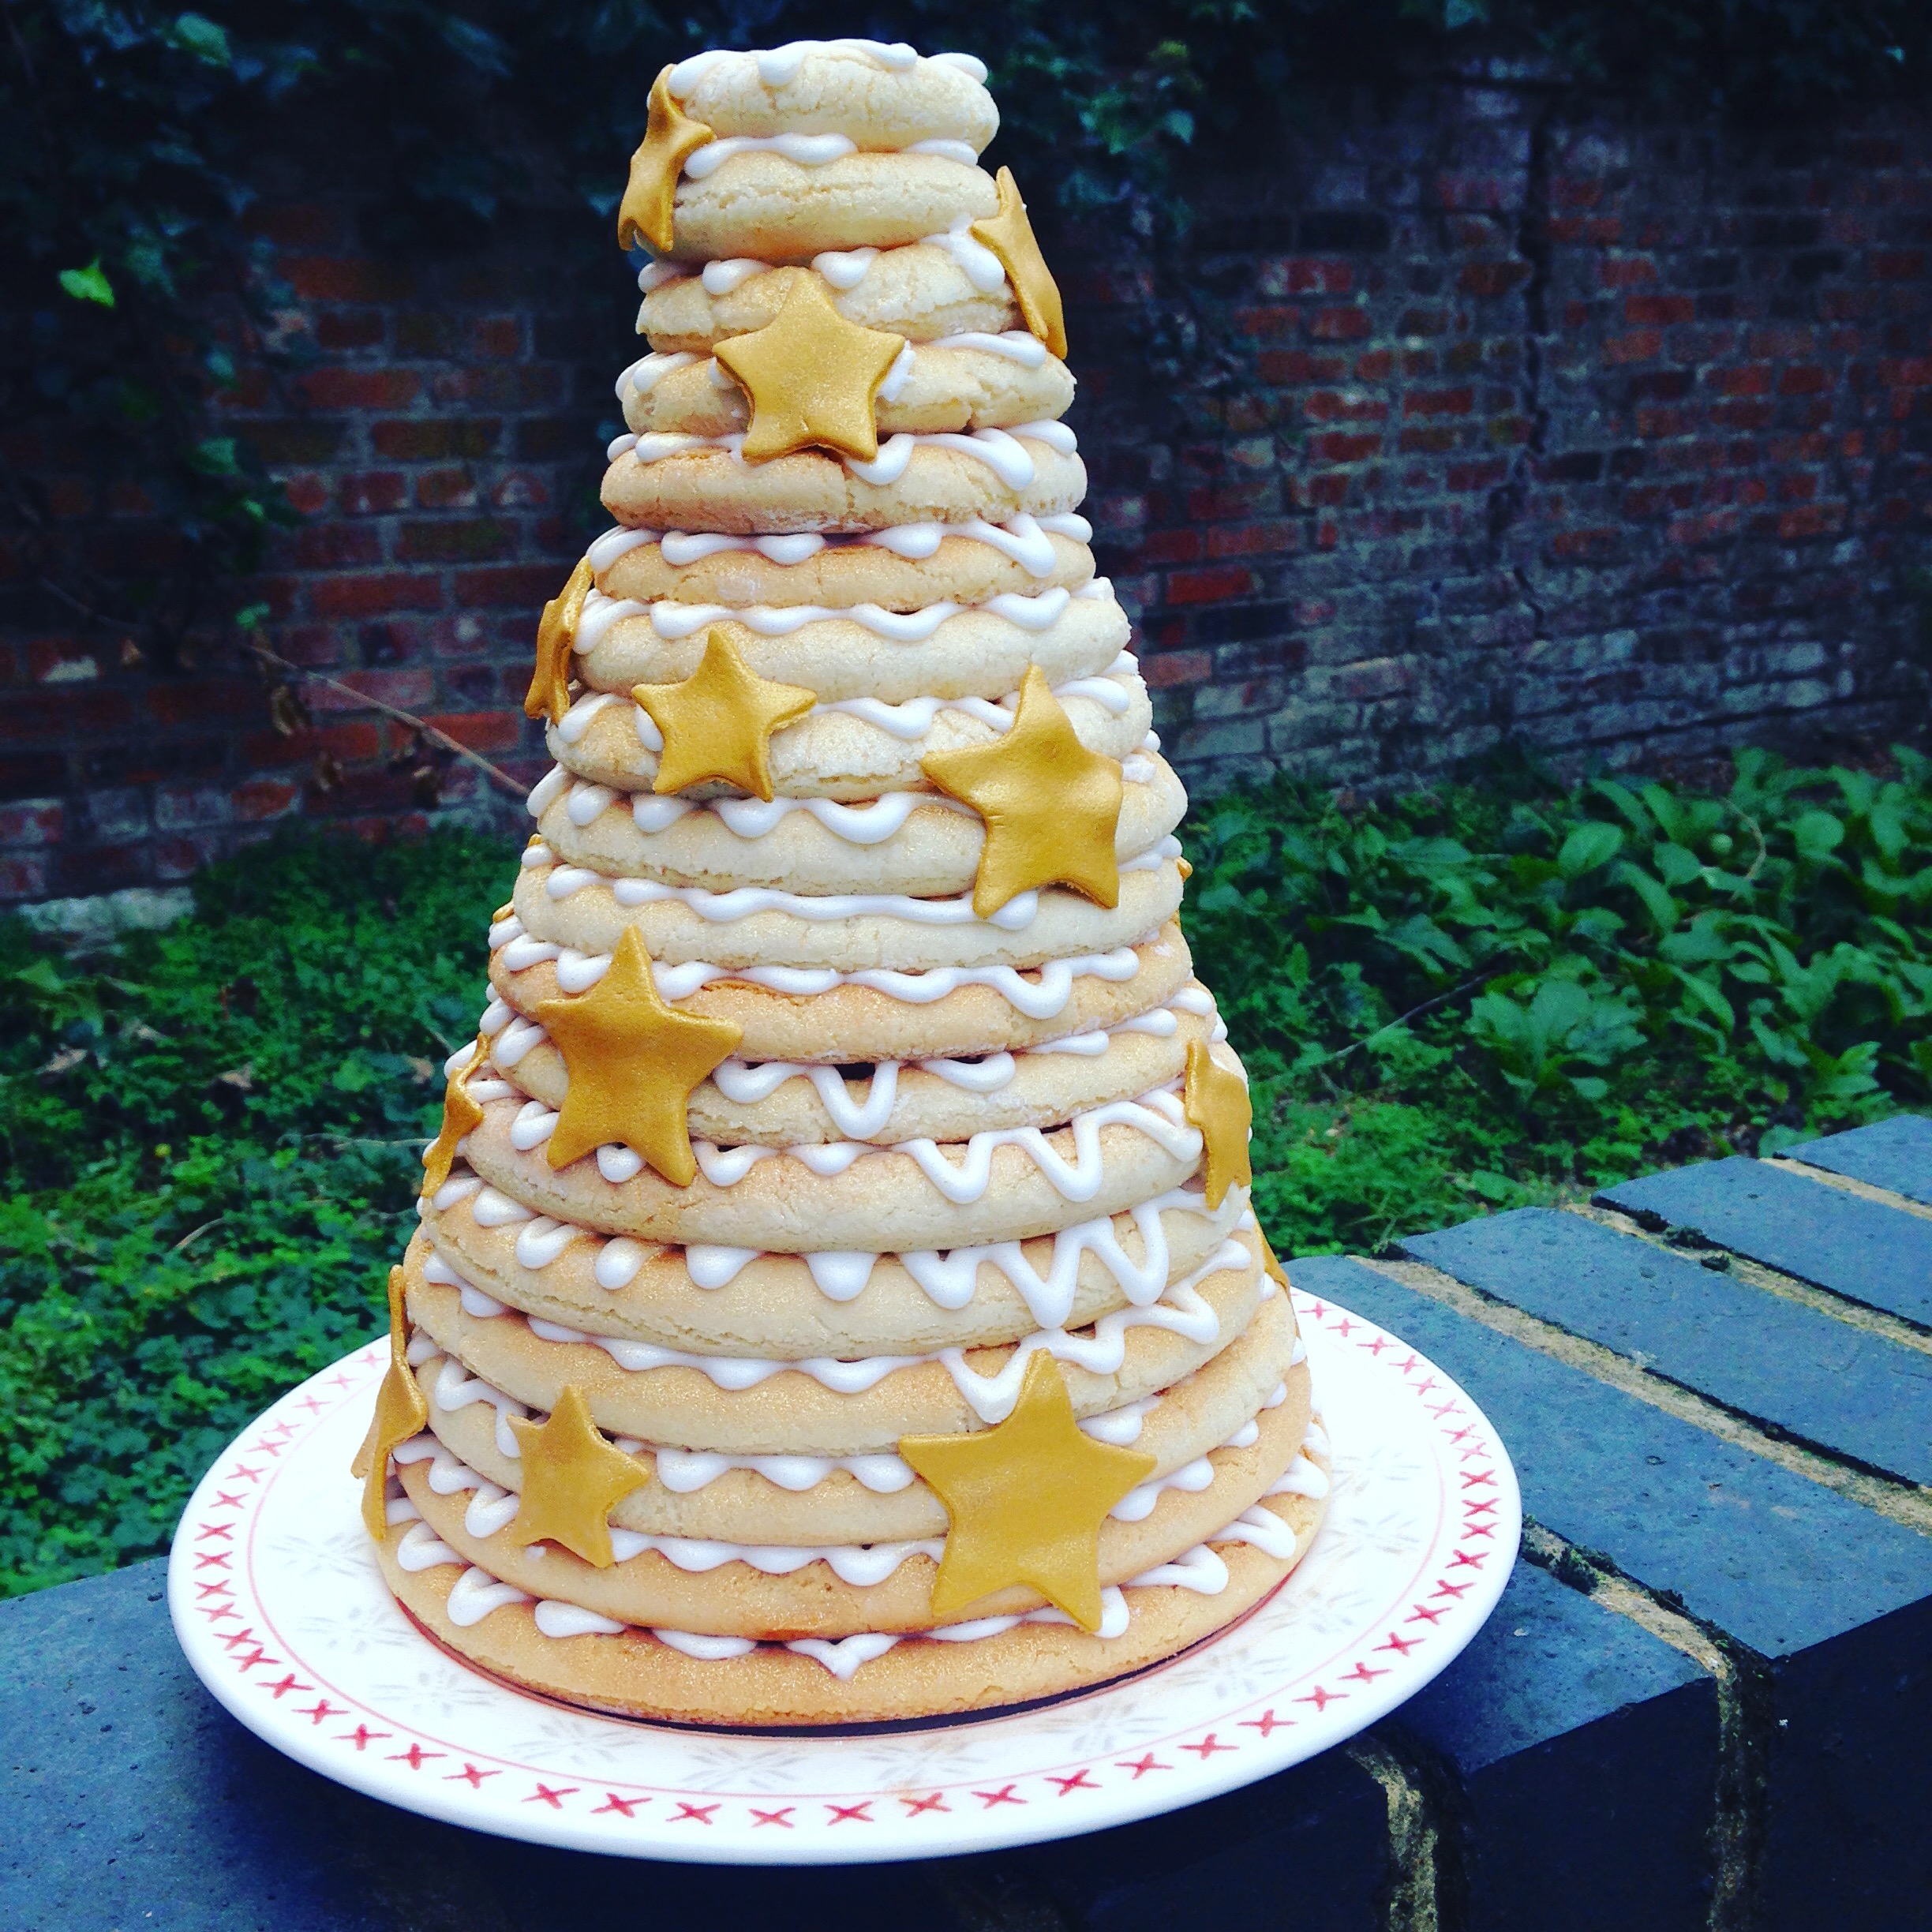
There are lots of other Easter recipes for you to try here on my blog too, including my Mini Egg Millionaire Shortbread, Chocolate Nest Cupcakes and Easter Sugar Cookies or you can see what else I get up to over the Easter weekend over on my Instagram or Facebook Page.


Gluten Free Easter: Mini Egg Millionaire Shortbread

It doesn’t feel like two minutes since Christmas, but March is here, Easter is almost upon us and I’m excited to be sharing with you my first Easter recipe of the year – Gluten Free Mini Egg Millionaire Shortbread.

image
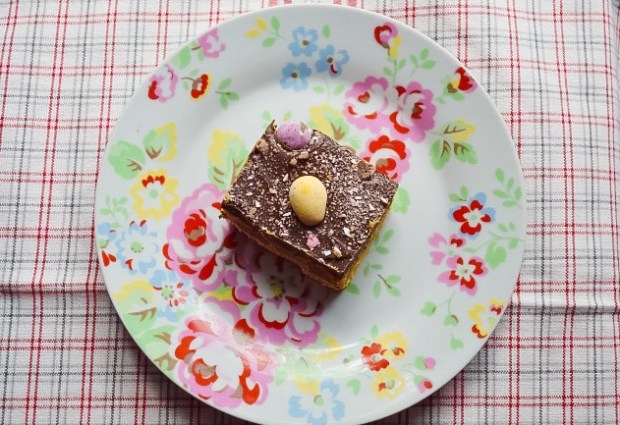
I’m rather obsessed with Millionaire Shortbread and Mini Eggs are quite possibly my favourite Easter confectionary, so I just had to put them together in a bake!
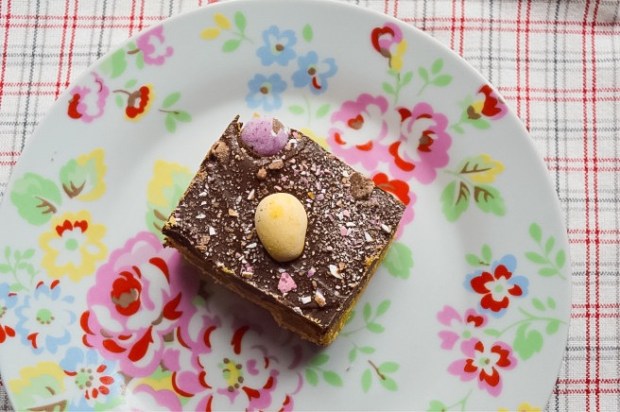
I don’t know what I’d do if Mini Eggs weren’t gluten free, but they do contain Maltodextrin, which whilst being a gluten free ingredient can sometimes prove troublesome for Coeliacs. There are a couple of supermarket alternatives out there, however, which don’t contain maltodextrin, including ‘Micro Easter Eggs‘ from Sainsbury’s and ‘Chicky Choccy Eggs’ from M&S. ‘Galaxy Golden Eggs‘ are also gluten free and would create and interesting finish.


This bake would make a lovely treat for the children after a busy Easter Egg hunt and is the perfect way to use up any left over Mini Eggs after Easter!

image

Ingredients

For the shortbread base:
275g gluten free self raising flour
175g unsalted butter, cut into cubes
100g caster sugar

For the caramel layer:
1 x 397g tin of condensed milk
100g unsalted butter
100g dark brown sugar

For the chocolate layer:
200g dark chocolate
100g milk chocolate

To decorate:
1 x bag of mini eggs

Method

1. Preheat oven to 160 degrees C/gas mark 3 then grease and line a 20 x 20 square tin with greaseproof paper.

2. To make the shortbread base, mix together the flour and sugar in large bowl, then rub in the butter until you are left with a breadcrumb like texture.

3. Start to bring mixture together with your hands until you have a smooth ball of dough.

4. Press the dough into the tin, smoothing it into an even layer that reaches the corners of the tin.

5. Bake for 25 – 30 minutes or until golden brown, then set it aside to cool whilst you make the caramel.

6. To make the caramel, place the butter into a large microwavable bowl and heat until melted. Add the sugar and give the ingredients a good mix until you can’t feel any grains of sugar on the bottom of the bowl – you may need to heat it again for another 30 seconds or so to encourage the sugar to dissolve throughly.

7. Add the condensed milk and heat for a further two minutes before whisking the ingredients throughly with a balloon whisk. Heat the caramel for a further 4 – 5 minutes, giving it a good whisk after each minute.

8. Drop a little bit of the caramel into a glass of cold water – if the mixture can be rolled into soft ball then it’s ready to be used, otherwise it may need another 30 seconds in the microwave.

9. Smooth the caramel in an even layer over the shortbread base, then leave to set.

10. For the chocolate layer, gently melt the chocolate in a heatproof bowl over a pan of simmering water. Pour the chocolate over the top of the shortbread and caramel layers and smooth out with a palate knife.

11. Decorate the top with mini eggs – I broke up a few mini eggs by bashing the bag with a rolling pin which I then scattered across the top – then leave to set before cutting into equally sized pieces.

image

There will be more Easter bakes coming up very soon, but in the meantime, you can keep up to date with my kitchen adventures on Instagram or on my Facebook Page.

UPDATE – Here in the UK Mini Eggs are definitely Gluten Free, but I’ve been informed that Mini Eggs in the US may contain gluten due to potential cross contamination risks during the manufacturing process.

Gluten Free White Chocolate and Raspberry Muffins

February has been such an incredibly busy month for me, so I’ve very little time to sit down and get this blog written, but I promise I’ve not been neglecting you!

In fact, I’ve been working on perfecting one of my favourite bakes and I’m really excited to finally be able to share with you my recipe for Gluten Free White Chocolate and Raspberry Muffins!

image

In the past I’ve struggled to bake the perfect gluten free muffins – often they don’t rise enough or the texture is more like that of a cupcake rather than a muffin, which are supposed to have a much denser texture as opposed to being light and fluffy.  

After a bit of trial and error I have come up with a recipe which I think ticks all the right boxes; the texture was exactly right and the muffins rose enough to create that classic muffin look.

Here are a few golden rules to abide by if you want perfect gluten free muffins:

1. Mix the dry ingredients separately to the wet ingredients – This helps to make sure that the raising agents are evenly distributed throughout the mixture.

2. Don’t over mix the batter – Because of the lack of gluten we need something to make the muffins rise, so don’t over work the batter as this can cause the raising agents to work less affectively. Stir the ingredients until just combined and don’t worry about any lumps.

3. Use the right amount of raising agents – I found that baking powder alone wasn’t enough so I also used a small amount of bicarbonate of soda – but don’t use too much or it can leave an unpleasant flavour.

4. Keep chocolate chips in the fridge until you need them – This simple trick stops the chocolate chips melting in the oven and helps them to retain their shape.

image

My muffins have an added twist, in that they have a raspberry jam centre but you could use fresh raspberries, if you prefer!

image

Raspberry and White Chocolate Muffins – GF/DF options
Makes 8

Ingredients:
300g gluten free self raising flour
1 tsp baking powder
1/2 tsp bicarbonate of soda
150g caster sugar
2 large eggs
75 ml sunflower oil
200ml milk (or dairy free alternative)
1 tsp vanilla extract
100g white chocolate chips, refrigerated (or dairy free alternative)
8 tsp raspberry jam

Method:

1. Preheat the oven to 180 C/160 C/gas mark 4 and line a muffin tin with 8 muffin cases.

2. In a large bowl, sift together the flour, baking powder and bicarbonate of soda.

3. In separate bowl, whisk together eggs, sugar, oil, milk and vanilla extract until combined then add this to the dry ingredients.

4. Gently mix the ingredients together until they form a batter which is only just combined (don’t worry too much if there are any lumps), then stir through the chocolate chips.

5. Spoon approximately 1 and a half tablespoons of batter into each case, followed by a teaspoon of jam then fill the muffin cases with a further tablespoon of batter, ensuring the jam is fully covered.

6. Bake the muffins for 25 minutes, until golden brown.

7. Leave to cool on a wire rack before serving.

Gluten Free Scones Recipe

Scones have always been one of my  favourite bakes. They were the very first thing I was taught to bake at school and are a good bake for baking beginners.

image

I used to have a little trouble making good gluten free scones – the end result would often be quite crumbly and couldn’t get them to rise like I wanted.

I’ve discovered that an egg and a little milk is required to help bind the ingredients together – making the dough ever so slightly wetter than normal (but not sticky) helps to ensure that the scones don’t dry out during baking.

Possibly the most important tip is not to roll the dough out too thin, otherwise your scones will end up rather flat –  start off with a little height (at least 3cm) and you’ll end up with nice tall scones.

I chose to make some of the scones with glacé cherries and some without – feel free to leave them out if you’re not a fan, but if you do use cherries, make sure you wash the syrup off them as they can make the scones a bit soggy in places!

image


Scones – GF/DF options
Recipe makes approximately 6 – 8 Scones.

Ingredients:
250g gluten free self raising flour
1 tsp big powder
75g butter, unsalted (or dairy free alternative like Stork Baking Block)
40g caster sugar
75ml milk (or dairy free alternative)
2 eggs (one for glazing)
50g glacé cherries, chopped and rinsed (optional)

Method:
1) Preheat the oven to 220 C/200 fan C/gas mark 6.

2) In a large bowl, sift together the flour, baking powder and a pinch of salt.

3) Rub together the butter and flour mixture until you have a breadcrumb like texture, then stir through the sugar.

4) Add an egg and start to bring the mixture together using a wooden spoon.

5) Add the milk bit by bit (you might not need it all) and use your hands to bring the mixture together in a smooth dough.

6) Lightly dust a work surface with flour then roll out the dough to about 3 cm thick – don’t roll out the dough too flat or you will have very flat scones!

7) Cut the scones out with 6cm flutted scone cutter. Place the scones on a baking tray lined with greaseproof paper then lightly brush each one with beaten egg.

8) Bake the scones in a preheated oven for 12 to 15 minutes, until golden brown.

9) Leave the scones to cool on a wire rack before serving with jam and clotted cream!

image

If you want to keep up to date with my kitchen adventures you can find me on Instagram @titchyton or on my Facebook page.

Gluten Free Corn Tortillas Recipe

The art making of gluten free bread as always alluded me and unfortunately most of my attempts have ended in complete and utter disaster; so recently I’ve been trying to come of up with easy bread recipes to try and tackle my fear of making gluten free bread.

After a bit of thinking I thought that flatbreads would be a good place to start as they don’t need rise, eliminating many potential problems you find getting  gluten free bread to work – starting with flatbreads definitely made me feel much less daunted!

After a bit of research I decided to trying gluten free Tortilas after reading about an ingredient  called Masa Harina, a gluten free flour which is used in Mexico and South America to make Corn Tortillas.

image

Masa Harina is a type of cornflour, but it is very different from the cornflour you can buy in supermarkets here in the UK.

Masa Harina is made from corn kernels which have been soaked in limewater, this helps the corn to soften before it is ground into flour. As a result this flour can be made into a dough which is very malleable and easy to handle – Ideal for Tortillas!

So far, so good – the only problem is that Masa Harina is quite difficult to find here in the UK as it’s not readily available in supermarkets. I picked some up for £2.60 on my most recent trip to Borough Market, from Cool Chile Co who sell Mexican cooking supplies – good news for all you fellow Londoners, but if you live outside of London your best bet is to buy it online.

image

Making these Tortillas is incredibly simple – all you need to do is mix the flour with some water and a pinch of salt, then knead it into a dough.

I don’t own a Tortilla press so I rolled the dough into small balls and used a heavy pan to flatten them into round discs before frying them lightly on each side.

The Tortillas were strong enough to hold their filling and didn’t begin to disintegrate on contact with hot food, they were also pliable enough to be folded up properly.

image

I was very impressed with my first attempt at homemade Tortillas and was so happy to be able to try out an authentic and traditional way of making them without the stress of having to adapt the recipe to be gluten free!

They tasted amazing and I will definitely be making these again (despite the fact that getting hold of Masa Harina is a little difficult) because now I’ve tasted these these, I don’t think I could ever go back to shop bought!

Gluten Free Corn Tortillas Recipe
(Makes approximately 12 small Tortillas or 6 large Tortillas)

Gluten Free/Dairy Free/Egg Free

Ingredients:
150g Masa Harina (I used Co Chile Co Masa Harina Flour)
100ml cold water
Pinch of Salt

Method:

  1. In a large mixing bowl, mix the flour, salt and water until it comes together to form a soft dough that is not sticky or overly dry.
  2. If the dough is too dry, add slightly more water or if it’s too wet add more flour.
  3. Cover the dough and refrigerate for 10 – 15 minutes.
  4. Roll the dough out into 15 smalls balls (if you are making small tortillas) or 8 large balls.
  5. Use a Tortilla press to shape the the dough into flat discs. If you don’t own a tortilla press, place a ball of dough in-between two sheets of plastic wrap and use a heavy pan or plate to flatten them into shape.
  6. Place a lightly oiled frying pan over a high heat.
  7. Fry each Tortilla for about a minute on each side, then wrap them in a tea towel to stay warm until serving.

Gluten Free Christmas: Kransekake Recipe

For me, every Christmas table should have a showstopper, something extra special which makes the family go “Wow!”

I don’t know about you, but I don’t think there is anything more show stopping than the towering Kransekake Cake which would look simply spectacular at the centre of any Christmas dinner table!
IMG_0393
The Kransekake is a traditional Scandinavian cake which is often served at special occasions including weddings and Christmas celebrations. It consists of 18 almond flavoured rings which are stacked on top of each other to form an impressive tower – If you’re a Marzipan fan, you’ll love this cake!

12360078_984881254917308_60926301423683865_n My Kransekake Design

Although it looks very impressive, it’s actually quite straight forward to make! The rings are made from a dough consisting of ground almonds, icing sugar and egg whites which is shaped to fit Kransekake moulds which can be found at Lakeland.

Kransekake Cakes are usually gluten free, although dough is sometimes rolled out in Semolina flour which is not suitable for Coeliacs. For my Kransekake cake, I rolled the dough out in Cornflour instead of Semolina.
image1-4
Gluten Free Kransekake Recipe – GF/DF

Recipe inspired by Paul Hollywood’s Recipe from ‘The Great British Bake Off’

Ingredients
500g ground almonds, plus cornflour for dusting
500g icing sugar
4 egg whites
1 tsp almond extract
sunflower oil spray

For the Decoration:
2 egg white
500g icing sugar
edible spray glitter
fondant stars (optional)

You will also need 6 Kransekake Moulds (I bought mine from Lakeland)

Method

1. In a large bowl mix together the ground almonds and icing sugar.

2. Add the egg whites and almond extract, then using your hands work the ingredients into a smooth ball of slightly sticky dough.

3. Chill the dough in the fridge for at least two hours.

4. Preheat the oven to 200 C/180 C Fan/gas mark 6.

5. Spray the Kransekake moulds with oil and dust them generously with cornflour.

6. Dust a work surface with cornflour and split the dough into 6 equally sized pieces.

7. Split one of the pieces of dough into three different sized pieces: one large, one medium and one small.

8. Roll the balls of dough out into pieces which are approximately a finger-width and long enough to wrap round the Kransekake moulds.

9. Place the first piece into the Kransekake mould and pinch the ends together. Repeat with all the other pieces until all the moulds are filled.

10. Place the moulds onto a baking tray and bake for 10 minutes or until golden brown.

11. Remove the Kransekake rings from the oven and allow them to set in their moulds – if you try to remove them while they are warm they will break! Once the Kransekake are cool remove them from their moulds and set them aside while you make the icing.

12. To make the Royal Icing, place the egg whites in a bowl and slowly sift in the icing sugar in batches. In between each batch of sugar stir the icing with a wooden spoon or a balloon whisk until the icing thickens up.

13. Spoon the icing into a piping bag fitted with a small round writing nozzle.

14. Before you begin to decorate, sort the rings out into size order.

15. Place the largest ring onto your serving plate (you could use a bit of icing to adhere it to the plate and stop it from slipping around). Pipe a zig-zag pattern onto the ring and place the second largest ring on top. Repeat until all the rings have been neatly stacked.

16. To finish, spray the Kransekake with edible spray glitter. I made mine extra special by covering it in gold stars made from fondant icing.

I hope you all enjoy the Christmas season and have a go at my Christmas recipes this year, which also include my Gluten Free Gingerbread Cookies which I posted last Christmas, my Hazelnut Cranberry and Orange Biscotti and my Cointreau Christmas Cake.
DSC_0020
I am taking a well deserved Christmas break, but I will be back in the New Year with plenty more gluten free recipes for you all to try.  In the meantime, why not check out my out my Instagram page or my Facebook page to see what else I get up to over Christmas!

Wishing you all a very Merry Christmas and a Happy New Year!  xxx

Gluten Free American Style Chocolate Chip Cookies

Today I’m really excited to share with you my recipe for Gluten Free American Style Chocolate Chip Cookies!
image2-2
I’ve been having really bad cookie cravings since I caught a whiff of freshly baked cookies wafting out from Millie’s Cookies while I was walking around Westfield a few weeks ago…

I know you can buy gluten free cookies from the supermarket, but they’re not the same! You might think I am being picky, but supermarket versions are rather chunky and crunchy, not soft and chewy like the ones you can buy freshly made from bakeries.

I decided the only thing for it was to make my own and although I haven’t had a proper cookie in over three years, these cookies are exactly like what I remember! They have a slightly crunchy outside and a lovely soft and chewy centre bursting with chocolate chips.
image1
The trick to making the best chocolate chip cookies to make sure you don’t over bake them. I accidentally over baked the first few which made them a bit too hard, but if you take them out of the oven while they are still quite soft and leave them to set on the baking tray your cookies will retain their chewy centre.

Gluten Free American Style Chocolate Chip Cookies – GF/DF options

Ingredients
175g gluten free self raising flour
100g rice flour
2 tsp cornflour
A pinch of salt
150g butter, melted (or dairy free alternative like Stork Baking Block)
125g caster sugar
75g light brown sugar
2 tsp vanilla extract
2 egg yolks
1 tbsp milk
150g milk or dark chocolate chips (or dairy free alternative)

Method

1. In a large bowl, mix together the flours and the sugar.

2. Add the melted butter, vanilla extract, egg yolks and milk. Mix until all the ingredients are combined then fold through the chocolate chips.

3. Wrap the cookie dough in cling film, then chill the dough in the fridge for a few hours until it has firmed up.

4. Heat oven to 180 C/160 fan/gas mark 3.

5. Line two large baking trays with baking parchment.

6. Separate the dough into pieces that weigh approximately 35g each and roll each one into a ball shape.

7. Place the balls of dough on the prepared baking trays making sure you leave room for the cookies to spread out as they bake.

8. Bake the cookies for 12 – 15 minutes. The cookies should be golden brown and will remain quite soft – don’t be tempted to bake them for longer.  If the cookies have puffed up a bit, gently press them down with your fingers a few times towards the end of the bake so you don’t end up with cookies which are too dense and cake like.

9. Leave the cookies to firm up on the baking tray then carefully transfer them to a wire rack to cool completely.
image2
Tis almost the season to be jolly, so I will have plenty of Christmas recipes coming real soon. In the meantime, come and follow me over on Instagram or Facebook to see what else I’m getting up to!

Gluten Free Ginger Cake

Autumn is here and as the weather turns colder I look forward to all the flavours the new season has to offer. Gone are the summer fruits, in are the wintery comfort foods and what could be more comforting than slice of warm and spicy ginger cake?

image

In my opinion, comfort food should be as fuss free and simple to achieve as possible. My ginger cake recipe is exactly that and requires no advanced techniques – simply mix the ingredients together and bake!

This cake certainly packs a punch and has a very strong spicy ginger flavour, so feel free to use less ginger if you’d prefer a milder flavour.

image 
Ginger Cake – GF/DF options

Ingredients:
200g gluten free self raising flour
200g light brown sugar
2 – 3 tsp ground ginger
1 tsp bicarbonate of soda
55g unsalted butter, melted (or dairy free alternative)
2 large eggs
1 tbsp golden syrup
1 tbsp black treacle
100ml strong black tea, cooled

Method:

1. Preheat the oven to 180 C/160 C fan/gas mark 4 then grease and line a 2lb loaf tin with baking parchment.

2. In a large bowl: Mix together the flour, sugar, ginger and bicarbonate of soda.

3. In a separate bowl: whisk together the eggs, golden syrup and treacle.

4. Make a well in the centre of the ingredients, add the egg mixture, melted butter and tea then mix until you are left with a smooth and lump-free batter.

5. Pour the mixture into the prepared loaf tin. Bake for 30 – 35 minutes, when the cake is done it should be firm to touch.

6. Turn the cake out onto a wire rack and leave to cool before serving.

image

This cake matures really well and tastes even better after a day or two. If you can wait, wrap your cake in some greaseproof paper and store it in an air tight container for at least 12 hours before you tuck in – the longer you leave his cake, the sticker it gets! This cake will be at it’s best for at least 5 days and keeps for up to 7 days, if stored properly in an airtight container.