Gluten Free Rhubarb and Apple Crumble with Homemade Custard

The UK has been experiencing a bit of a cold snap over the last week and as temperatures have continued to plummet I have found myself drawn to warming comfort foods.

Although it is not quite peak-rhubarb season until about April, rhubarb is available as early as February and I recently spotted some beautiful pink rhubarb at my local fruit and veg stall which made my mouth water. I think people often don’t know what to do with rhubarb, but one of the simplest ways to cook it is in a crumble – and you can’t really go wrong with the classic combination of Rhubarb and Apple.

crumble 4

For most recipes, it is essential to sweeten rhubarb with a little sugar, but not so much that it begins to lose all its sharpness. If cooked properly, rhubarb should be that perfect balance between sweet and sour – be careful too, not to cook the rhubarb for too long as it can lose it shape become mush.

Crumble

I topped my crumble with gluten free oats, but if you struggle to tolerate gluten free oats, you could try buckwheat flakes, quinoa flakes or flaked almonds instead.

Gluten Free Rhubarb and Apple Crumble with Homemade Custard Ingredients – GF/DF options

For the filling:
400g pink rhubarb, cut into thumb size pieces
300g Bramley apples, peeled and sliced
100g caster sugar

For the crumble topping:
75g unsalted butter (or dairy free butter)
250g all-purpose gluten free flour (I used Schär All Purpose Baking Mix)
50g caster sugar
A handful of gluten free oats, buckwheat flakes, quinoa flakes or flaked almonds

Custard:
1 tsp cornflour
1 egg yolk
1 tsp vanilla extract
20g caster sugar
150ml double cream (or dairy free alternative)
100ml milk (or dairy free alternative)

Method

1) Preheat the oven 200 C/180 C fan/gas mark.

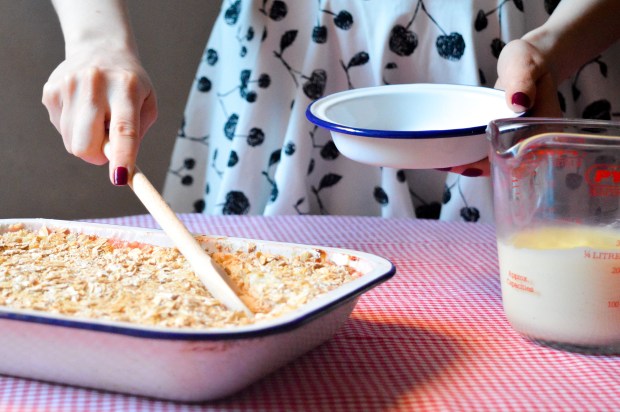
2) Place the rhubarb and caster sugar into a heavy bottomed pan. Heat the ingredients over a low to medium heat until the rhubarb starts to release its juices, but holds its shape.

2) Add the slices of apple to the pan and stir until the apple is coated with the rhubarb juice. Pour the fruit into the baking dish and set aside while you make the crumble topping.

3) To make the crumble topping, mix together the flour and sugar then rub in butter until you are left with a breadcrumb like texture.

4) Spoon the crumble mixture over the fruit filling, ensuring it is completely covered. Top with gluten-free oats (or one of the alternatives listed above), then bake in the preheated oven for 30 minutes until the topping is golden brown.

5) To make custard: place the cornflour, egg yolk, sugar, and vanilla extract into a heavy bottomed pan and give the ingredients a quick whisk. Add milk and cream then place the pan over a medium heat. Continuously whisk the mixture to help it thicken and to stop the custard burning – do not let it boil.

6) Once the custard has thickened remove the pan from the heat and serve.

crumble 2

I love seeing your take on my recipes, so remember to share a snap of your crumbles over on Facebook, Twitter or Instagram using the hashtag #titchytonbakes.

Gluten Free Canapés: Mini Baked Potatoes and Enchilada Bites

If you’re in need of idea for gluten free party food, then look no further than these incredibly simple homemade Canapés – Mini Baked Potatoes and Enchilada Bites.

1 
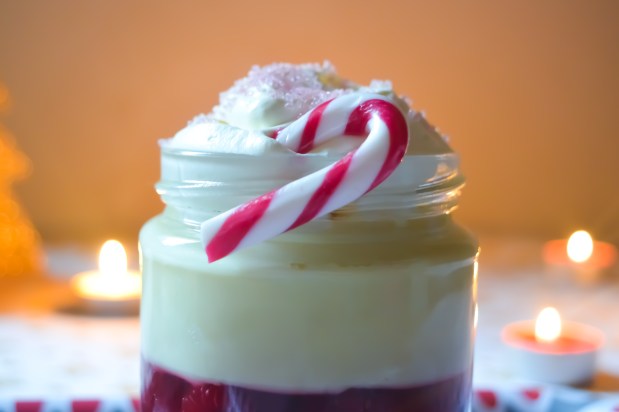
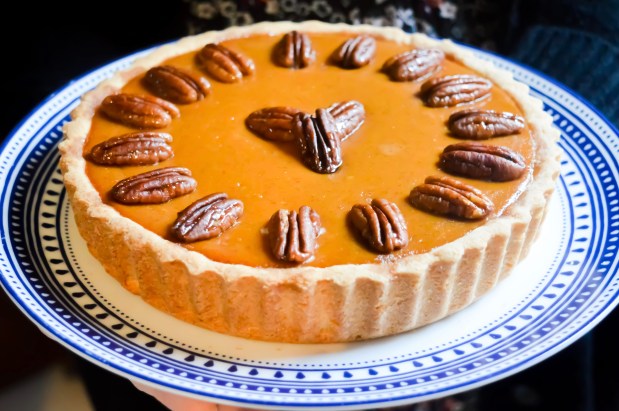
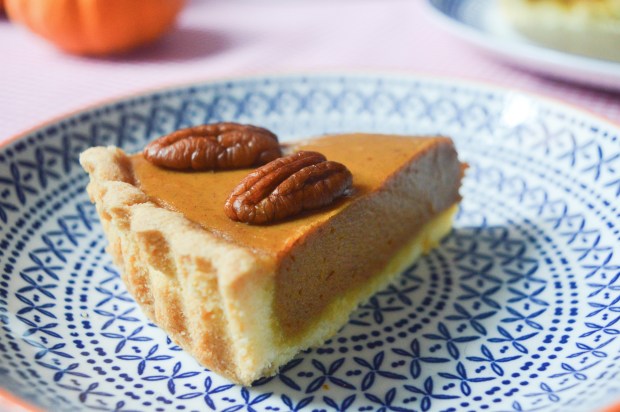
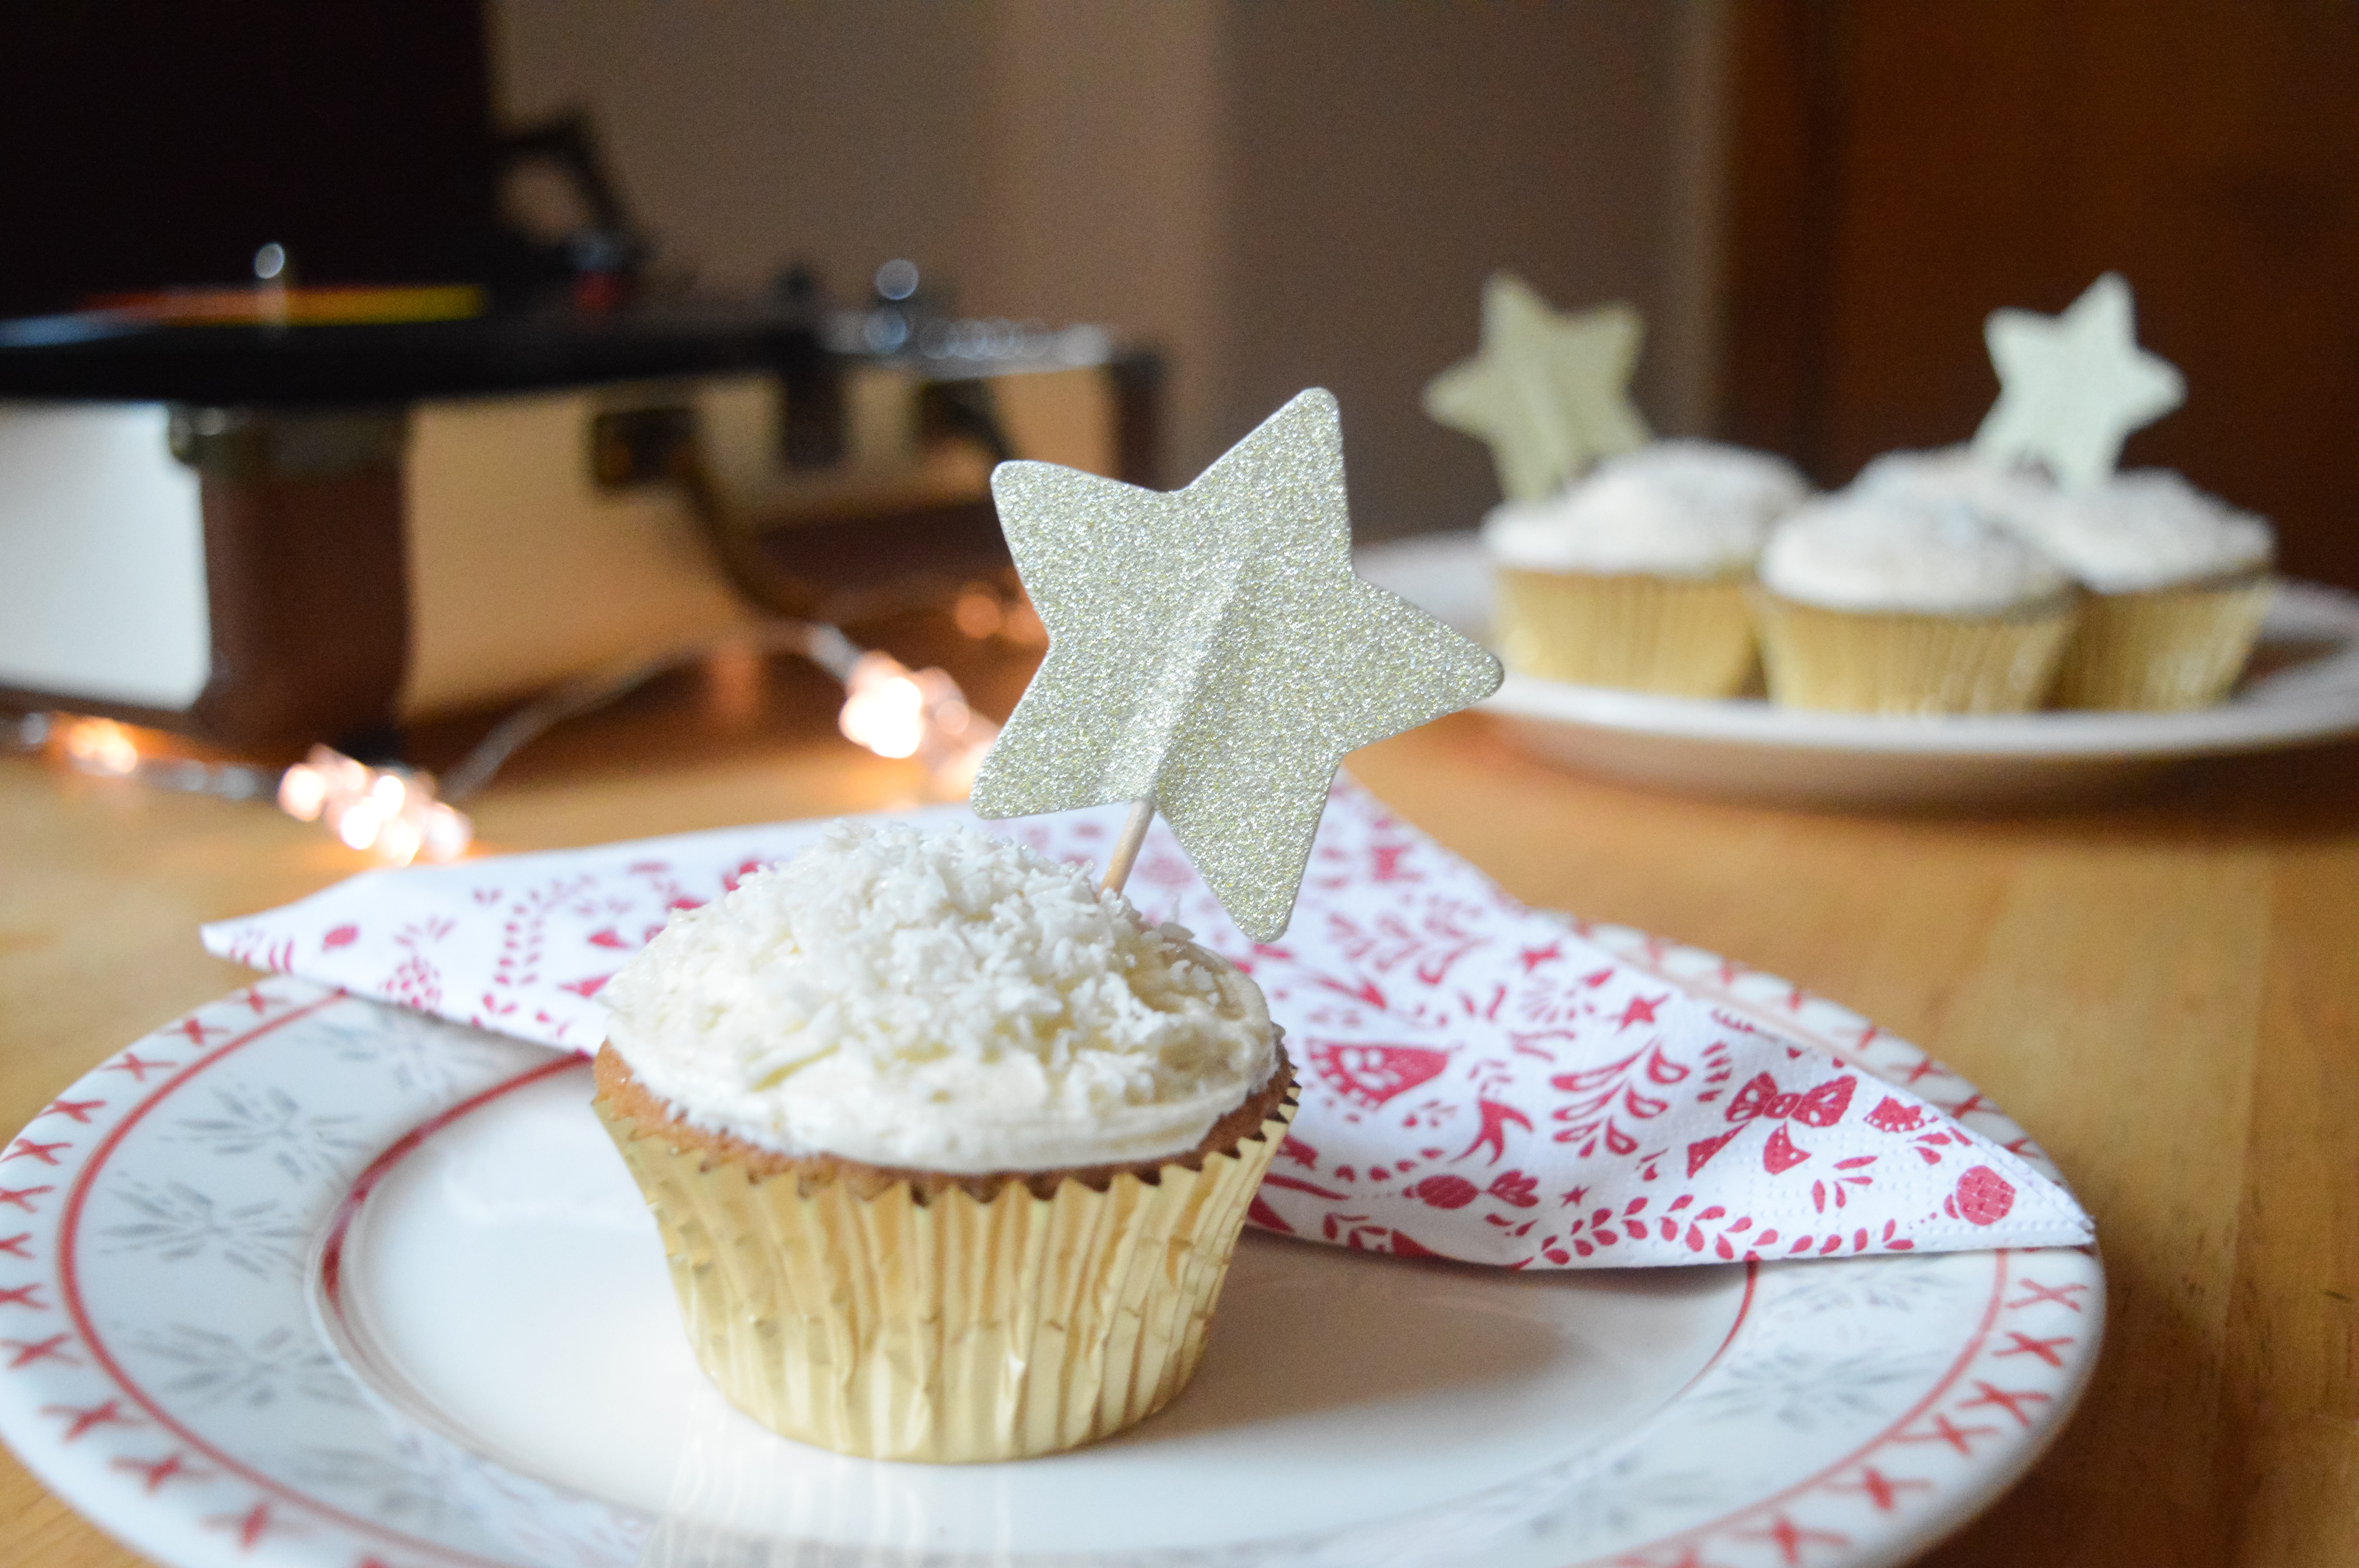
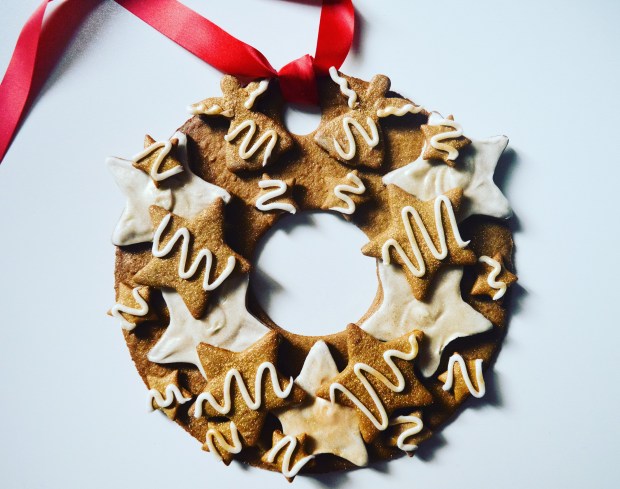
When it comes party food, I think the prep needs to be as simple as possible – both of these recipes can be prepared in advance and finished off just before serving, giving you plenty of opportunity to mingle amongst your guests.

Both recipes can also be made suitable for vegetarians; simply replace the chicken in the enchilada cups with sweetcorn and swap the Chorizo topping on the baked potatoes for some chopped chives.

4

These Canapés would make a lovely addition to any New Years Eve party, or a buffet style celebration on New Years Day – I also think they would appeal to both gluten eaters and gluten free guests equally…  in fact, I will be surprised if anyone cottons onto the fact that they are gluten free!


Enchilada Bites – GF/DF options
Recipe Makes 20

3

Ingredients:

10 Old El Paso Mexicana Street Market White Corn Tortillas or similar gluten free wraps

200g cooked chicken breast (Vegetarian option: substitute chicken for sweetcorn)

150g mild salsa

100g black beans

1/2 tsp paprika

1/2 tsp cayenne pepper

100g mature cheddar, grated (or dairy free equivalent)

Method:

  1. Preheat oven to 200 C/180 fan/or gas mark 6, then lightly grease two muffin tins with sunflower oil.
  2. Slice each tortilla into quarters, then press two pieces of tortilla into each hole of the muffin tin so that they cross over.
  3. Place the tortilla cases into the oven and bake for 5 to 10 minutes until crispy and golden.
  4. Mix together the chicken, beans, paprika, cayenne pepper and salsa, then place a heaped teaspoon of the mixture into each case.
  5. Top each tortilla cup with cheddar cheese and bake until the cheese turns golden – you can do this just before serving.

Mini Baked Potatoes (GF/EF/DF options)

2

Ingredients:

20 mini potatoes

20 slices of chorizo

150g mature cheddar, grated (or dairy free alternative)

Oil, salt and pepper

Method:

  1. Preheat oven to 200 degrees C/gas mark 6
  2. Cut a cross in the centre of each potato, then place them on a baking tray.
  3. Drizzle the potatoes with oil, then season with salt and pepper.
  4. Bake the potatoes for 25 – 30 minutes.
  5. Leave the potatoes to cool slightly, then use a knife to open up each one.
  6. Place grated cheese into the centre of each potato and top each one with a slice of Chorizo.
  7. Place the potatoes into the oven until the cheese melts and turns golden – you can do this just before serving.

To make a vegetarian version substitute the chorizo for chopped chives.

I love seeing your take on my recipes, so remember to share a snap of your Canapés over on Facebook, Twitter or Instagram using the hashtag #titchytonbakes.

I hope all my lovely readers have a fantastic New Years Eve and a very Happy New Year – Here’s to 2018!


Gluten Free Christmas: Raspberry and White Chocolate Trifles

I don’t know about you, but in my house it’s not Christmas Day without trifle – I’m pretty sure my family have had trifle every single Christmas day for as long as I can remember.

My Gluten Free Raspberry and White Chocolate Trifles are inspired by my mum because she is always in charge of the trifle. My mum’s recipe usually contains layers of sponge, jelly and fruit, custard and cream – I know the use of jelly can be quite controversial, but for me trifle is not trifle without jelly.

FE60904D-7DDA-4FB4-99EC-9ABEC19BF477

I have, however, made a few small additions to this criteria. Instead of traditional vanilla custard, I opted for an indulgent white chocolate custard and instead of the traditional sherry soaked sponges, I went for a Black Raspberry Liqueur for a twist.

4E40CB18-F73B-4139-8B78-0F10F4E81AA9

This recipe is fantastic option for Christmas Day or a Christmas dinner party, as the majority of the work can be done the day before and the desserts can be finished off before serving. If you want like to save even more time, you could always use shop bought cake – I think Sainsbury’s gluten free Madeira loaf works wonderfully in trifle.

For a non – alcoholic version, miss out the Chambord Liqueur.

64A6A7B4-C07C-46FC-9241-E84E4A1A0C34


Raspberry and White Chocolate Trifles – GF/DF options

You’ll need 8 small jars or a large dessert bowl.

Ingredients

For the Sponge Layer:

80g golden caster sugar
3 large eggs
60g gluten free self raising flour
20g butter, melted and cooled (or dairy free alternative)
75ml Chambord Black Raspberry Liqueur

OR

You could use shop bought cake (I like Sainsbury’s Gluten Free Madeira Loaf)

For the Jelly Layer:

1 x 135g packet Raspberry Jelly
290ml boiling water
290ml cold water
50ml Chambord Liqueur
300g Fresh Raspberries (or frozen berries if you prefer)

For the White Chocolate Custard:

3 large egg yolks
3 tsp cornflour
50g caster sugar
1/2 tsp vanilla extract
250ml whole milk (or dairy free alternative)
250ml double cream (or dairy free alternative)
250g white chocolate (or dairy free alternative)

For the Cream:

600ml double cream
50g icing sugar
2 tsp vanilla extract

To Decorate:

Pink edible glitter
Mini Candy canes (I found these in Flying Tiger)

Method:

1. To make the sponge:

– Preheat the oven to 200 C/180 fan/gas Mark 6), then grease and line a Swiss Roll tin or a baking tray with slightly raised sides.

– Place the eggs and sugar into large bowl and beat for 5 minutes using an electric hand mixer until the ingredients have tripled in volume and the mixture has reached ‘ribbon stage’.

– Sift in the gluten free flour and gently fold it through being careful not to knock out air out of the mixture, then fold through the cooled melted butter.

– Pour the mixture into the prepared tray and tilt to level out the mixture. Bake for 8 – 10 minutes or until the sponge starts to shrink away from the sides of the tin and the top is firm to touch.

– Turn the sponge out onto a wire wrack to cool, then using a 6cm round cutter, stamp out 8 sponge discs. Dip each sponge disc into the Black Rapsberry Liqueur, then place into the bottom of each jar. If you are using a large dessert bowl you can break the sponge into pieces, or cut out a disc to fit the bottom of the bowl.

2. To Make the Jelly:

– Place the Jelly cubes into a heatproof jug and add the boiling water. Stir until the cubes have dissolved, then pour in the cold water and the Black Raspberry Liqueur.

– Once the mixture has cooled, evenly distribute it between the 8 Jars, then add  a layer raspberries to each one. Each jar should have a layer of sponge and a layer of jelly and raspberries.

– Screw the lids onto each jar and leave them in fridge set overnight.

3) To make the White Chocolate Custard:

– Break the white chocolate into pieces and place them into a heatproof bowl over a pan of gently simmering water.

– Whilist the chocolate melts, place the  the sugar, egg yolks, cornflour and vanilla extract into a heavy bottomed pan and whisk until combined. Pour over the milk and double cream, then place the pan over a low heat. Whisk the mixture until it begin to thicken and can coat the back of a wooden spoon.

– Pour the custard mixture into the white chocolate and whisk until combined. Leave the mixture to cool, then place cling film over the surface of the custard to prevent it forming a skin. Leave the custard to set in the fridge overnight.

4) Finish and decorate just before serving:

– Add a layer of custard to each jar.

– Whisk together the double cream, sugar and vanilla extract until it reaches soft peaks.

– Add a layer of cream to each jar – then top each one with a sprinkling of edible glitter and a candy cane.

98AE8F31-BDE2-4272-80D5-EF4C7740F070

I love seeing your take on my recipes, so remember to share a snap of your trifles over on Facebook, twitter or Instagram using the hashtag #titchytonbakes.

Gluten Free Pecan and Pumpkin Pie

Here it is, just in time for Thanksgiving  – my Gluten Free Pecan and Pumpkin Pie recipe.

FFA24DA1-E7F5-4EE0-883D-10099EB7F763

This is the perfect recipe for those of you who are obsessed with everything Pumpkin Spice. I have never actually tried Pumpkin Spice or Pumpkin Pie until now, but I can see the attraction – pumpkin and cinnamon are a match made in heaven!

B795BDE9-D86F-4D2D-9626-44F71AF9F0D1

I have also been working on perfecting my gluten free pastry. For this recipe I used the new Schär Universal Mix it; which is a gluten free all purpose blend that can be used for lots of different types of bakes, including cakes, biscuits and pastry. So far I’ve made both biscuits and pastry with it and I’ve had fantastic results – often I find that gluten free pastry is far too crumbly and biscuit-like, but this pastry melted in the mouth as was sturdy enough to encase the pie filling. Result!


Pecan and Pumpkin Pie (GF)

Ingredients

For the Pastry:

200g all purpose gluten free flour (I used Schär All Purpose Baking Mix)
50g ground almonds
75g icing sugar
2 egg yolks
125g unsalted butter, cold

For the Filling:

75g golden caster sugar
2 eggs
2 tsp ground cinnamon
1 tsp ground ginger
1 x 397g tin condensed milk
1 x 425g tin natural pumpkin purée (I used Baking Buddy Natural Pumpkin Purée)

For the Topping:

2 tbsp Pure maple syrup
A few handfuls of Pecan nuts

Method:

1) To make the pastry, stir together the flour, ground almonds and icing sugar in a large mixing bowl.

2) Rub together the flour mixture with the cold butter, then the egg yolks and start to bring the mixture together your hands.

3) Tip the contents of the bowl out onto a floured work surface and knead the dough until it comes together in a smooth ball – you can add a few drops of water to help, if necessary.

4) Wrap the pastry in cling film and put it in the fridge to cool for about 30 minutes to an hour – this is very important as the colder the pastry is, the easier it is to work with.

5) Preheat the oven to 180 C/160 C fan/gas mark 4, then throughly grease your tart tin with butter.

6) Roll out the chilled pastry between two sheets of greaseproof baking paper (this will prevent the pastry from sticking to your work surface) until it is about the thickness of a 1 pound coin.

7) Use greaseproof paper to help you get the pastry into the tin safely. Firstly, peel off the top layer of baking paper, place the tin upside down into the middle of the pastry then carefully flip the pastry over with the help of the bottom sheet of baking paper. Peel off the bottom baking sheet and gently press the pastry down into the tin, making sure it is pressed right into each groove – don’t panic if you do get any tears or any holes, just neatly patch it up with some spare pastry.

8) Trim off any excess pastry. Place some baking paper into the case and fill it baking beans (any dried beans or rice will do) then blind bake the pastry case for 10 minutes. Remove the baking beans and bake the case for a further 5 minutes to help dry it out.

9) Meanwhile make the pie filling: whisk together together the sugar, eggs, spices, condensed milk and pumpkin purée until smooth.!

10) Let the pastry case cool down slightly before pouring in the pie filling so that the case is completely fully

11) Bake the pie for approximately 25 minutes, then mix the pecan nuts with the maple syrup and neatly arrange them on top the pie. Bake the pie for a further 15 minutes until filling is firm to touch and the nuts toasted.

12) Leave the pie to cool before serving so that the filling can set properly.

3AF64AE4-B034-4ECD-B8DF-E79824249DC3

I love seeing your take on my recipes, so remember to share a snap of your Pies over on Facebook, twitter or Instagram using the hashtag #titchytonbakes.


Gluten Free Christmas: Coconut Snow Cupcakes

It’s almost Christmas Day! It’s been a busy festive season for me, but I still have one Christmas recipe to share with you this year –  my Gluten Free Coconut Snow Cupcakes.imageThese cupcakes are a little different to your traditional Christmas bakes, perfect for anyone who isn’t a big fan of dried fruit but still festive enough to be served on Christmas Day – I think they would also be lovely served at a New Years Eve party! imageI got these cute star decorations from HEMA – they are actually cocktail sticks but I thought they would make cute cupcake toppers, but you can use any cupcake toppers or edible decorations of your choosing!


Coconut Snow Cupcakes – GF/DF options

Ingredients

For the sponge:

200g golden caster sugar

200g butter, softened (or dairy free alternative)

200 gluten free self raising flour

2 tbsp dessicated coconut

1 tsp baking powder

3 tbsp milk (or dairy free alternative)

1/2 vanilla pod deseeded (or 2 tsp of vanilla extract)

1/2 tsp coconut extract (optional)

2 large eggs

For the buttercream icing:

150g unsalted butter, softened (or dairy free alternative)

250g icing sugar, plus extra for dusting

1 tsp vanilla extract

To  decorate:

3 tbsp dessicated coconut

edible glitter (optional)

Method

1) Preheat the oven to 160 C/140 c fan/gas mark 3 and line a cupcake tray with cupcake cases.

2) In a large bowl, stir together the flour, baking powder and bicarbonate of soda.

3) In a separate bowl cream the butter, vanilla extract and sugar together with an electric hand mixer until light and fluffy.

4) Scrape down the sides of the bowl with a spatula. With the mixer on a low speed, add the egg a bit at a time along with a tablespoon of the flour mixture.

5) Once the egg is fully combined, add the rest of the flour and the milk until you are left with a smooth mixture.

6) Spoon approximately one and a half tablespoons of the mixture into each cupcake case, being careful not to overfill them.

7) Bake for approximately 20 – 22 minutes – the cupcakes are ready when they are golden brown and firm to touch.

8) Leave the cupcakes to cool in the tin for a few minutes, then transfer them to a wire rack to finish cooling while you prepare the buttercream icing.

9) To make the buttercream, beat the butter, icing sugar and vanilla extract with an electric hand mixer until light and fluffy and almost white in colour.

10) Once the cupcakes have cooled, spread the buttercream forest in over each cupcake using a palate knife, then sprinkle each one with desiccated coconut and a touch of edible glitter to finish.

image

That’s it for my Christmas recipes this year! If you’re looking for more gluten free Christmas baking inspiration why not check out my Gluten Free Stollen Muffins, Gluten Free Gingerbread Wreath or you can find a full list of my Christmas recipes over on my Recipes page.


Gluten Free Christmas: Gingerbread Wreath

We are 12 days into advent and I finally feel as though I’m getting into the full swing of the festivities. So far most of Advent has been spent in the kitchen working on festive bakes, most of which have involved copious amounts of edible glitter which I keep finding everywhere, including in my hair, on the floor, on the cat…

Today I’m going to share with you my recipe for this gingerbread wreath which is definitely an excuse to get out the edible glitter.

img_3316

The Gingerbread wreath is completely edible (except for the Red Ribbon) and although it looks impressive and difficult to achieve, it was actually incredibly easy! You don’t need any fancy equipment, just a large dinner plate, a sharp knife and a few different sized cookie cutters. Whipping up the gingerbread dough takes only a matter of minutes and the construction of the wreath isn’t too daunting, as long as you follow the instructions step by step. The wreath is not really design to be used as a decoration as the ribbon won’t support the weight of a wreath – but it would make a lovely edible Christmas gift.

img_3321


Gluten Free Gingerbread Wreath – GF/DF options

This recipe is inspired by Cassie Best’s Gingerbread Wreath for BBC Good Food

Ingredients

For the Gingerbread:
125g gluten free self raising flour blend
200g rice flour, plus extra for dusting
1 tsp bicarbonate of soda
2 tsp ground ginger
2 tsp cinnamon
125g unsalted butter (or dairy free alternative)
150g soft dark brown sugar
2 tbsp golden syrup
1 tbsp black treacle
1 large egg

To Decorate:
200g Ready to roll Icing
30 ml cold water
250g icing sugar
1 egg white
Edible glitter

You will also need:
A sharp knife
1 x large dinner plate
1 x inch piping nozzle
1 x 9cm round cutter
1 x small star cutter
1 x medium star cutter
1 x large star cutter
1 x small angel cutter
1 red ribbon

Method

1) In a large bowl, sift together the flours, bicarbonate of soda, ginger and cinnamon. Using your hands, rub the butter into the dry ingredients until it becomes like fine bread crumbs and then stir through the dark brown sugar.

2) In a separate bowl whisk the egg with a fork, then add this to the cookie mixture along with the golden syrup and black treacle. Mix until the ingredients come together. The cookie dough will appear quite wet at this stage but don’t be tempted to add more flour or you will dry out the dough!

3) Gently knead the dough on a floured surface with floured hands until it turns into a smooth, soft and slightly sticky ball of dough. Dust the dough with flour as you knead to stop it sticking to the work surface. Wrap the dough in cling film and leave to chill in the fridge for at least 2 hours – chilling helps the dough to firm up so it can be rolled out.

4) Preheat the oven to 180 C/160 fan/gas mark 4. Roll half of the dough out in between two sheets of greaseproof paper until it is the thickness of a 1 pound coin. Remove the top layer of greaseproof paper, then place a large dinner plate face down into the centre of the dough and use a sharp knife to cut out a large circular disc of gingerbread.

5) Transfer the gingerbread onto a baking tray (you can use the bottom sheet of baking paper to line your tray) then use a 9 cm circular cutter to cut out a circle of dough from the centre of the gingerbread disc and a 1 cm piping nozzle to cut out a hole for the ribbon.

6) Bake the base of your wreath for 10 to 12 minutes – watch out for the edges catching.
Once baked, leave the wreath to firm up on the baking tray for a few minutes before transferring it to wire rack to finish cooling.

7) Roll out the remaining dough and cut out 5 large stars, 4 medium stars, 11 small stars and 2 angel shapes. Arrange the shapes onto a baking tray and bake for 10 to 12 minutes – the smaller cookies will need checking after 8 minutes.

8) Once baked, leave the cookies to firm up on the baking tray for a few minutes bering transferring them to wire rack to finish cooling.

9) While the cookies cool, make the royal icing: place 1 egg white in a bowl and slowly sift icing sugar in batches. In between each batch of sugar, stir the icing with a wooden spoon or a balloon whisk until the icing thickens up, then transfer the icing into a piping bag fitted with a small writing nozzle.

10) Next, make the fondant icing: break the ready to roll icing into pieces and place them in a bowl. Add a splash of water and use a spatula to break up the icing until it starts to become more paste like, then add the rest of the water and beat with an electric hand mixer until the fondant becomes runny.

11) Spread the fondant icing over the 5 large star shapes and sprinkle each one with edible glitter. Decorate the remaining pieces with the royal icing and leave all the pieces to dry for about an hour before you assemble the wreath.

12) Use the remaining royal icing to stick the biscuits to the wreath. Sprinkle the wreath with edible glitter and thread a red ribbon through the hole to finish.

img_3343


There will be plenty of festive bakes coming your way really soon. Meanwhile, why not come and see what else I’m getting up to over the festive season by following me on Instagram or Facebook. Remember, If you give this recipe take a snap of it and share it with me on Instagram, Facebook or Twitter using the hashtag #titchytonbakes and I will share my favourites on my Facebook page!

Gluten Free Christmas: Stollen Muffins

It’s beginning to look a lot like Christmas… and I don’t know about you, but I’m rather glad. It’s been a scary and rather uncertain year with everything that has been going on in the world, so I’m grateful for a distraction and I hope that a bit of Christmas cheer will help to take my mind off it… and yours too!

So, get ready for my first Christmas recipe of the year and prepare to feel fabulously festive.

image

My Gluten Free and Dairy Free Stollen Muffins are every bit as tasty as actual Stollen and are the perfect way to get your Stollen fix, without the hassle of making bread.

Stollen is a German Christmas bread which usually contains dried fruit, almonds, marzipan and spices, such as cinnamon. These muffins are chock full of everything you’d find in traditional stollen, but with a dash of my favourite tipple for good measure, because it’s Christmas!

image


Stollen Muffins – GF/DF

Ingredients

2 – 3 tbsp Cointreau (you could also use Brandy, Rum or Amaretto)
200g mixed dried fruit (I used sultanas/raisins/cherries/mixed peel)
300g gluten free self raising flour
Zest of an orange
1 tsp ground cinnamon
1/2 tsp ground ginger
1 tsp baking powder
1/2 tsp bicarbonate of soda
150g ready to roll marzipan (chopped into small pieces)
100g caster sugar
50g light brown sugar
2 large eggs
100 ml sunflower oil
200 ml almond milk
1 tsp almond extract
1/2 vanilla extract
50g flaked almonds

Method

1) Leave the mixed fruit to soak in Cointreau overnight.

2) Preheat the oven to 180 C/160 C fan/gas mark 4 and line a muffin tin with muffin cases.

3) In a large bowl, stir together the flour, baking powder, bicarbonate of soda, orange zest, cinnamon and ginger, then stir through marzipan.

4) In a separate bowl, whisk together eggs, sugar, oil, almond milk, vanilla extract and almond extract until combined, then add this to the dry ingredients.

5) Gently mix together all the ingredients using a wooden spoon until you are left with a batter which is only just combined (don’t worry too much if there are any lumps), then stir through the dried fruit and the flaked almonds.

6) Spoon approximately 2 tablespoons of batter into each muffin case, then bake for 25 minutes, until golden brown.

7) Leave the muffins to cool completely on a wire rack, before dusting them with icing sugar to finish.

Be sure to store the muffins in an air tight container and they will last for 4 to 5 days.

image

Keep your eyes peeled for lots more Christmas recipes coming soon, but in the meantime why not try some of my Christmas recipes from previous years:

Gluten Free Gingerbread Cookies

Gluten Free Hazelnut, Cranberry and Orange Biscotti

Gluten Free Cointreau Christmas Cake

Gluten Free Kransekake (Traditional Scandinavian Cake)

Sweet and Salted Peanut Butter Popcorn Squares

These Sweet and Salted Peanut Butter Popcorn Squares are the perfect treat to enjoy on a Sunday afternoon, snuggled up on the sofa in your pyjamas while you watch a film Marathon. Be careful though, they are super moorish!

IMG_6387


Sweet and Salted Peanut Butter Popcorn Squares – GF/EF/DF options

Ingredients

For the popcorn squares:
60g butter (or dairy free alternative)
100g gluten free salted and sweet popcorn
180g white mini marshmallows
3 tbsp chunky peanut butter

To decorate:
50g milk and dark chocolate (or dairy free alternative)

Method

1) Grease and line a square cake tin with baking paper.

2) Place a large heavy bottomed pan over a low to medium heat, then add the butter and marshmallows and heat them until they have completely melted.

3) Fold the peanut butter through the marshmallow mixture, then add the popcorn and stir until fully coated.

4) Working quickly, spoon the mixture into the prepared tin and smooth it out using a greased palate knife until it starts to reach corners of the tin.

5) Place a large square of grease proof paper over the top of the mixture, then use your hands to press the mixture right down into the tin.

6) Peel off the greaseproof paper and leave the mixture to set for a few hours.

7) Once the mixture has set, turn it out of the tin and cut it into bite size squares.

8) Next, melt the chocolate in heat proof bowl over a pan of simmering water. Transfer the chocolate into a piping bag and pipe a zig-zag pattern over each popcorn squares.

IMG_6385

Store the popcorn squares in an airtight container and they should last for up to a week.

Gluten Free Peanut Butter & Chocolate Chip Granola

It’s a well known fact that I love Peanut Butter and that I would put it in everything and anything, if I could!

In my opinion, granola is made infinitely better with the presence of peanut butter which not only delicious, but dairy free too. To make this granola recipe completely dairy free, just miss out the chocolate chips or use chunks of dairy free dark chocolate instead.

The recipe is easily adaptable, so you can change up the ingredients depending on what you fancy and it’s also lovely healthy way to start to the day, as the oats will give you that energy boost to get through until lunch time!

image

Gluten Free Peanut Butter Granola  – GF/DF/EF

Ingredients:
250g gluten free oats
3 tbsp Smooth Peanut Butter (preferably one containing only natural sugars)
1 tbsp Sunflower Oil
2 tbsp Maple Syrup
50g Dark Chocolate Chips (or dairy free alternative)
A handful of chopped unsalted peanuts

Method:

1) Preheat Oven to 180 C/160 C fan/gas mark 4.

2) In a large heavy bottomed pan mix the peanut butter, oil and maple syrup over a low heat, then add the oats and stir until combined.

3) Spread the oats into a thin layer across a baking tray lined with greaseproof paper, then scatter across the chopped peanuts.

4) Bake the mixture for 5 minutes, give the oats a a quick stir with a wooden spoon, then return them to the oven and to bake for a further 5 minutes or until golden brown.

5. Once the Granola has cooled completely, stir through the chocolate chips (optional).

If you want to keep up to date with my kitchen adventures you can find me on Instagram @titchyton or on my Facebook page.

Gluten Free Christmas: Kransekake Recipe

For me, every Christmas table should have a showstopper, something extra special which makes the family go “Wow!”

I don’t know about you, but I don’t think there is anything more show stopping than the towering Kransekake Cake which would look simply spectacular at the centre of any Christmas dinner table!
IMG_0393
The Kransekake is a traditional Scandinavian cake which is often served at special occasions including weddings and Christmas celebrations. It consists of 18 almond flavoured rings which are stacked on top of each other to form an impressive tower – If you’re a Marzipan fan, you’ll love this cake!

12360078_984881254917308_60926301423683865_n My Kransekake Design

Although it looks very impressive, it’s actually quite straight forward to make! The rings are made from a dough consisting of ground almonds, icing sugar and egg whites which is shaped to fit Kransekake moulds which can be found at Lakeland.

Kransekake Cakes are usually gluten free, although dough is sometimes rolled out in Semolina flour which is not suitable for Coeliacs. For my Kransekake cake, I rolled the dough out in Cornflour instead of Semolina.
image1-4
Gluten Free Kransekake Recipe – GF/DF

Recipe inspired by Paul Hollywood’s Recipe from ‘The Great British Bake Off’

Ingredients
500g ground almonds, plus cornflour for dusting
500g icing sugar
4 egg whites
1 tsp almond extract
sunflower oil spray

For the Decoration:
2 egg white
500g icing sugar
edible spray glitter
fondant stars (optional)

You will also need 6 Kransekake Moulds (I bought mine from Lakeland)

Method

1. In a large bowl mix together the ground almonds and icing sugar.

2. Add the egg whites and almond extract, then using your hands work the ingredients into a smooth ball of slightly sticky dough.

3. Chill the dough in the fridge for at least two hours.

4. Preheat the oven to 200 C/180 C Fan/gas mark 6.

5. Spray the Kransekake moulds with oil and dust them generously with cornflour.

6. Dust a work surface with cornflour and split the dough into 6 equally sized pieces.

7. Split one of the pieces of dough into three different sized pieces: one large, one medium and one small.

8. Roll the balls of dough out into pieces which are approximately a finger-width and long enough to wrap round the Kransekake moulds.

9. Place the first piece into the Kransekake mould and pinch the ends together. Repeat with all the other pieces until all the moulds are filled.

10. Place the moulds onto a baking tray and bake for 10 minutes or until golden brown.

11. Remove the Kransekake rings from the oven and allow them to set in their moulds – if you try to remove them while they are warm they will break! Once the Kransekake are cool remove them from their moulds and set them aside while you make the icing.

12. To make the Royal Icing, place the egg whites in a bowl and slowly sift in the icing sugar in batches. In between each batch of sugar stir the icing with a wooden spoon or a balloon whisk until the icing thickens up.

13. Spoon the icing into a piping bag fitted with a small round writing nozzle.

14. Before you begin to decorate, sort the rings out into size order.

15. Place the largest ring onto your serving plate (you could use a bit of icing to adhere it to the plate and stop it from slipping around). Pipe a zig-zag pattern onto the ring and place the second largest ring on top. Repeat until all the rings have been neatly stacked.

16. To finish, spray the Kransekake with edible spray glitter. I made mine extra special by covering it in gold stars made from fondant icing.

I hope you all enjoy the Christmas season and have a go at my Christmas recipes this year, which also include my Gluten Free Gingerbread Cookies which I posted last Christmas, my Hazelnut Cranberry and Orange Biscotti and my Cointreau Christmas Cake.
DSC_0020
I am taking a well deserved Christmas break, but I will be back in the New Year with plenty more gluten free recipes for you all to try.  In the meantime, why not check out my out my Instagram page or my Facebook page to see what else I get up to over Christmas!

Wishing you all a very Merry Christmas and a Happy New Year!  xxx