Gluten Free Nutella Marble Cake

New Year is that time of year where we seek to return some balance to our lives, whether that be through setting New Year resolutions or undertaking a detox to repair our bodies after the hectic and often overindulgent festive season.

Personally, I have never managed to stick to a New Years resolution or detox diet, and although I do understand I can’t over indulge all year round, I do think that January is a time for comforting feel good food – after all, it can be a cold and bleak month.

nutella 5

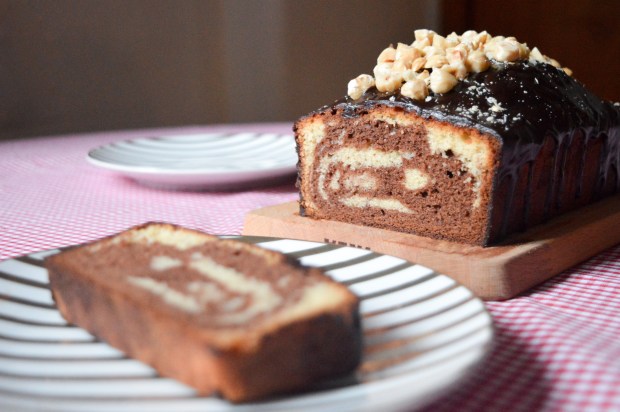
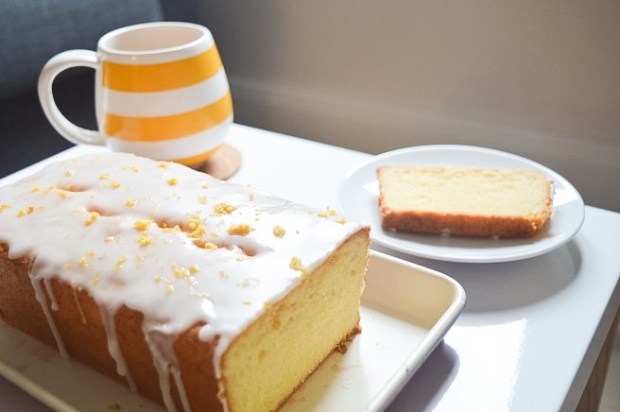
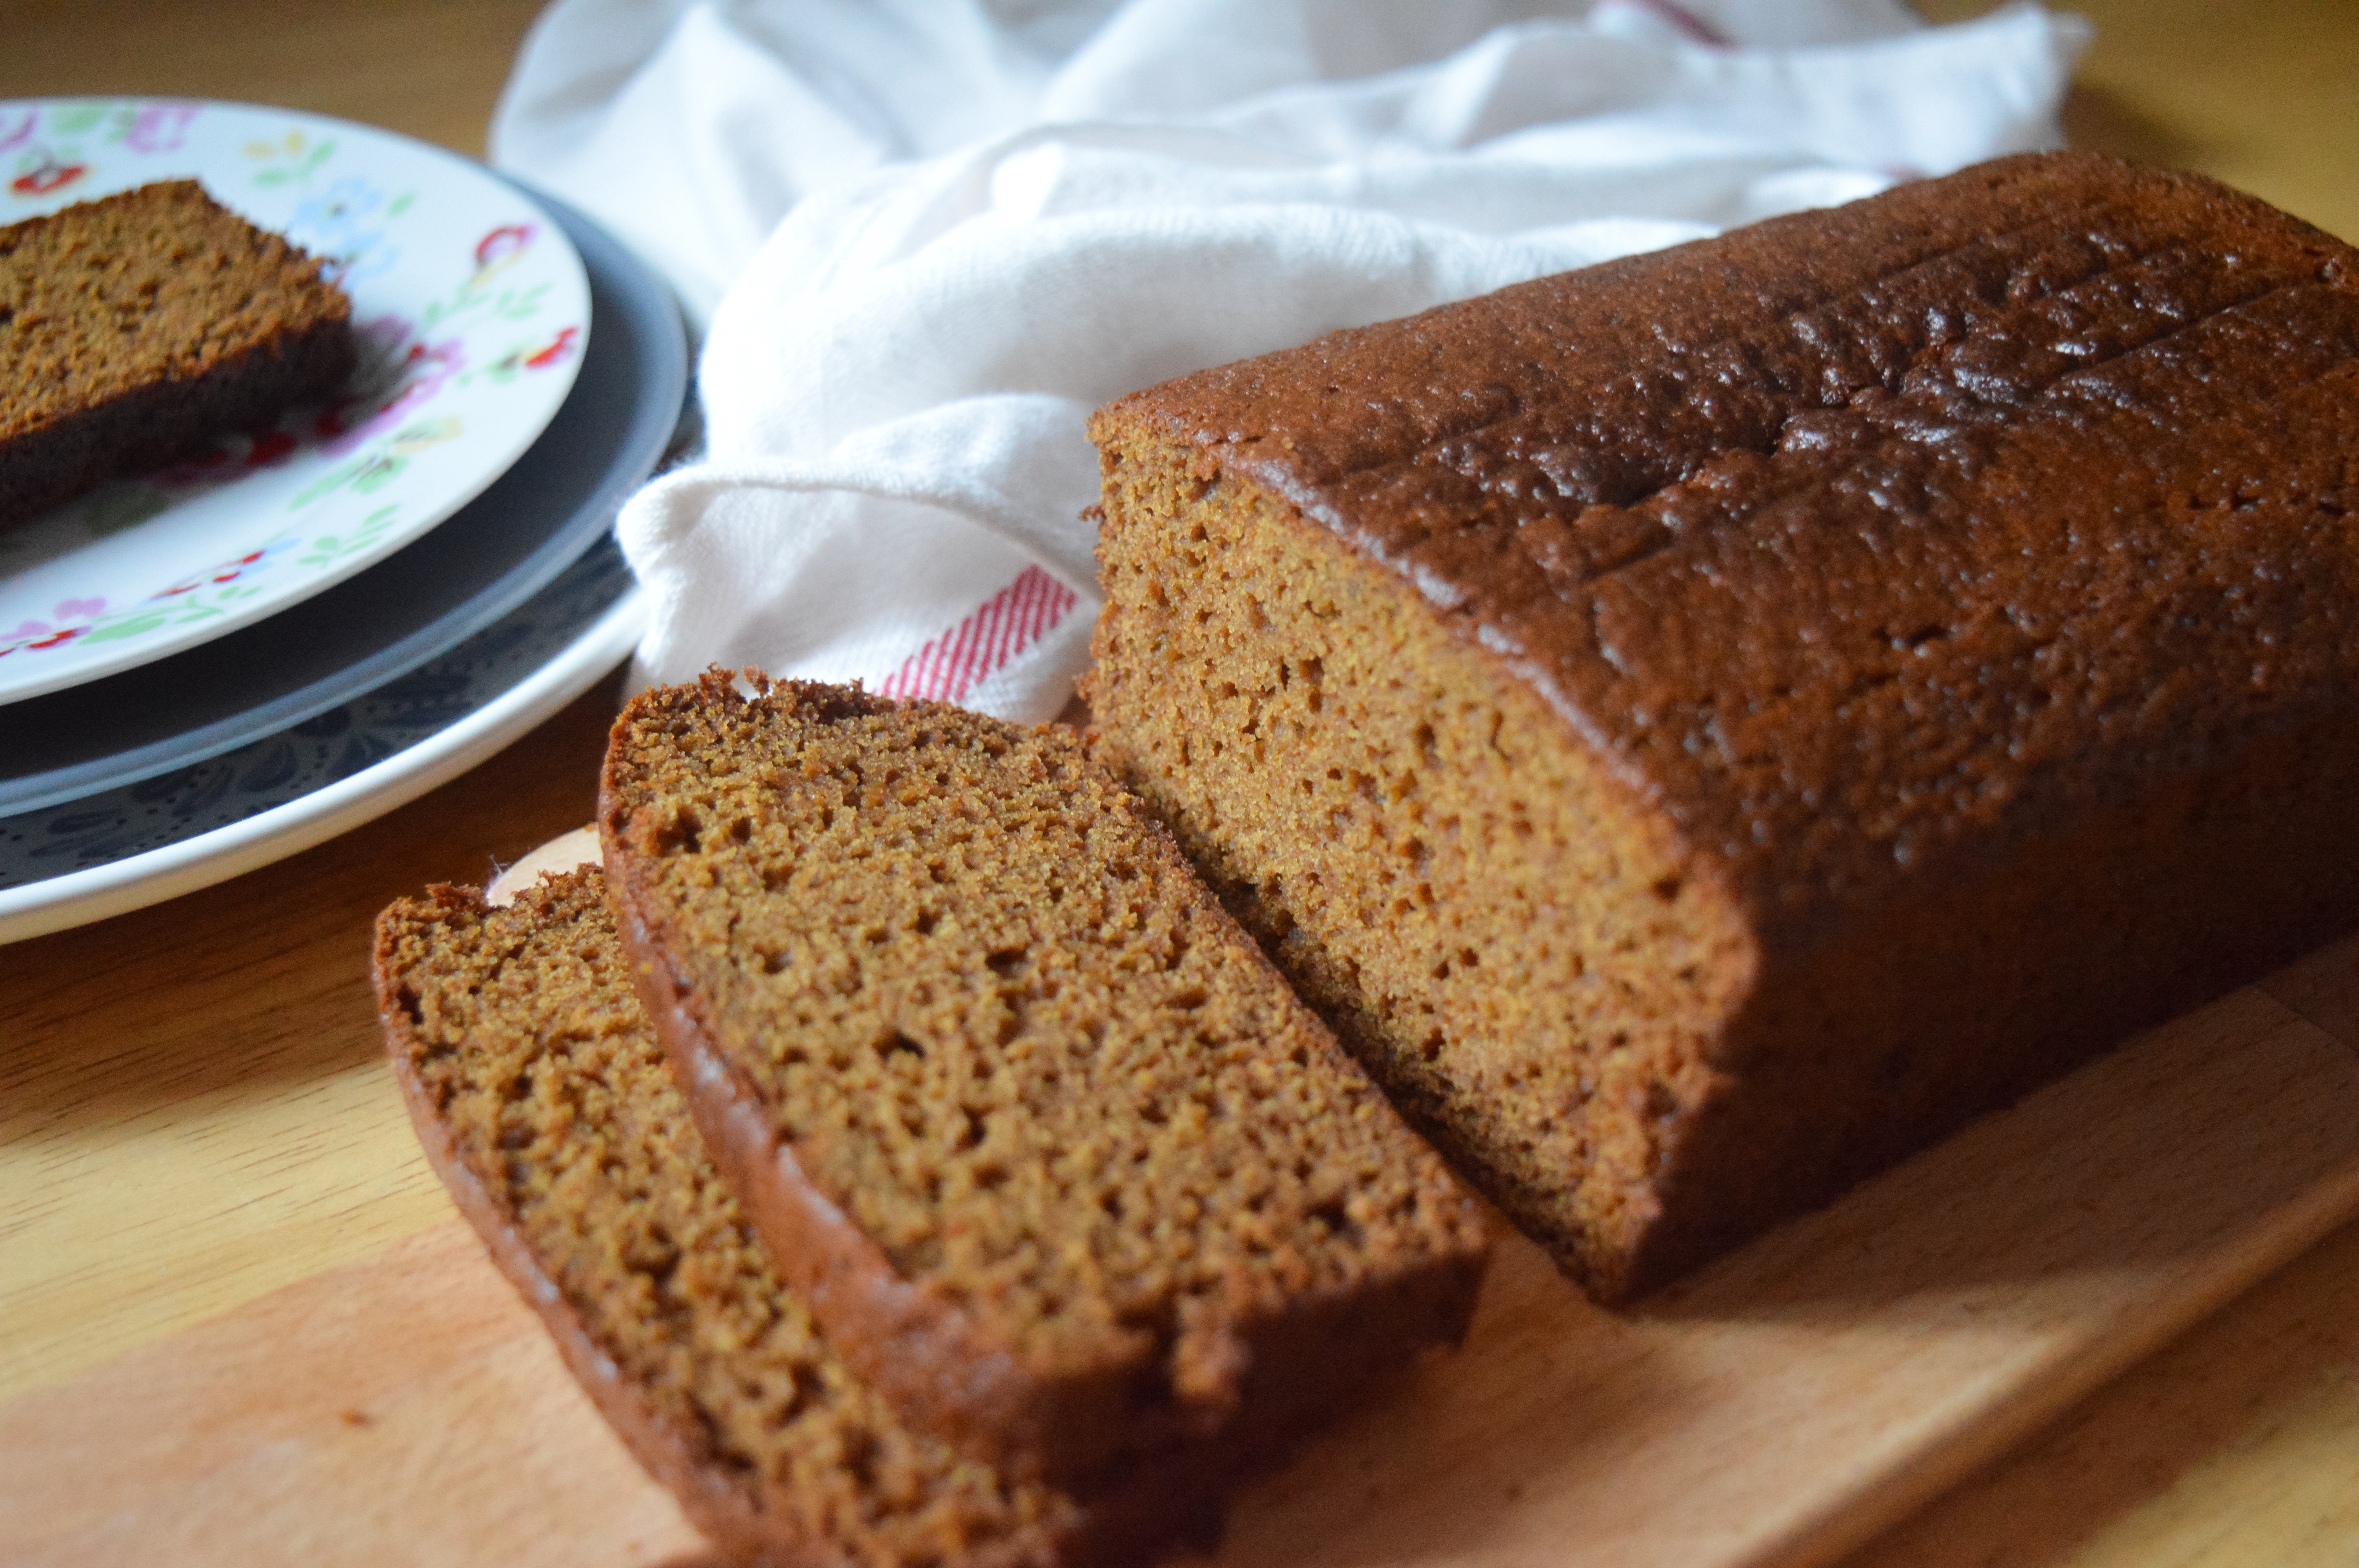
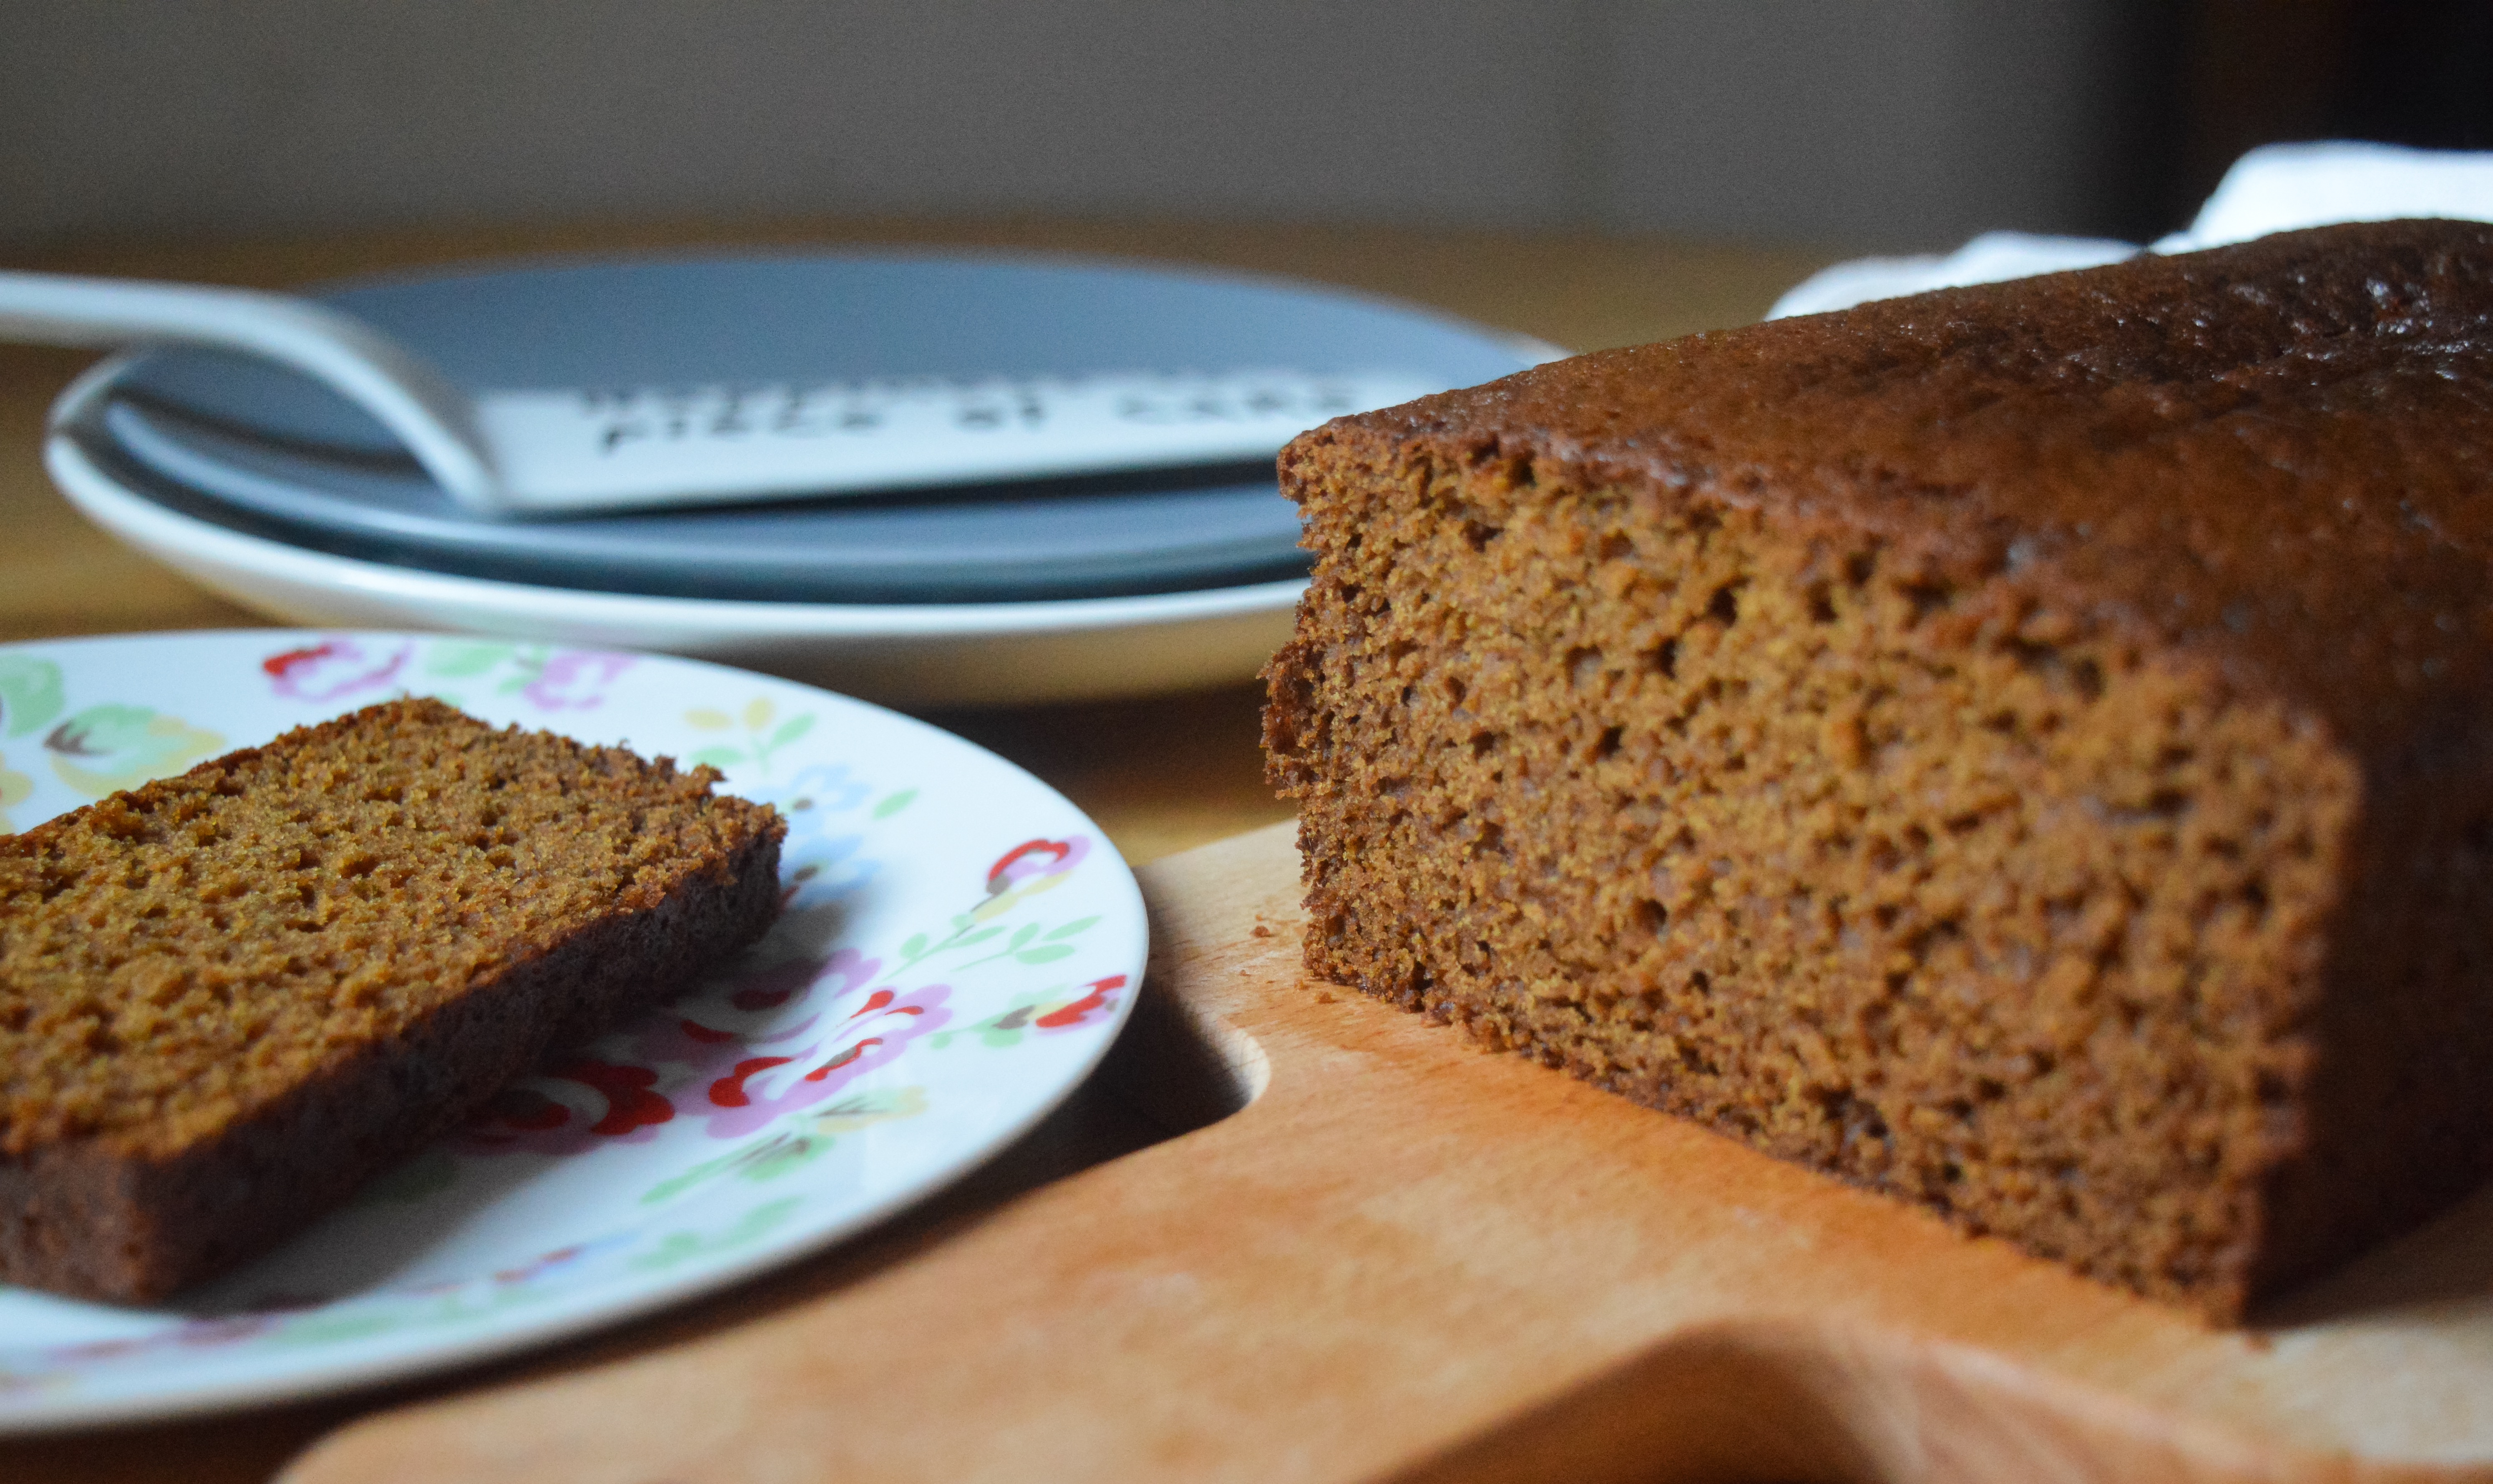
As far as comforting feel good food goes, I think my Gluten Free Nutella Marble cake fits the bill… I’d just better be sure to strike some balance in my diet by making sure I eat my greens, too!

nutella 2


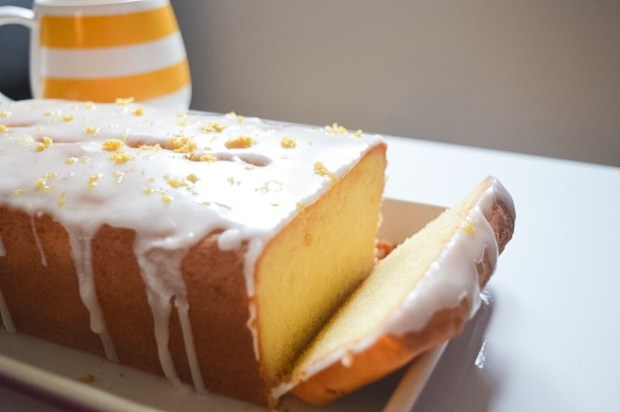
Nutella Marble Cake – GF/DF options

Ingredients

For the cake:
175g unsalted butter, softened
175g caster sugar
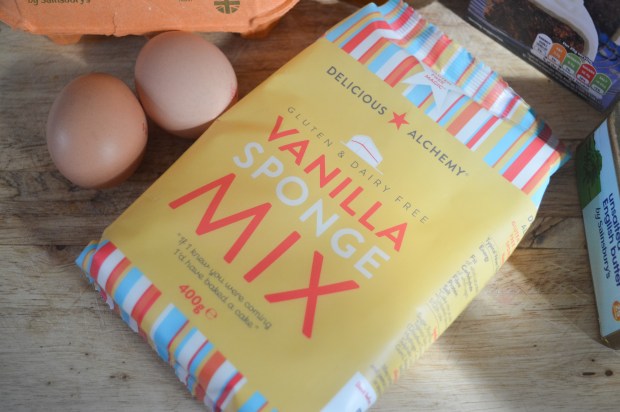
175g gluten free self raising flour
1 tsp baking powder
4 eggs
2 tbsp milk (or dairy free alternative)
1 tsp vanilla extract
2 tbsp cocoa powder
3 tbsp Nutella or similar hazelnut spread (or dairy free alternative)

For the chocolate glaze:
2 tbsp cocoa powder
4 tbsp golden syrup
25g butter (or dairy free alternative)

To decorate:
A handful of roughly chopped hazelnuts

Method:

1. Preheat the oven to 170 C/150 C fan/ mark 3, then grease and line a 2lb loaf tin with baking parchment.

2. In a large bowl, sift together the flour and baking powder.

3. In a separate bowl, cream together the butter and sugar with an electric hand mixer until light and fluffy. Add the eggs one at a time along with one tablespoon of the flour to stop the mixture from curdling. Add the remaining flour and milk, then beat until the ingredients are fully combined.

4. Divide the mixture between two bowls – add the vanilla extract to one half of the mixture, then stir the cocoa powder and the Nutella through the other half.

5. Spoon the vanilla and hazelnut mixtures into the prepared tin, alternating between the two colours – to create a marble effect, gently swirl a skewer through the mixture.

6. Bake for 60 – 80 minutes – or until a skewer inserted into the centre of the cake comes out clean.

7. Allow the cake to cool in the tin before turning it out on a wire rack. Leave to cool while you make the chocolate glaze.

8. To make the glaze: place the butter, golden syrup and cocoa powder into a small saucepan. Heat the ingredients over a medium heat and stir until the butter has melted and the ingredients are combined.

9. Drizzle the icing over the cake and finish with the chopped hazelnuts.

nutella 1

I love seeing your take on my recipes, so remember to share a snap of your marble cakes over on Facebook, twitter or Instagram using the hashtag #titchytonbakes.

Gluten Free Fondant Fancy Cupcakes (Inspired by ‘The Great British Bake Off’)

Today I’m going to share with you my Gluten Free Fondant Fancy Cupcakes recipe which is inspired by the showstopper challenge from the Semi Final of ‘The Great British Bake Off’.

image

Last week’s show saw the remaining four bakers battling it out over Patisserie for a place in final, but sadly Selasi didn’t make the cut. He might not have made it to the final, but he did win over the hearts of the nation and I will definitely miss him during this week’s show. Speaking of this week, the final will be a very bittersweet occasion, as although I am excited to see who wins, I am sad that this is the last episode of GBBO as we know it.

What I’m going to miss most is how the show has inspired me to bake things I’d never thought of trying – this includes fondant fancies, which were featured on last week’s show.

I used to love Fondant Fancies and seeing them on the show has made me feel super nostalgic – I remember having them at my Grandma’s house when I was little and how I always would choose the pink ones, because I liked them best!

I will admit though, Fondant Fancies looked incredibly difficult and fiddly to make, so I decided to go for a more simple approach. My Fondant Fancy cupcakes are much a easier to achieve, but they are every bit as delicate, dainty and delicious as the fondant fancies I remember.

image

These cupcakes would be lovely served at afternoon tea or a birthday party and are sure to impress, despite being deceptively simple.

Fondant Fancy Cupcakes

Makes approximately 16 small cupcakes

Ingredients

For the cupcakes:

150g softened butter (or dairy free alternative)
150g caster sugar
150g gluten free self raising flour
1/2 tsp baking powder
2 eggs
1 tsp vanilla extract
1 tbsp milk (or dairy free alternative)

For the buttercream:

100g softened butter (or dairy free alternative)
100g icing sugar

For the fondant icing:

300g ready to roll icing
50ml cold water
A few drops of pink food colouring

Method

1. Preheat the oven to 160 C/140 C fan/gas mark 3 then line two cupcake trays with 16 cupcake cases.

2. In a large bowl, beat the butter, sugar and vanilla together with an electric hand mixer until light and fluffy.

3. Add a tablespoon of flour, then beat in the eggs a little bit a time before sifting in the remaining flour and baking powder. Add the milk, then beat the ingredients together with the electric hand mixer until combined.

4. Spoon two teaspoons of mixture into each cupcake case, being careful not to overfill them. Bake for 20 to 25 minutes until golden brown and firm to touch.

5. Leave the cupcakes to cool on a wire rack. To make the buttercream, beat the butter with an electric hand mixer until it’s very light and fluffy. Add the icing sugar and continue to beat until all the ingredients are combined, then transfer the buttercream to a piping bag fitted with a medium plain nozzle.

6. Once the cupcakes have cooled, pipe a blob of buttercream onto each cupcake then place them in freezer to firm up while you make the fondant icing.

7. Cut the ready to roll icing into pieces and place them in a large bowl. Add a splash of water and using a spatula start to break up the icing until it starts to become more paste like. Add the rest of the water and beat with an electric hand mixer until the fondant becomes more runny.

8. Save a couple of tablespoons of the white icing to decorate the top of the cupcakes. Add a couple of drops of pink food colouring to the remaining icing and mix until the fondant turns a light pink colour.

9. Remove the cupcakes from the freezer. Spoon a little of the pink fondant icing over each cupcake, then use a palate knife to spread out the icing making sure that the buttercream is covered.

10. Put the left over white icing into a piping bag fitted with a small writing nozzle. Pipe the icing across the top in a zig zag pattern.

image

Gluten Free Torta Della Nonna Recipe

Today I’m going to share with you my gluten free take on a classic Italian dessert called Torta della Nonna, which in English means ‘Grandma’s Cake’.

image

Torta della Nonna is a traditional dessert cake, not unlike a custard tart, which consists of a sweet shortcrust pastry case, filled with creme patisserie and topped with almonds or pine nuts.

3268CC9F-DD30-4619-BDB5-8E9FB9A809C8
Gluten free pastry can be notoriously tricky to get right, but with a few experiments I have come up with a simple recipe and a few tips and tricks which make handling the pastry much easier.

Torta della Nonna – GF/DF options

Ingredients

Pastry:

300g plain gluten free flour

100g icing sugar

3 egg yolks

150g butter (or dairy free alternative)

Creme Patisserie:

Zest of 1 small unwaxed lemon

400ml milk (or dairy free alternative)

3 egg yolks

1 tsp vanilla extract

30g cornflour

100g caster sugar

Topping:

Milk, for glazing (or dairy free alternative)

A handful of almonds or pine nuts

Method:

1) To make the pastry: Stir together the flour and icing sugar. Add the egg yolks and butter, rub the ingredients together until they start to form a dough. Tip the contents of the bowl out onto a lightly floured work surface, knead the dough for a few minutes until it forms a smooth ball of pastry.

2) Wrap the pastry in cling film and put it in the fridge to chill for about 30 minutes to an hour. This is very important as the colder gluten free pastry is, the easier it is to work with.

3) While the pastry is chilling it’s time to make the creme patissiere. Start by placing 300 ml of milk, vanilla extract and lemon zest into a heavy bottomed pan – remember to save 100 ml of the milk as you will need it in a moment.

4) Warm the milk over a low heat but do not let it boil. Once the milk is hot strain it through a sieve to get rid of the lemon zest.

5) Next, place the remaining milk, egg yolks, cornflour and sugar into a separate bowl then whisk until combined.

6) Add this mixture to the hot milk by pressing it through a sieve to get rid of any lumps.

7) Increase the heat slightly to bring the mixture to a boil, keep stirring until the mixture thickens and remove from the heat.

8) Pour the creme patissiere into a bowl and allow it to cool slightly before covering it with cling film and popping it in the fridge for later.

9) Once the pastry has been chilled it’s time to assemble the tart. Preheat your oven to 180 C/160 C fan/gas mark 4, then grease an 8 inch loose bottomed flan or tart tin with butter – remember to throughly grease the sides of the tin or you will struggle to remove your tart at the end.

10) Take your pastry out of the fridge and cut it in half. Keep one half for the base of the tart and place the other half back in the fridge to keep cool – this will be used to make the lid later.

11) The best way to roll out gluten free pastry is between two sheets of greaseproof baking paper which will prevent the pastry from sticking to your work surface.

12) Use greaseproof paper to help get the pastry into the tin safely. Firstly, peel off the top layer of baking paper, place the tin upside down into the middle of the pastry then carefully flip the pastry over with the help of the bottom sheet of baking paper. Peel off the bottom baking sheet and gently press the pastry down into the tin, insuring it’s pressed right into each groove – don’t panic if you do get any tears or any holes, just neatly patch it up with some spare pastry.

13) Trim off any excess pastry. Place some baking paper into the case and fill it baking beans (any dried beans or rice will do) then blind bake the pastry case for 10 minutes. Remove the baking beans and bake the case for a further 5 minutes to help dry it out.

14) Once the pastry case has been blind baked, allow it cool for a few minutes before spooning the creme patissiere into the pastry case until it’s almost full.

15) Roll out the pastry for the lid between two baking sheets, exactly the same way as you did the base. I often struggle getting lids on pies and tarts without the pastry tearing, so I like to pop the pastry lid into the freezer for a few minutes once it’s been rolled out which makes it much easier to handle and less likely to tear. To get the lid on your tart safely, use the bottom baking sheet to help flip the pastry upside down on top of the tart, then carefully  peel off the baking paper and trim off the excess pastry.

16) Press down around the edge of the tart and prick the lid with a fork to prevent air bubbles forming. Using a pastry brush, glaze the top of the tart with milk and sprinkle on a few handfuls of either almonds or pine nuts.

17) Bake the tart in the preheated oven for 45 – 50 minutes or until the top is golden brown and the nuts are lightly toasted.

18) Once the tart has cooled, sprinkle it with a dusting of icing sugar and serve with either vanilla ice cream, double cream, or you can have it plain with a cup of coffee!

Torte della Nonna is best stored in the fridge and will keep for a few days – if it lasts that long!

CE882DBA-D6EB-4CCA-8D8E-CF77FBBB8F8D

I love seeing your take on my recipes, so remember to share a snap of your Torta della Nonna over on Facebook, twitter or Instagram using the hashtag #titchytonbakes.

Gluten Free Battenberg featuring Delicious Alchemy’s Gluten Free Vanilla Sponge Mix

There is less than a week until ‘The Great British Bake Off’ returns to our screens, and even though it’s been delayed slightly thanks to the Rio Olympics, I am no less excited to see what surprises lie in store this year.

The return of Bake Off means that Delicious Alchemy’s Gluten Free Magic Bake Off is also back for another year and to celebrate I’m going to share with you my Gluten Free Battenberg Cake which I made using Delicious Alchemy’s Vanilla Sponge Mix

image

image

Back in 2014 I entered Delicious Alchemy’s Gluten Free Magic Bake Off for a bit of fun with a Gluten Free Red Velvet Cake that I made for my sister’s birthday. I ended up making it to the final three bakers and although I didn’t win the overall competition, I was chuffed to bits to make it that far. I hadn’t been on a gluten free diet that long and it gave me the confidence boost I needed to start writing that gluten free food blog my friends were always nagging me to write… the very blog you’re reading now!

Regular readers of my blog will know that I am an enormous fan of Delicious Alchemy’s products, particularly their baking mixes and I always have a few stashed away in cupboard for emergencies just incase I need to whip up something super quick.

Their Gluten Free Vanilla Cake Mix is perfect for this Battenberg Cake as it makes the process much simpler – you need very few ingredients, whipping up the mixture for the sponge takes only a matter of minutes and the construction of the cake isn’t too daunting as long as you follow the instructions step by step!


image

My top tip when making a Battenberg Cake is to use food colouring which is bake stable – I recommend using either a gel or a paste as many liquid food colourings aren’t bake stable which means the sponge won’t retain its colour when baked.


Gluten Free Battenberg (GF/DF options)

Ingredients

You will need one packet of Delicious Alchemy Vanilla Sponge Mix (400g) spilt into two 200g portions.

Yellow Sponge:
200g Delicious Alchemy Gluten Free Vanilla Sponge Mix
100g softened butter (or dairy free alternative)
2 eggs
2 tbsp milk (or dairy free alternative)
A few drops of a yellow food colouring (make sure it’s bake stable)

Pink Sponge:
200g Delicious Alchemy Gluten Free Vanilla Sponge Mix
100g softened butter (or dairy free alternative)
2 eggs
2 tbsp milk (or dairy free alternative)
A few drops of pink food colouring (make sure it’s bake stable)

For assembling the cake:
400g ready to roll white marzipan
3 tbsp apricot jam

Method:

1) Preheat the oven to 180 degrees C/gas mark 4 then grease and line a square tin with baking paper.

To save time (and washing up) I decided to bake both sponges in the same tin. To do this, I made a divider out tin foil and placed it down the centre of tin. The divider should fit snuggly into the tin which and should be sturdy enough to stand up by itself. Make sure you grease the divider too so that you can remove the cake more easily.

3) Firstly make the yellow sponge: Place half (200g) of the Delicious Alchemy vanilla sponge mix in a large bowl with the butter, eggs and milk, then beat with a electric hand mixer for 15 seconds. Scrape down the sides of the bowl, add the yellow food colouring and mix for a further 10 – 15 seconds ensuring the food colouring is fully incorporated.

4) Next, make the pink sponge: Place the remaining half of the Delicious Alchemy vanilla sponge mix into a large bowl with the butter, eggs and milk, then beat with a electric hand mixer for 15 seconds. Scrape down the sides of the bowl, add the pink food colouring and mix for a further 10 – 15 seconds ensuring the food colouring is fully incorporated.

5) Carefully spoon the mixtures into the prepared tin ensuring the divider properly separates them.

6. Bake the sponges for 20 – 25 mins. Check the sponges are cooked by inserting a skewer into the middle of each sponge, if the skewer comes out clean then the sponges are ready.

7. Leave the sponges to cool in the tin for a moment and then transfer the cakes onto a wire rack to cool completely – If you attempt to assemble the cakes whilst they are still warm they will crumble.

8. Once your cake has cooled, trim the tops with a sharp knife or a cake wire to ensure they are flat and even in height.

9. Place the sponges on top of each other and trim the edges so that they are nice and neat.

10. Cut the sponges in half, straight down the middle so you are left with four long pieces of sponge.

11. Gently heat the jam in a pan or a microwave to make it easier to spread.

12. Take one of the yellow and one of the pink pieces of sponge, brush the top and sides lightly with the apricot jam then place them side by side. Brush the next two pieces of sponge with jam and then place them on top so that they create the iconic checked pattern.

13. Knead the marzipan in icing sugar until it becomes more pliable then roll it out into a large square which is longer than the length of the cake and wide enough to wrap around the cake.

14. Make sure the cake is evenly covered in apricot jam to ensure that the marzipan sticks to the sponge. Place the cake onto the marzipan and tightly wrap it around the cake.

15. Trim off the the excess marzipan to create neat edges and leave the ends exposed so the  checked pattern can clearly be seen.

16. Serve!

image

You can find out more about Delicious Alchemy’s Gluten Free Magic Bake Off, including how to enter, on their website.

They also have 25% off their baking and bread mixes on their online shop until the 4th October 2016 to celebrate the start of GFMBO so you can stock up and get practicing your skills!

Gluten Free Lemon Drizzle Cake

Last weekend I went to stay with my sister and her boyfriend up in Leeds and on a rather dull and grey sunday afternoon, we decided to bake a Lemon Drizzle cake.

image

My family are not coeliac or on a gluten free diet, but they are always happy to try and critique my gluten free cakes whenever I’m around and I’m happy to report that they think they taste just as good as normal cakes!

image

When I was little, my mum used to make the most delicious lemon flavoured Madeira cake and have I tried to create a gluten free version of her Madeira cake as the base of my Lemon Drizzle.

Here a few snaps of our afternoon:

Lemon Drizzle Cake – GF/DF options

Ingredients

For the cake:

175g caster sugar
175g butter, softened
225g gluten free self raising flour
1 tsp baking powder
3 large eggs
1 tbsp lemon zest from an unwaxed lemon
3 tbsp lemon juice

To decorate:
150g icing sugar
3 – 4 tsp lemon juice
Finely grated lemon zest

Method

1. Preheat oven to 170 C/150 C fan/gas mark 4 then grease and line a 2 lb loaf tin with greaseproof paper.

2. Sift together flour and baking powder then stir through lemon zest.

3. In a separate bowl, cream together the butter and sugar with an electric hand mixer until pale, light and fluffy. Add the eggs one at a time along with one tablespoon of the flour to stop the mixture from curdling.

4. Stir through the remaining flour and lemon juice and mix until all ingredients are fully combined.

5. Spoon the mixture into the prepared loaf tin, then bake for 50 – 55 mins minutes.

Insert a skewer into the middle of the cake to check if it’s cooked– if it comes out clean the cake is ready.

6. Allow the cake to cool in the tin for a few minutes, before turning it out on a wire rack to cool completely before decorating.

7. To make the icing: sift the icing sugar into a bowl, add the water slowly whilst stirring – the icing shouldn’t be too runny but should be spreadable.

8. Spread the icing over the top of the cake, allowing it drip down the sides.

To finish, sprinkle finely grated lemon zest across the top of the cake.

image

Gluten Free Easter: Carrot Cake Recipe

Today, I’m going to share with you my Gluten Free Carrot Cake Recipe – perfect for those of you who aren’t too keen on chocolate but still want something sweet to celebrate the Easter weekend.  
image

I love Carrot cake, and whilst it isn’t necessarily thought of as a traditional Easter bake, I really can’t think of a better time of year to enjoy it. After all… Easter, Spring, Bunnies… it all makes sense really!

image

This cake is really quite simple to make and keeps really well –  In fact, it tasted as good, if not better a few days later. It can also be kept at room temperature, although, if your house is a bit warm it may be best kept in the fridge.

Carrot Cake with Cream Cheese Frosting – GF

Ingredients

For the cake:
300g gluten free self raising flour
1 tsp baking powder
1 tsp bicarbonate of soda
2 tsp ground cinnamon
1 tsp ground ginger
200g grated carrots
50g walnuts, roughly chopped
175g light brown sugar
1 tbsp maple syrup
150ml sunflower oil
3 large eggs

For the frosting:
2 x 180g tub philadelphia cheese
1 x 250g tub mascarpone cheese
4 tbsp icing sugar, sifted
1 tsp vanilla extract

Plus decorations, I used these House of Cake Carrot Sugar Decorations from Sainsbury’s.

Method:

1. Preheat the oven to 180 C/160 C fan/gas mark 4 and grease and line a round 7″ tin with greaseproof paper.

2. In a large bowl, sift together the flour, baking powder, bicarbonate of soda and spices, then stir through the grated carrots and chopped walnuts.

3. In a separate bowl, whisk together the eggs, sugar, sunflower oil and maple syrup, then add this to the dry ingredients, mixing until the ingredients are just combined.

4. Spoon the ingredients into the prepared tin and then bake for 50 – 55 minutes or until a skewer inserted through the middle comes out clean.

5. Remove the cake from the tin and leave to cool completely before assembling. `

6. For the frosting, gently mix together the Philadelphia, Mascarpone and vanilla extract then gently fold through the icing sugar.

7. Carefully cut the cake into two halves using a sharp knife or cake cutting wire.

8. Place the base of the cake onto a serving plate, cover it with and even layer of frosting then place the second piece of cake on top. Spread remaining frosting across the top using a palate knife and finish off the cake with your chosen decorations.

I hope you have a wonderful Easter weekend. If you are looking for any more Easter baking inspiration why not check out my Gluten Free Mini Egg Ice Cream recipe which can be found over on The Daily Spectacle website. It’s a no churn recipe and it can be prepared ahead – the perfect dessert for Easter Sunday Lunch.

image
There are lots of other Easter recipes for you to try here on my blog too, including my Mini Egg Millionaire Shortbread, Chocolate Nest Cupcakes and Easter Sugar Cookies or you can see what else I get up to over the Easter weekend over on my Instagram or Facebook Page.


Gluten Free White Chocolate and Raspberry Muffins

February has been such an incredibly busy month for me, so I’ve very little time to sit down and get this blog written, but I promise I’ve not been neglecting you!

In fact, I’ve been working on perfecting one of my favourite bakes and I’m really excited to finally be able to share with you my recipe for Gluten Free White Chocolate and Raspberry Muffins!

image

In the past I’ve struggled to bake the perfect gluten free muffins – often they don’t rise enough or the texture is more like that of a cupcake rather than a muffin, which are supposed to have a much denser texture as opposed to being light and fluffy.  

After a bit of trial and error I have come up with a recipe which I think ticks all the right boxes; the texture was exactly right and the muffins rose enough to create that classic muffin look.

Here are a few golden rules to abide by if you want perfect gluten free muffins:

1. Mix the dry ingredients separately to the wet ingredients – This helps to make sure that the raising agents are evenly distributed throughout the mixture.

2. Don’t over mix the batter – Because of the lack of gluten we need something to make the muffins rise, so don’t over work the batter as this can cause the raising agents to work less affectively. Stir the ingredients until just combined and don’t worry about any lumps.

3. Use the right amount of raising agents – I found that baking powder alone wasn’t enough so I also used a small amount of bicarbonate of soda – but don’t use too much or it can leave an unpleasant flavour.

4. Keep chocolate chips in the fridge until you need them – This simple trick stops the chocolate chips melting in the oven and helps them to retain their shape.

image

My muffins have an added twist, in that they have a raspberry jam centre but you could use fresh raspberries, if you prefer!

image

Raspberry and White Chocolate Muffins – GF/DF options
Makes 8

Ingredients:
300g gluten free self raising flour
1 tsp baking powder
1/2 tsp bicarbonate of soda
150g caster sugar
2 large eggs
75 ml sunflower oil
200ml milk (or dairy free alternative)
1 tsp vanilla extract
100g white chocolate chips, refrigerated (or dairy free alternative)
8 tsp raspberry jam

Method:

1. Preheat the oven to 180 C/160 C/gas mark 4 and line a muffin tin with 8 muffin cases.

2. In a large bowl, sift together the flour, baking powder and bicarbonate of soda.

3. In separate bowl, whisk together eggs, sugar, oil, milk and vanilla extract until combined then add this to the dry ingredients.

4. Gently mix the ingredients together until they form a batter which is only just combined (don’t worry too much if there are any lumps), then stir through the chocolate chips.

5. Spoon approximately 1 and a half tablespoons of batter into each case, followed by a teaspoon of jam then fill the muffin cases with a further tablespoon of batter, ensuring the jam is fully covered.

6. Bake the muffins for 25 minutes, until golden brown.

7. Leave to cool on a wire rack before serving.

Gluten Free Christmas: Kransekake Recipe

For me, every Christmas table should have a showstopper, something extra special which makes the family go “Wow!”

I don’t know about you, but I don’t think there is anything more show stopping than the towering Kransekake Cake which would look simply spectacular at the centre of any Christmas dinner table!
IMG_0393
The Kransekake is a traditional Scandinavian cake which is often served at special occasions including weddings and Christmas celebrations. It consists of 18 almond flavoured rings which are stacked on top of each other to form an impressive tower – If you’re a Marzipan fan, you’ll love this cake!

12360078_984881254917308_60926301423683865_n My Kransekake Design

Although it looks very impressive, it’s actually quite straight forward to make! The rings are made from a dough consisting of ground almonds, icing sugar and egg whites which is shaped to fit Kransekake moulds which can be found at Lakeland.

Kransekake Cakes are usually gluten free, although dough is sometimes rolled out in Semolina flour which is not suitable for Coeliacs. For my Kransekake cake, I rolled the dough out in Cornflour instead of Semolina.
image1-4
Gluten Free Kransekake Recipe – GF/DF

Recipe inspired by Paul Hollywood’s Recipe from ‘The Great British Bake Off’

Ingredients
500g ground almonds, plus cornflour for dusting
500g icing sugar
4 egg whites
1 tsp almond extract
sunflower oil spray

For the Decoration:
2 egg white
500g icing sugar
edible spray glitter
fondant stars (optional)

You will also need 6 Kransekake Moulds (I bought mine from Lakeland)

Method

1. In a large bowl mix together the ground almonds and icing sugar.

2. Add the egg whites and almond extract, then using your hands work the ingredients into a smooth ball of slightly sticky dough.

3. Chill the dough in the fridge for at least two hours.

4. Preheat the oven to 200 C/180 C Fan/gas mark 6.

5. Spray the Kransekake moulds with oil and dust them generously with cornflour.

6. Dust a work surface with cornflour and split the dough into 6 equally sized pieces.

7. Split one of the pieces of dough into three different sized pieces: one large, one medium and one small.

8. Roll the balls of dough out into pieces which are approximately a finger-width and long enough to wrap round the Kransekake moulds.

9. Place the first piece into the Kransekake mould and pinch the ends together. Repeat with all the other pieces until all the moulds are filled.

10. Place the moulds onto a baking tray and bake for 10 minutes or until golden brown.

11. Remove the Kransekake rings from the oven and allow them to set in their moulds – if you try to remove them while they are warm they will break! Once the Kransekake are cool remove them from their moulds and set them aside while you make the icing.

12. To make the Royal Icing, place the egg whites in a bowl and slowly sift in the icing sugar in batches. In between each batch of sugar stir the icing with a wooden spoon or a balloon whisk until the icing thickens up.

13. Spoon the icing into a piping bag fitted with a small round writing nozzle.

14. Before you begin to decorate, sort the rings out into size order.

15. Place the largest ring onto your serving plate (you could use a bit of icing to adhere it to the plate and stop it from slipping around). Pipe a zig-zag pattern onto the ring and place the second largest ring on top. Repeat until all the rings have been neatly stacked.

16. To finish, spray the Kransekake with edible spray glitter. I made mine extra special by covering it in gold stars made from fondant icing.

I hope you all enjoy the Christmas season and have a go at my Christmas recipes this year, which also include my Gluten Free Gingerbread Cookies which I posted last Christmas, my Hazelnut Cranberry and Orange Biscotti and my Cointreau Christmas Cake.
DSC_0020
I am taking a well deserved Christmas break, but I will be back in the New Year with plenty more gluten free recipes for you all to try.  In the meantime, why not check out my out my Instagram page or my Facebook page to see what else I get up to over Christmas!

Wishing you all a very Merry Christmas and a Happy New Year!  xxx

Gluten Free Ginger Cake

Autumn is here and as the weather turns colder I look forward to all the flavours the new season has to offer. Gone are the summer fruits, in are the wintery comfort foods and what could be more comforting than slice of warm and spicy ginger cake?

image

In my opinion, comfort food should be as fuss free and simple to achieve as possible. My ginger cake recipe is exactly that and requires no advanced techniques – simply mix the ingredients together and bake!

This cake certainly packs a punch and has a very strong spicy ginger flavour, so feel free to use less ginger if you’d prefer a milder flavour.

image 
Ginger Cake – GF/DF options

Ingredients:
200g gluten free self raising flour
200g light brown sugar
2 – 3 tsp ground ginger
1 tsp bicarbonate of soda
55g unsalted butter, melted (or dairy free alternative)
2 large eggs
1 tbsp golden syrup
1 tbsp black treacle
100ml strong black tea, cooled

Method:

1. Preheat the oven to 180 C/160 C fan/gas mark 4 then grease and line a 2lb loaf tin with baking parchment.

2. In a large bowl: Mix together the flour, sugar, ginger and bicarbonate of soda.

3. In a separate bowl: whisk together the eggs, golden syrup and treacle.

4. Make a well in the centre of the ingredients, add the egg mixture, melted butter and tea then mix until you are left with a smooth and lump-free batter.

5. Pour the mixture into the prepared loaf tin. Bake for 30 – 35 minutes, when the cake is done it should be firm to touch.

6. Turn the cake out onto a wire rack and leave to cool before serving.

image

This cake matures really well and tastes even better after a day or two. If you can wait, wrap your cake in some greaseproof paper and store it in an air tight container for at least 12 hours before you tuck in – the longer you leave his cake, the sticker it gets! This cake will be at it’s best for at least 5 days and keeps for up to 7 days, if stored properly in an airtight container.

Coeliac Awareness Week: Gluten Free Victoria Sandwich Cake

It’s Coeliac Awareness Week!

Here in the UK approximately 1 in 100 people suffer with Coeliac Disease, however, due to the fact it is commonly misdiagnosed it is believed that an estimated half a million people are living with undiagnosed Coeliacs Disease every day – something that this campaign is aiming to change.

To help raise awareness of this fantastic campaign, this week I will be posting very simple Gluten Free Recipes starting with my Victoria Sandwich Recipe.

image
Victoria Sandwich is one of those really classic bakes. This week I will be all about those classic favourites that people don’t want to miss out on just because they are on a Gluten Free diet. I also hope these recipes will inspire any newly diagnosed Coeliacs to get baking!

Gluten Free Victoria Sandwich – GF/DF options

Ingredients:

Sponge:
150g caster sugar
150g unsalted butter (or dairy free margarine)
150g gluten free self raising flour
1 tsp baking powder (check it’s gluten free)
2 large eggs
3 – 4 tbsp milk (or dairy alternative)
1 tsp vanilla extract

Filling:
Strawberry jam
Icing sugar, to decorate.

Method:

1) Preheat the oven to 180 C/160 C fan/gas mark 4.

2) Grease and line two sandwich cake tins.

3) In large bowl, sift together the flour and baking powder.

4) In a separate bowl, cream together the butter and sugar with a wooden spoon until light and fluffy.

5) Add the eggs one at a time along with a tablespoon of flour to stop the cake mixture from splitting – make sure each egg is fully combined before adding the next one.

6) Fold in the remaining flour, milk and vanilla extract until all the ingredients are fully combined.

7) Divide the cake mixture between the two sandwich tins and smooth it to the edges using a palate knife.

8) Gently tap the tins on the work surface to get rid of any air bubbles. Bake for 15 minutes or until the cake is golden on top – the cake is ready when it is firm to touch.

9) Turn out the cakes onto a wire rack to cool.

10) To assemble the cake: place one of the cakes onto a serving plate and cover it with a thick layer of jam. Place the second piece on top then dust with icing sugar for a lovely finishing touch!
image
Please check out www.coeliac.org.uk to see how you can get involved with Coeliac Awareness week or share this recipe with your friends to help to spread the word.

You can also keep up to date with my Gluten Free adventures by following me on Instagram or on Facebook.