
Today I’m going to share with you my gluten free take on a classic Italian dessert called Torta della Nonna, which in English means ‘Grandma’s Cake’.

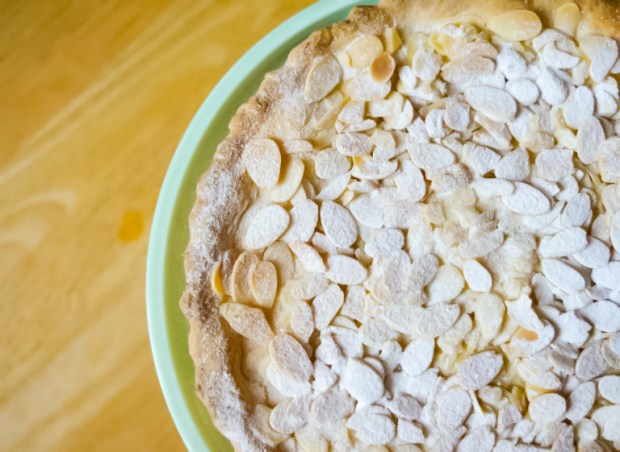
Torta della Nonna is a traditional dessert cake, not unlike a custard tart, which consists of a sweet shortcrust pastry case, filled with creme patisserie and topped with almonds or pine nuts.
Gluten free pastry can be notoriously tricky to get right, but with a few experiments I have come up with a simple recipe and a few tips and tricks which make handling the pastry much easier.
Torta della Nonna – GF/DF options
Ingredients
Pastry:
300g plain gluten free flour
100g icing sugar
3 egg yolks
150g butter (or dairy free alternative)
Creme Patisserie:
Zest of 1 small unwaxed lemon
400ml milk (or dairy free alternative)
3 egg yolks
1 tsp vanilla extract
30g cornflour
100g caster sugar
Topping:
Milk, for glazing (or dairy free alternative)
A handful of almonds or pine nuts
Method:
1) To make the pastry: Stir together the flour and icing sugar. Add the egg yolks and butter, rub the ingredients together until they start to form a dough. Tip the contents of the bowl out onto a lightly floured work surface, knead the dough for a few minutes until it forms a smooth ball of pastry.
2) Wrap the pastry in cling film and put it in the fridge to chill for about 30 minutes to an hour. This is very important as the colder gluten free pastry is, the easier it is to work with.
3) While the pastry is chilling it’s time to make the creme patissiere. Start by placing 300 ml of milk, vanilla extract and lemon zest into a heavy bottomed pan – remember to save 100 ml of the milk as you will need it in a moment.
4) Warm the milk over a low heat but do not let it boil. Once the milk is hot strain it through a sieve to get rid of the lemon zest.
5) Next, place the remaining milk, egg yolks, cornflour and sugar into a separate bowl then whisk until combined.
6) Add this mixture to the hot milk by pressing it through a sieve to get rid of any lumps.
7) Increase the heat slightly to bring the mixture to a boil, keep stirring until the mixture thickens and remove from the heat.
8) Pour the creme patissiere into a bowl and allow it to cool slightly before covering it with cling film and popping it in the fridge for later.
9) Once the pastry has been chilled it’s time to assemble the tart. Preheat your oven to 180 C/160 C fan/gas mark 4, then grease an 8 inch loose bottomed flan or tart tin with butter – remember to throughly grease the sides of the tin or you will struggle to remove your tart at the end.
10) Take your pastry out of the fridge and cut it in half. Keep one half for the base of the tart and place the other half back in the fridge to keep cool – this will be used to make the lid later.
11) The best way to roll out gluten free pastry is between two sheets of greaseproof baking paper which will prevent the pastry from sticking to your work surface.
12) Use greaseproof paper to help get the pastry into the tin safely. Firstly, peel off the top layer of baking paper, place the tin upside down into the middle of the pastry then carefully flip the pastry over with the help of the bottom sheet of baking paper. Peel off the bottom baking sheet and gently press the pastry down into the tin, insuring it’s pressed right into each groove – don’t panic if you do get any tears or any holes, just neatly patch it up with some spare pastry.
13) Trim off any excess pastry. Place some baking paper into the case and fill it baking beans (any dried beans or rice will do) then blind bake the pastry case for 10 minutes. Remove the baking beans and bake the case for a further 5 minutes to help dry it out.
14) Once the pastry case has been blind baked, allow it cool for a few minutes before spooning the creme patissiere into the pastry case until it’s almost full.
15) Roll out the pastry for the lid between two baking sheets, exactly the same way as you did the base. I often struggle getting lids on pies and tarts without the pastry tearing, so I like to pop the pastry lid into the freezer for a few minutes once it’s been rolled out which makes it much easier to handle and less likely to tear. To get the lid on your tart safely, use the bottom baking sheet to help flip the pastry upside down on top of the tart, then carefully peel off the baking paper and trim off the excess pastry.
16) Press down around the edge of the tart and prick the lid with a fork to prevent air bubbles forming. Using a pastry brush, glaze the top of the tart with milk and sprinkle on a few handfuls of either almonds or pine nuts.
17) Bake the tart in the preheated oven for 45 – 50 minutes or until the top is golden brown and the nuts are lightly toasted.
18) Once the tart has cooled, sprinkle it with a dusting of icing sugar and serve with either vanilla ice cream, double cream, or you can have it plain with a cup of coffee!
Torte della Nonna is best stored in the fridge and will keep for a few days – if it lasts that long!

I love seeing your take on my recipes, so remember to share a snap of your Torta della Nonna over on Facebook, twitter or Instagram using the hashtag #titchytonbakes.


Reblogged this on Highchair Chow and commented:
Great for gluten free eaters
LikeLiked by 1 person